
iVac has become well-known for making it easy to automate the dust collection system for any shop, big or small. Here at Infinity we have done our best to make choosing the right iVac package for your shop easy and worry-free. Let me show you how to go about connecting your dust collector to an iVac system and exactly what you'll need. In short, it all depends on the size of your dust collector's motor.
We've made it easy for you to select the right iVac system using the flowchart below.
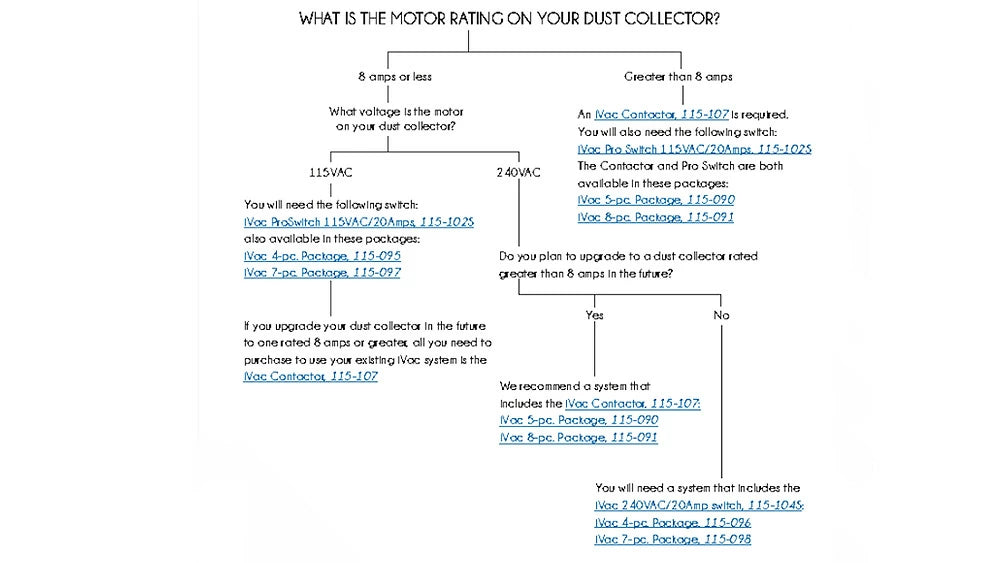
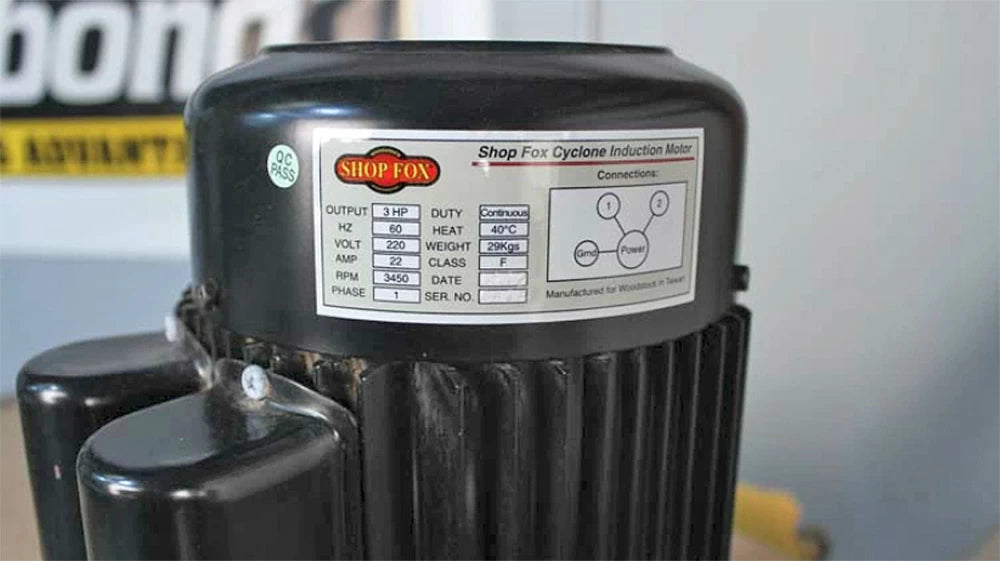
If your dust collector is relatively small and is rated at 8 amps or fewer (roughly 1 hp for 115v and 2hp for 230v) you can get by with just an iVac Pro Switch for a truly plug-and-play system. However, if your dust collector is rated at 9 amps or more you will need an iVac Contactor (115-107).
The iVac Contactor Dust Collector Controller (115-107) is a relay that is wired between your dust collector and the iVac Pro Switch. It insulates the switch from the higher amperage draw of a larger dust collector that might damage it if it were connected directly to your dust collector. The great part is, the Contactor only requires a 115V Pro Switch (115-102S) no matter what type of dust collector you have.
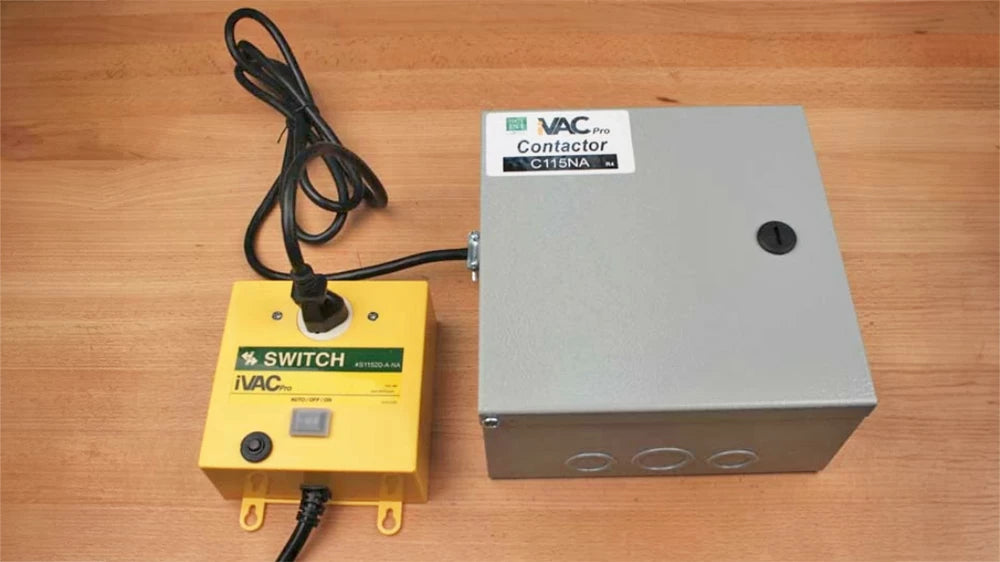
The beauty of the Contactor is that it makes your iVac system truly universal. It doesn't matter if your dust collector is 115v, 230v, or even 600 volts/3-phase, the Contactor will allow you to wire it right up. This is especially important if you have a small dust collector now and want to upgrade to a larger one in the future. You won't have to worry about your new dust collector being compatible with your iVac system.
NOTE: Before wiring up the contactor, be sure to consult with a licensed electrician and your local electrical codes first. And if you're not comfortable connecting the wiring yourself, by all means talk to an licensed electrician. The instructions and photos shown here are for illustrative purposes only and may not be representative of your local electrical codes. These are straightforward systems to wire and can be installed in short order. iVac includes a clear set of instructions that explain the basics of wiring your dust collector for use with the Contactor.
Infinity Cutting Tools is not responsible and cannot be held liable for any damages or injury that may occur from improper wiring.
Once you have power coming into the Contactor, connecting everything else in the iVac system is easy.
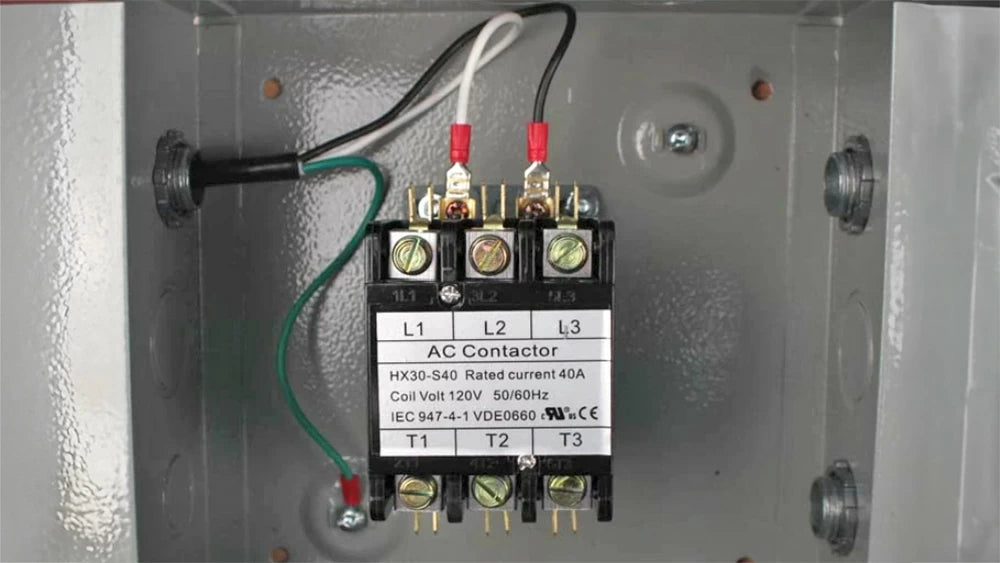
The first step is to hook up the power cord that plugs into your 115V Pro Switch. This cord comes with the Contactor and already has all the connectors installed on the wires. Attach the ground (green) wire to the ground post on the Contactor box, and plug the hot wire (Black) and neutral wire (white) onto the posts on the relay.
The second step is to connect the A/C power source coming from the wall into the Contactor. For 115v and 230v collectors, this process is also pretty straightforward.
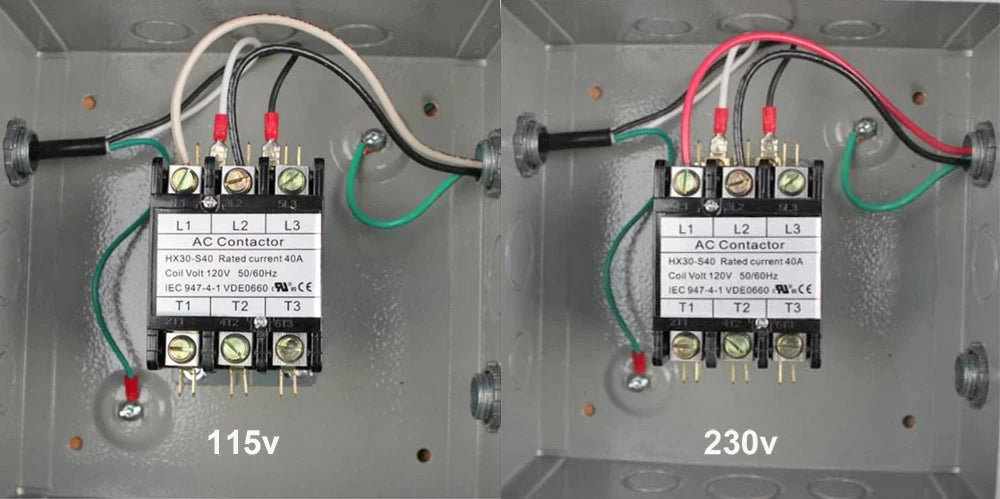
For a 115v dust collector (above, left) the hot and neutral wires from the A/C power source are connected to the L1 and L2 terminals. These two wires will bring power into the Contactor. You have a hot wire (black), a neutral wire (white), and a ground wire (green). Attach the ground wire to the ground post in the box. Attach the hot and neutral wires to the L1 and L2 terminals. It doesn't matter which wire goes to which terminal.
For a 230v dust collector (above, right) both hot wires coming from the power source are connected to the L1 and L2 terminals. These two wires will bring power into the Contactor. You'll have 2 hot wires (they could be red, black, or one of each) and a ground (green) wire. Attach the ground wire to the ground post in the box. Attach the 2 hot wires to the L1 and L2 terminals.
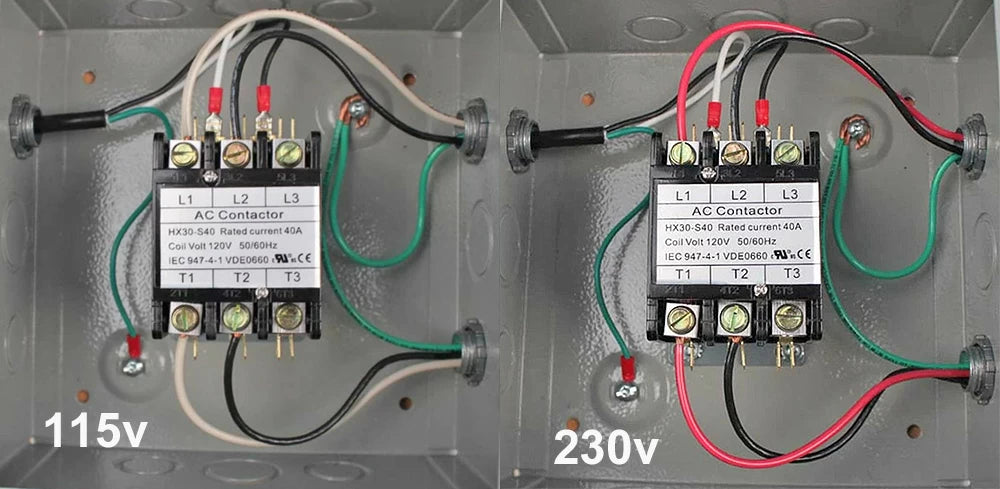
The third step is to attach the wires from your dust collector to the Contactor. For 115V (above, left), again you will have hot, neutral, and ground wires. ground goes to the ground post and the hot and neutral wires go to the T1 and T2 terminals. Simply match the wire colors from the L1 and L2 terminals. In other words, if the hot (black) wire from the wall is attached to L1 terminal make sure the hot (black) wire from the dust collector is attached to the T1 terminal.
For 230V, the process is exactly the same (above, right). Match wire to wire from L1 and L2 to T1 and T2 and you're set.
I'm not going to go into the details of wiring your system for 3-phase power, but the Contactor will work just fine if you have 3 Phase in your shop and need it for your dust collector. The T3 and L3 terminals are used for hooking up 3-phase machines.
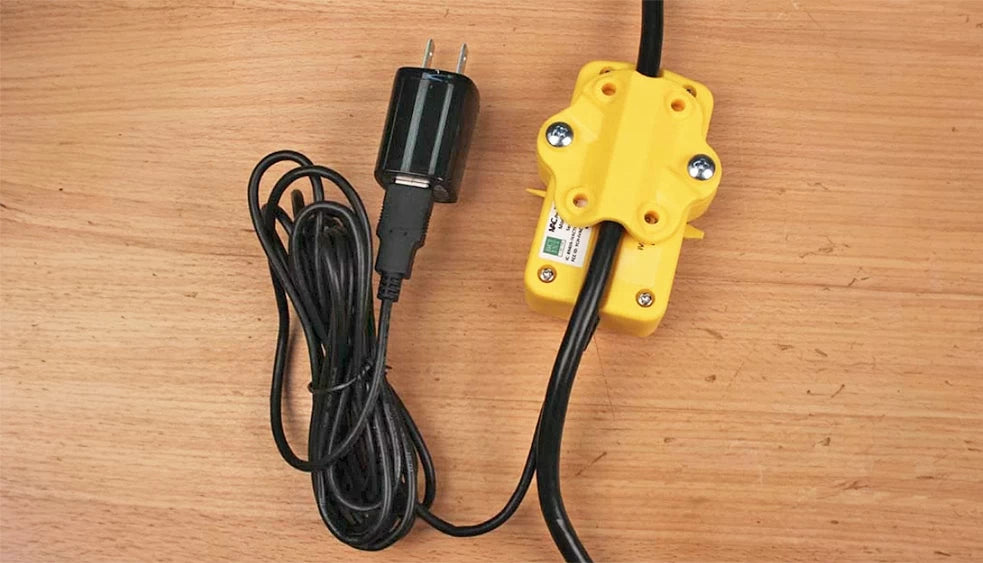
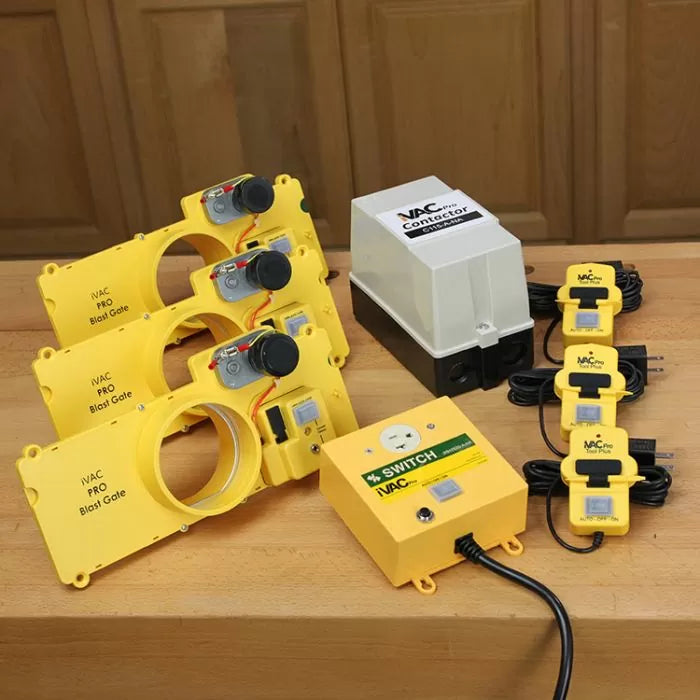
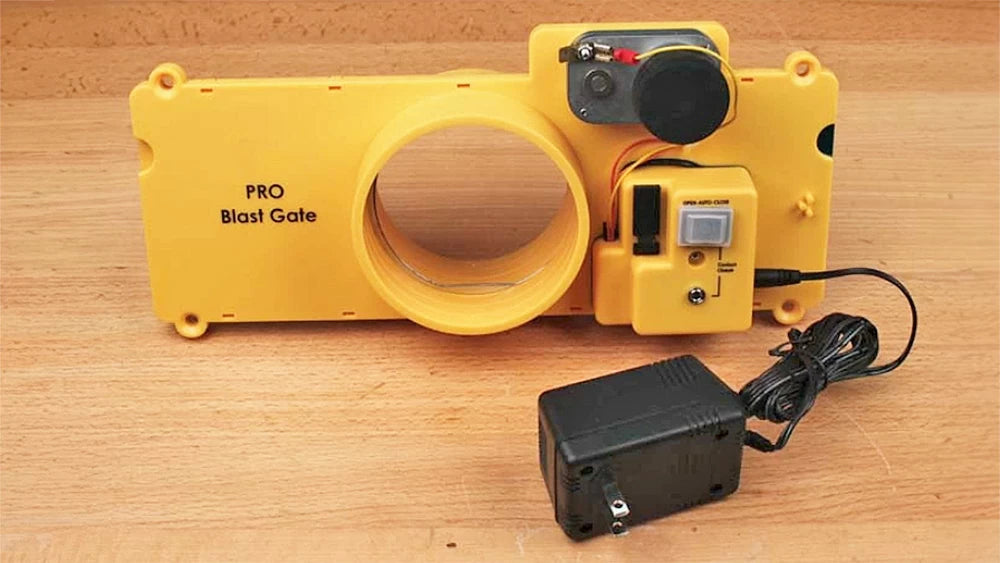
The rest of the iVac system is very easy to install. The iVac Pro Tool Plus simply clamps onto the power cord of your machine, like a table saw, and then plugs into a 110V outlet. Similarly, the iVac Pro Blast Gate replaces your manual 4" blast gate and plugs into its own 110V outlet.
The Pro Tool Plus (115-111), Pro Blast Gate (115-108), and Pro Switches have a series of small DIP switches inside that allow you to program the system so everything works together and the correct blast gate opens when you turn on your machine. iVac also has very clear instructions for programming your system.
Each iVac Pro System can have up to 8 tools and 8 blast gates all connected to one dust collector. If you have a large shop with more than one dust collector you can have as many as 4 systems installed. This means up to 32 machines can be controlled by an iVac system without any issues.