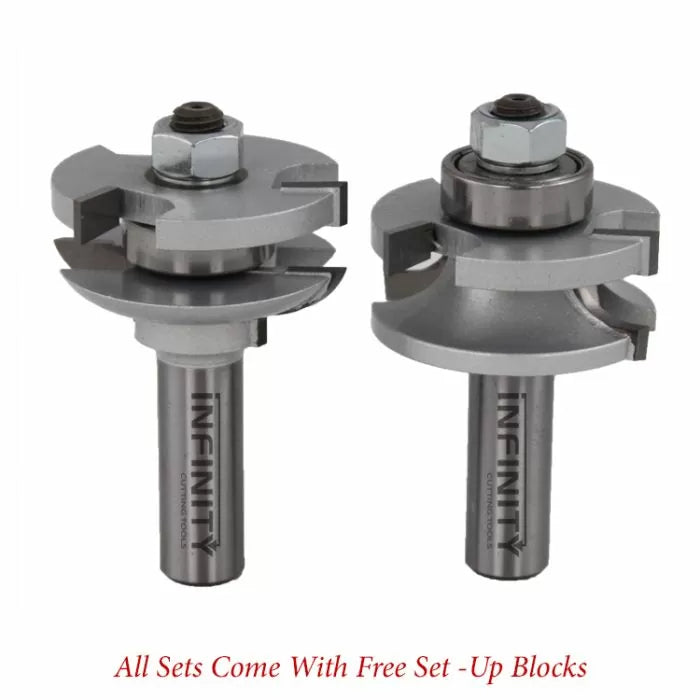

There is something about a glass door in your cabinetry that really helps to brighten up a room and add a beautiful architectural element, and a divided light glass door adds an even more elegant feature to that. A true divided light glass door adds an extra weapon to your cabinet building arsenal and I'm going to show you how to build one with a fast and relatively easy way by using Infinity Tools Matching 2 pc Rail and Stile router bit sets and the Glass Door Accessory Kit (Item #23-GLS).
Technique - When making fine furniture, window sashes, or full size doors with divided lights, you will typically see a mortise and tenoned door where even the muntins (dividers) having tenons and mortises. This creates a very strong heavy duty door/window. In cabinetry though, we can get away with a little less strength because we are typically using much thinner and lighter glass on much smaller doors, usually 3/4" thick. Having said that, the method we are going to use for this divided light cabinet door is a pinned cope joint. What that means is that we are going to add brad nails to each of the glue joints which provides a little extra mechanical strength to the glued joint. You can also add a loose tenon to each of the rail and stile joints to really add some extra strength. This method has been done by high production shops for a long time.
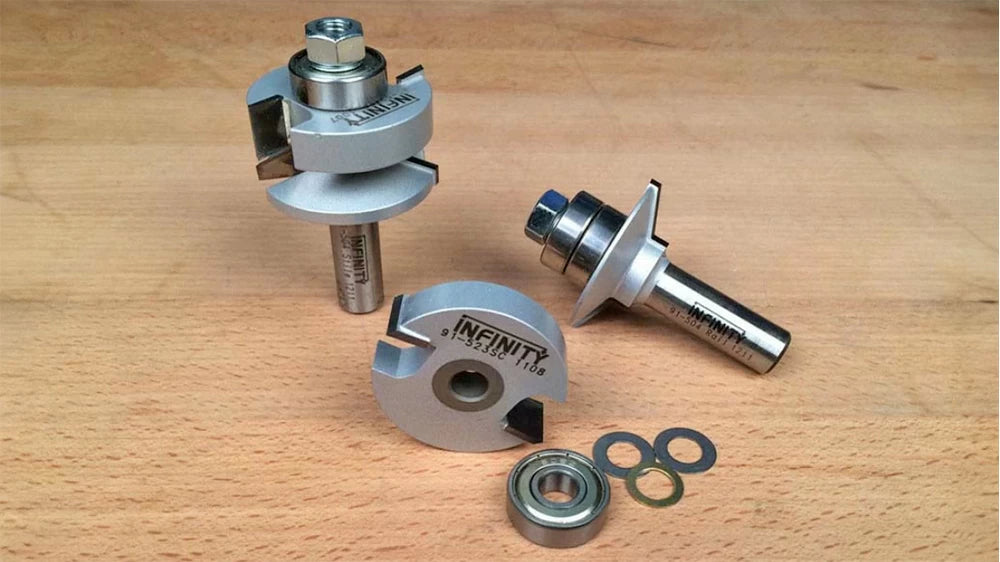
Conversion - To get started, we'll convert the 2-pc.Rail & Stile cabinet door router bit set by using the glass door accessory kit. We want to loosen the nut on the profile bit (stile), remove the 1/4" slot cutter, bearing, and washers (carefully note how you disassemble the cutter stack as you'll need to reverse this in the future). And leave the original shims in place.
To install the glass door accessory kit to our profile router bit, stack all of the shims from the 23-GLS kit, the 1/2" slot cutter, washer, bearing and finally, the nut.
To assemble the coping bit (rail), remove the nut and slot cutter (keeing the original shims in place) and then install the bearing from the 23-GLS kit and replace the nut. Please make sure to tighten these very securely. The video below shows just how easy this is.
Door Frame Build - If you have two router tables this would be a good time to use them both, one setup with the stile bit and the other with the rail bit. But even if you only have one router table don't worry, it can still be done easily with just a single table. If you're only using one router table you need to decide on your method of attack: cope or stick first? Doing the cope (rail) first means that you only will need to have a square backer board. Also, it makes cutting the dividers' copes much easier as you will have a bigger surface to work with. The negative is that you need to make sure your math and cuts are very accurate as sizing the dividers can be a chore if you don't get it right the first time.
Cutting the profile or sticking (stile) first means that you can cut all of your pieces to size and fit very easily. I always run extra lengths as well to help with error in case I cut a divider too short. The negative with this method is that you have to have multiple backer boards: a square stock piece and a piece that has been coped to allow you to place your sticked edge inside it to prevent blowout. There is no correct answer to this, its simply a personal choice and whatever you become used to. I prefer to do sticking first if I only have a single table but prefer to cope first when I run two tables. Again, the video shows how easy this really is.
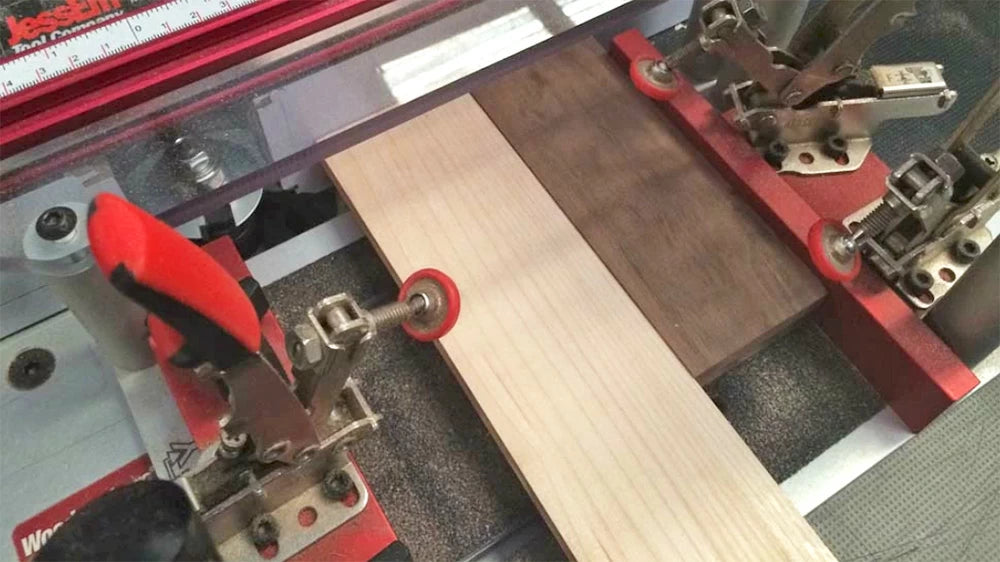
Always make test cuts to check fit - When doing the cope on the ends of your rails, I use a coping sled. It makes sure that my stock is held firmly and that my hands are far away from the router bit. Cut your rails to length, taking into account the profile cutters depth (on Infinity R/S bits, this is 7/16" extra on each side). Simply mill your material face down.
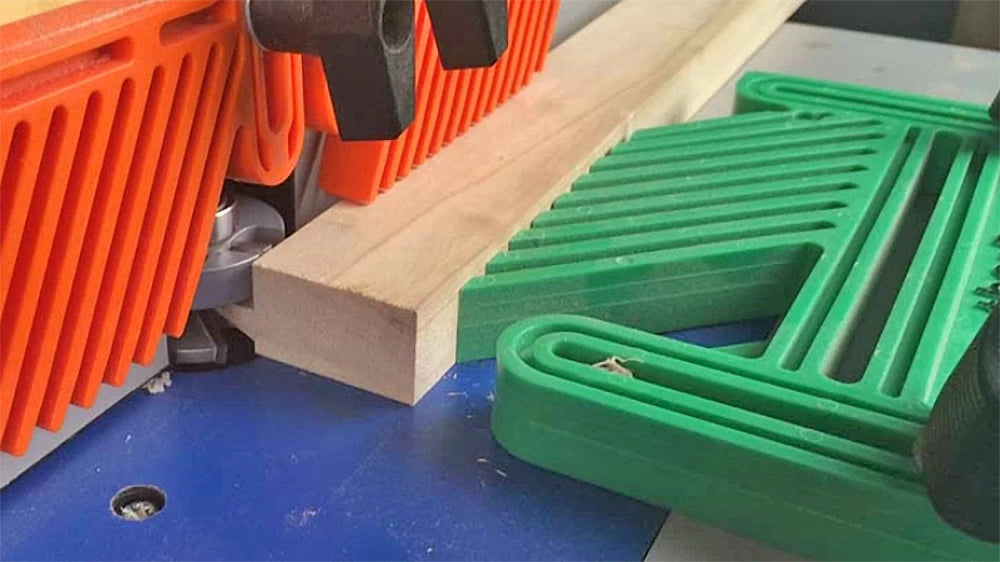
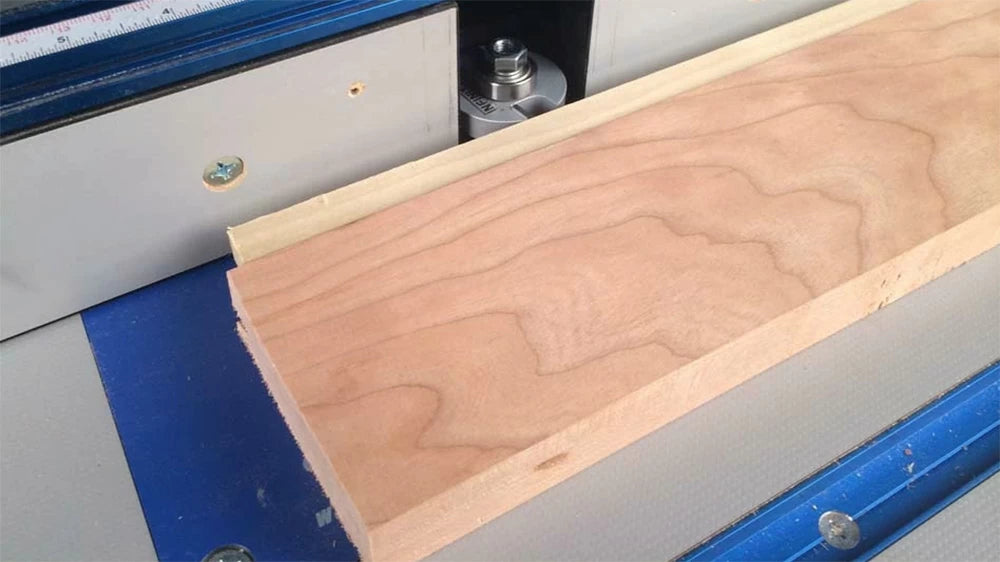
Use hold-downs and feather boards to run your stiles and one side of your dividers/muntins. You will run the material face down on the router table. Use feather boards when routing the profiles. Mill the profile pieces face down. I will cut one side of my muntins at this time as well.
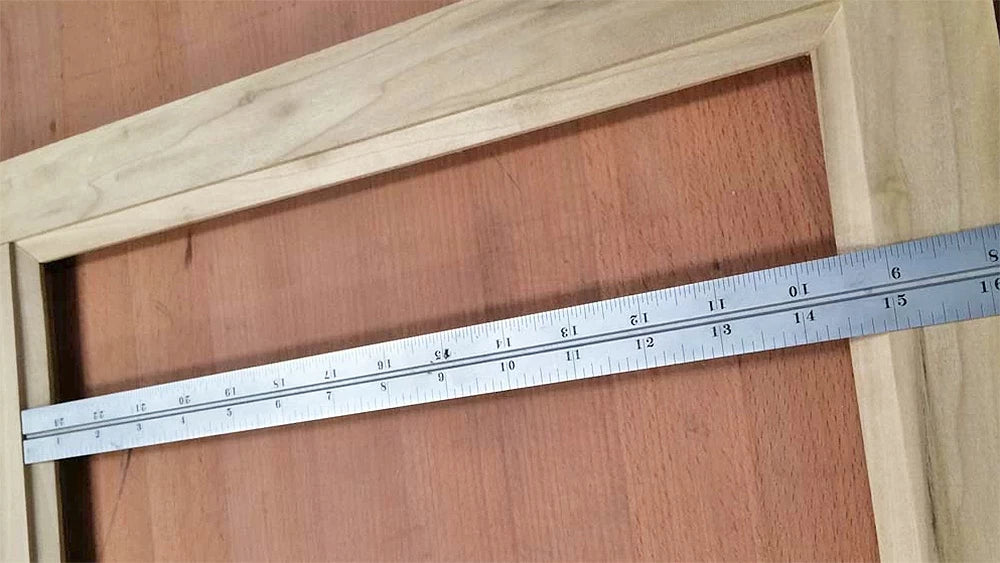
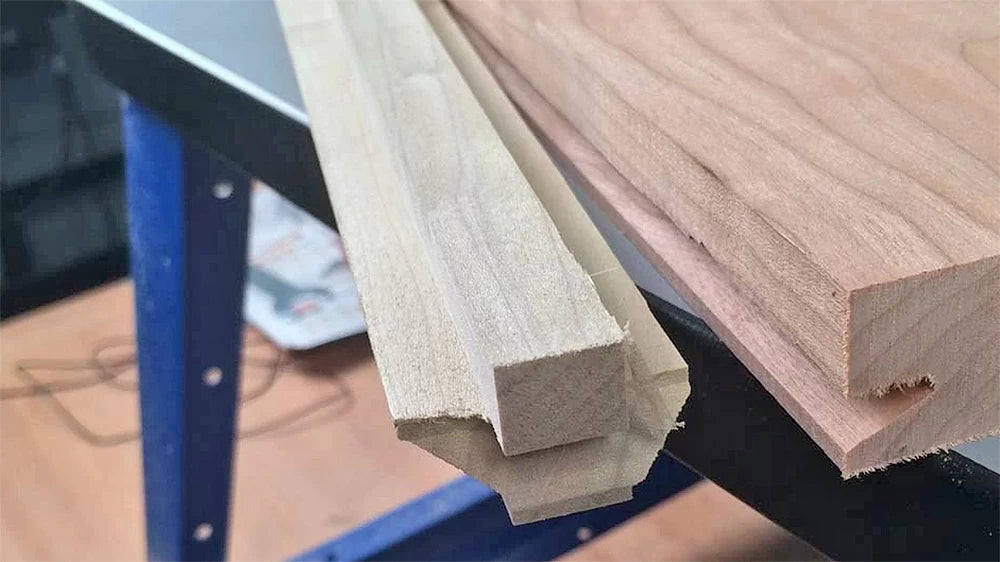
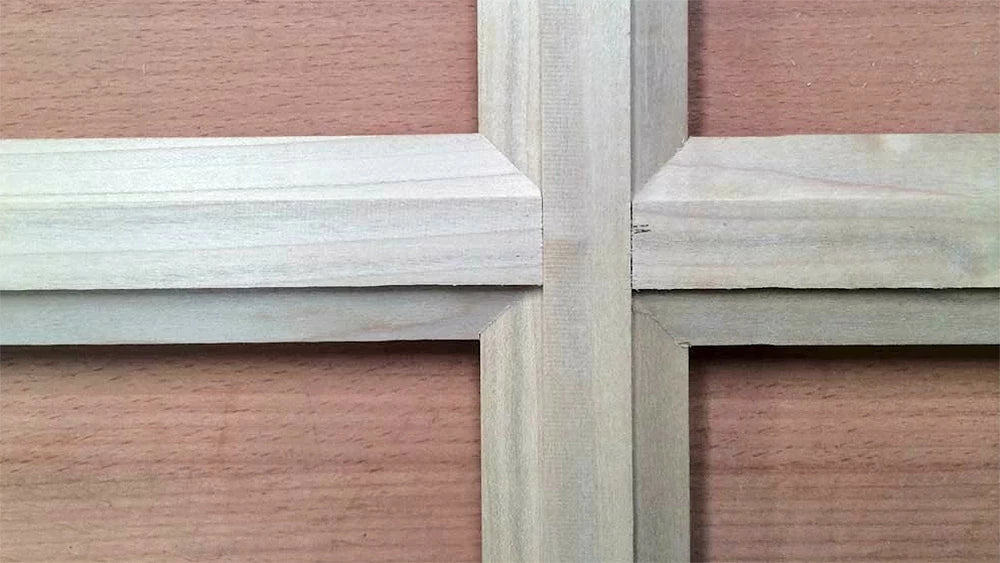
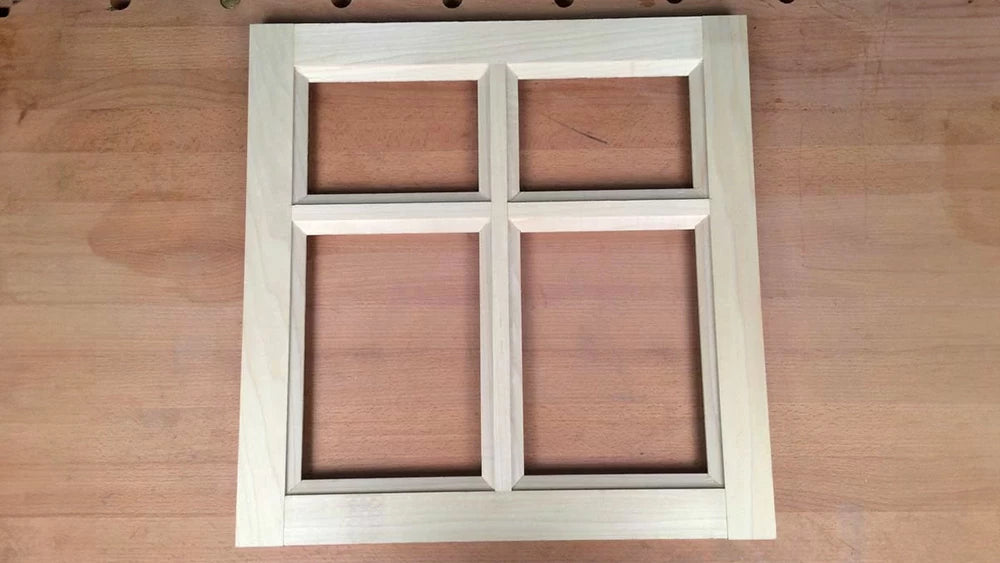
Making the Muntins (Dividers) - You should now have the exterior door milled up with your rail and stiles. I can now dry fit my door together and figure out my interior dimensions on my dividers. At this time you can also add a loose tenon to the rails and stiles for extra strength if you want. On this door we are doing a simple 4 light door (meaning we will have 4 glass panels), but you can divide the lights out however you choose. I measure out one long divider and the two shorter dividers at this time. Simply measure from profile to profile to get your measurements. Once you get some practice making this style of door you'll be able to mill the muntins when you are milling up the rails and stiles with no problems.
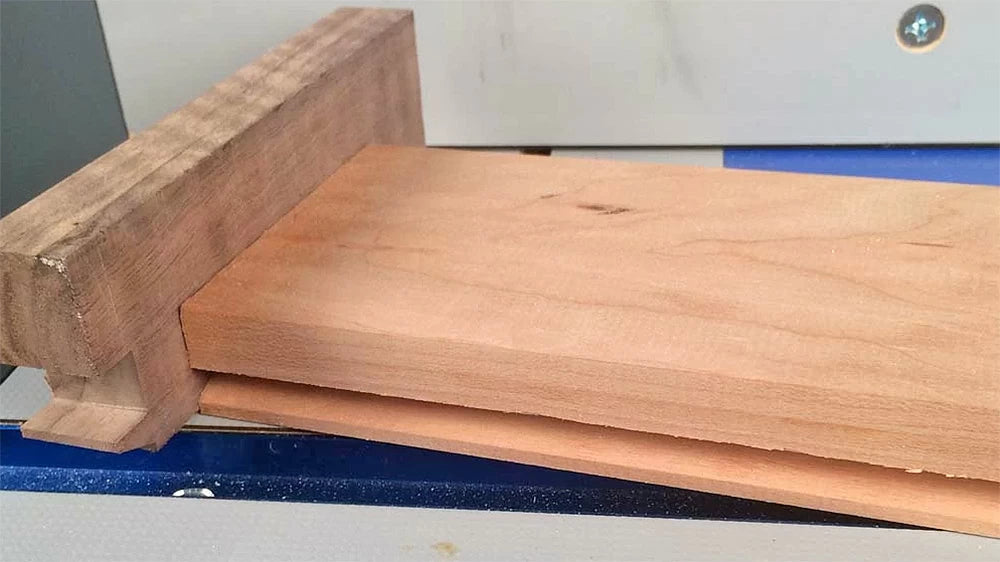
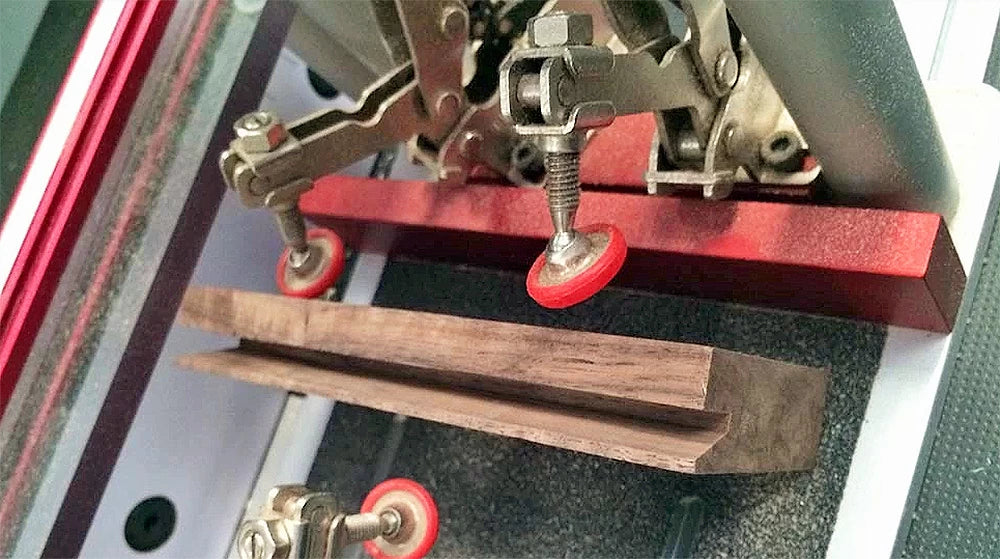
Running the dividers' sticking and coping can seem a little scary at first. If your divider stock is still wide and doesn't have a profile on it yet, you can cope wider flat stock that you will then rip to size and profile. We are going to use stick that is already ripped to size and has one edge profiled for this example. To profile the other side of the divider I like to use a simple milled-up jig. You will want to have a piece of wide flat stock that is slightly longer than the pieces you need to run and that has been coped down its long edge. You will also want to put a stop block on the end to keep your stock from flying out the back. Simply place your previously milled profile into the coped part of your jig and run the other side through the router bit. The jig should hold the stock very securely and feel very safe when you do this.
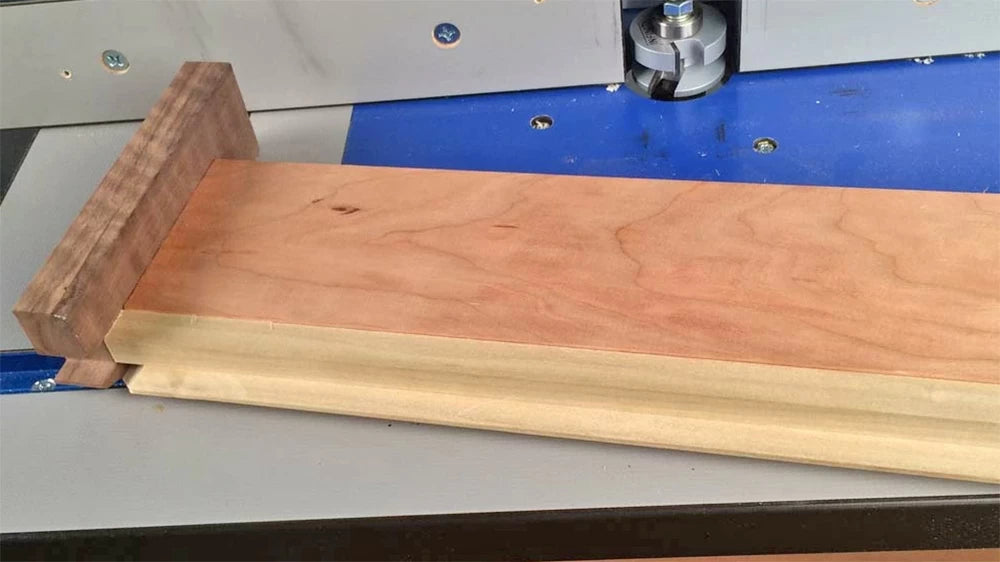
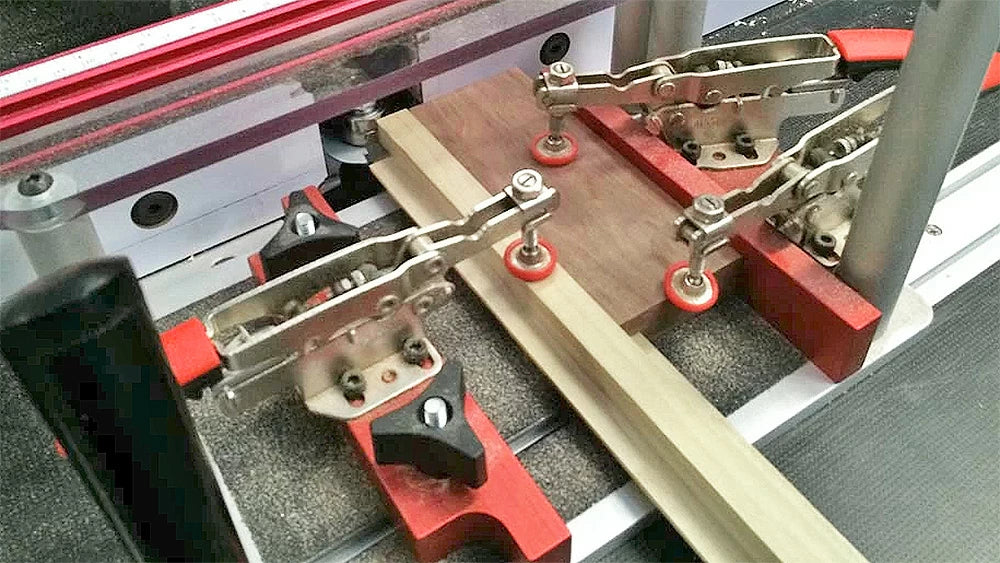
You can cope these small muntins safely and without blowout by using another simple jig. You will again need to make a backer block that has a coped edge on it. Simply slide your divider's profiled edges into the long coped edge of the backer block and cut the copes on the ends of the muntins. Its really not too bad with these jigs and it helps to keep a nice clean milled cope.
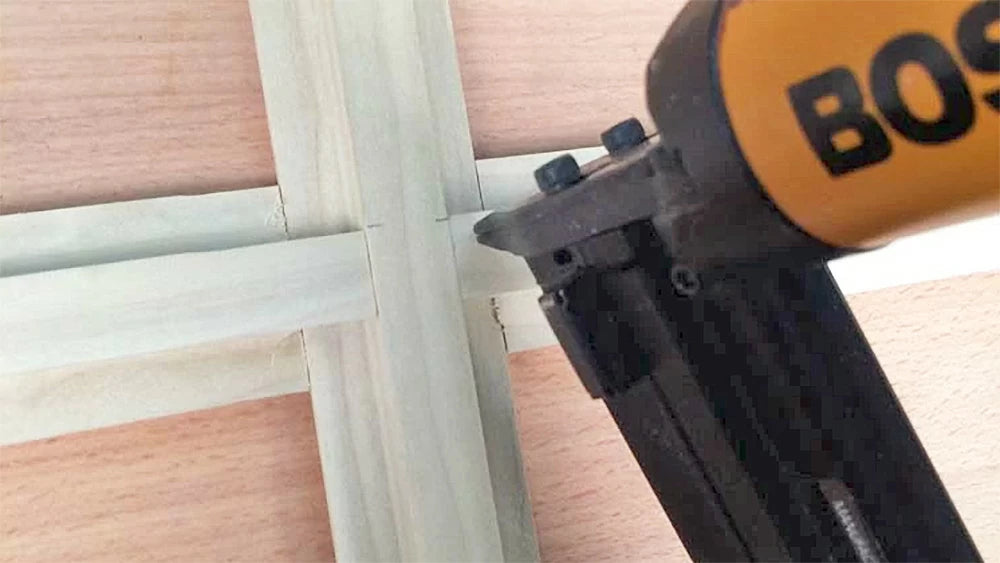
Dry fit the door and make sure all of your joints are nice and tight. If so, you can go ahead and start your glue up. You want to glue your dividers/muntins together first, as this makes it easier to glue up the whole assembly (you can use a quick setting glue if you'd like, although I usually just use wood glue and then pin the joint from the backside with some brad nails to hold them tight). Now you can glue up the whole door. Lay a stile down on its side, add the rails and dividers, and then attach the other stile. Clamp up. You want to make sure the door is extremely flat and square during this process. Add some brad nails to all of your joints and that's about all there is to the glue-up.
To add the glass, have your glass cut to size. Next you can secure your glass by either using silicone or cutting up some stop that you will cut to fit the rabbets. If you use stop consider using a few drops of silicone as well to help with any rattle that might occur.
NOTE: The 23-GLS Glass Door Kit has been updated with new shims. Download the latest instructions from the Documents Tab from our website.