
Most of woodworking is square. We make squares in the form of cabinets, tables, doors, etc. That's why it is so appealing when we get to see some break in the square, be it a slight curve or angle all the way to circles and ellipses. Circles and ellipses often get passed over by beginning woodworkers because the jigs to make them seem complicated or they don't know what tool to use.That's where Infinity's Oval and Circle Cutting jig with vacuum base comes in. Our jig makes cutting circles, arcs, and ellipses a very easy process. Unlike some of the other jigs on the market, ours has an attachment that allows you to draw out your circle or ellipse so that you can see your layout in your stock and saw off the excess material. This makes your routing job much easier.
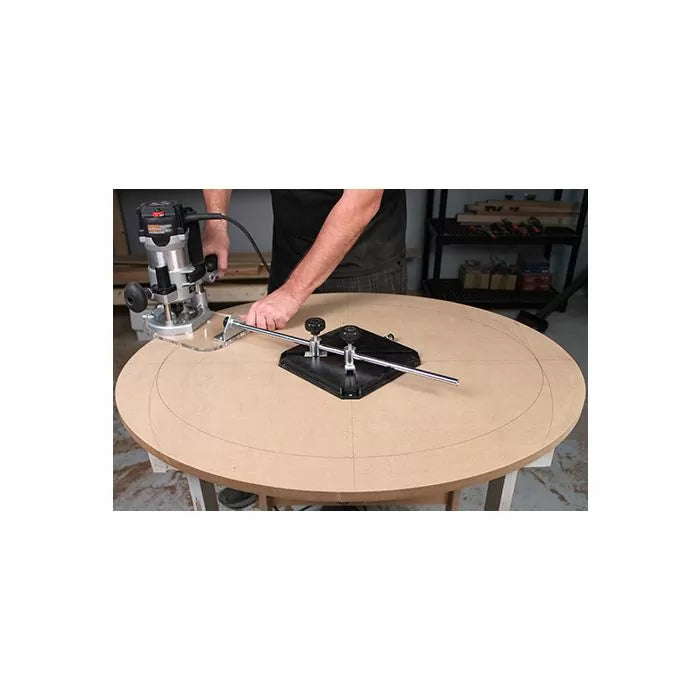
The Oval and Circle cutting jig is very easy to assemble and fits most standard router bases. Simply remove your router's base plate and replace it with the included universal base that has been pre-drilled to accept most routers on the market. Then attach the L-bracket to the top of the base (see pictures below). The extension arms attach to the pivot base when you go to cut your circles.


For cutting a circle, simply find the center point of your workpiece and mark it. Then draw extension lines along the two axis. Measure from the center point of your radius or half the diameter. Now you can attach the pivot base to the bottom of your workpiece with screws or to the top of your workpiece by using either double-sided tape or the vacuum base attachment. I attached ours to the bottom of my workpiece.
Next, simply align the holes in the pivot base over the axis lines we drew earlier and use the attached small screws to secure the base down. If you would like, you can now use the pencil attachment to layout your circle. Simply insert one of the pivots into the pivot base and slide it into the center position and attach the two setscrews into the dimples in the pivot base. Insert the rod which holds the pencil attachment into the pivot and extend the rod until you reach your desired length. Tighten the pivot screw onto the rod and draw your layout circle.
Next, I like to jigsaw off my waste to make routing a little easier. Try to stay as close to your layout line as you can.

For routing out the circle, I like to use a 1/2" diameter spiral router bit. If the pivot base is secured to the bottom, use a spiral upcut router bit. If the pivot base is secured to the top, use a spiral downcut router bit. You can also use the compression spiral router bit as another option for when it's secured on either side or take lighter passes with a plunge point straight router bit.
Now attach the router base to the pivot rod. Once the pivot rod is attached, set your distance by placing the router bit edge on the layout line. Make sure to tightly secure the pivot screw and L-bracket to the pivot rod. Now simply plunge the bit into the workpiece and travel in a counterclockwise motion. You can do this in either small/light passes for a cleaner cut or if you have removed the excess material you can do it in a single pass. And we now have a circle.


Ellipses can be set up in almost the same way. Find your center point on your workpiece and extend out your extension lines. Now make marks on the extension lines denoting the long axis and the short axis of your ellipse. You have a minimal differential length of 3.5" and a maximum differential of 9". Place both pivots in the pivot base after securing the base down. Set your desired long axis first by setting the pencil to the long mark and securing the pivot that is 90 degrees to the arm. I actually drew out multiple ellipses to show that you can orient your directions depending on material and wood grain. Next, set your short axis to the other pivot. Draw your layout line and make sure that the pivots follow the path you want. If they do, then you are ready to saw out your waste and attach your router. et your router the same way. Simply set the bit to the long mark and secure the 90-degree pivot and then take it back to the short mark and set the other pivot.
The Infinity Oval and Circle cutting jig is a definite help when making ovals, arcs, and circles. Please watch the video below for more detailed instructions.