
Box Joint Bonanza!
Box joints or finger joints are a great woodworking joint to learn, but if you don’t have the right equipment, they can be frustrating. Usually, dado blades have beveled outer teeth that leave the outside of the cut slightly deeper than the center. Router bits are another option, but sometimes exit chipout can be an issue. For the finest looking box joints we think you’ll ever see, try Infinity’s Flat-Top blades. These thick kerf blades make a splinter-free cut in hardwoods, with an absolutely flat bottom cut!

Choose Your Width, or Get a Set
These versatile Flat-Top blades are available in 5/32” or a full ¼” kerf. Better yet, you can buy kits that include multiple blades and a precision shim set, to handle a variety of grooves, dados and joinery tasks around the shop. Today, we’ll be building a simple shop made box joint jig to pair with a ¼”kerf Flat-Top blade.
Dirt Simple Jig
If you like functional jigs that don’t take all weekend to build, this is right up your alley. The main parts are ¾” plywood, with a few strips of hardwood thrown in. Start by cutting three pieces of plywood – all 18” long. The fixed fence is 5” wide, and the horizontal board that rides on the tablesaw is 3” wide. The moveable fence is 4-1/4” wide, so it will stand at roughly the same height as the fixed fence. Secure the fixed fence to the horizontal board with 4 screws and glue. Be careful to keep screws out of the blade path.

Mount Carriage to Runners
Now mount the “L” shaped assembly you just built to a pair of hardwood runners. Closed grain hardwood like hard maple works well, but whatever you have around the shop should work fine. Make the runners about 15” long, and sized to easily slide in the miter slots of your tablesaw. Use CA glue to temporarily attach the carriage to the runners, while carefully squaring it to the rip fence. Using superglue to temporarily attach runners first virtually guarantees a smooth sliding jig when you’re done.

Permanently Attach Runners
Reinforce the maple runners with (3) #6 x ¾” long screws each. Be sure to pre-drill and counterbore the holes. Soften the corners and edges of the runners with a piece of sandpaper.

Plow the Fence
With the ¼” Flat-Top blade installed (or your choice of 5/32”, ¼”, 3/8”, or ½” blade and shim combinations), push the jig past the blade to create an initial kerf in the fixed fence. For this first cut in plywood, set your blade about 1-1/4” high, and back up the cut with a scrap of plywood for best results.

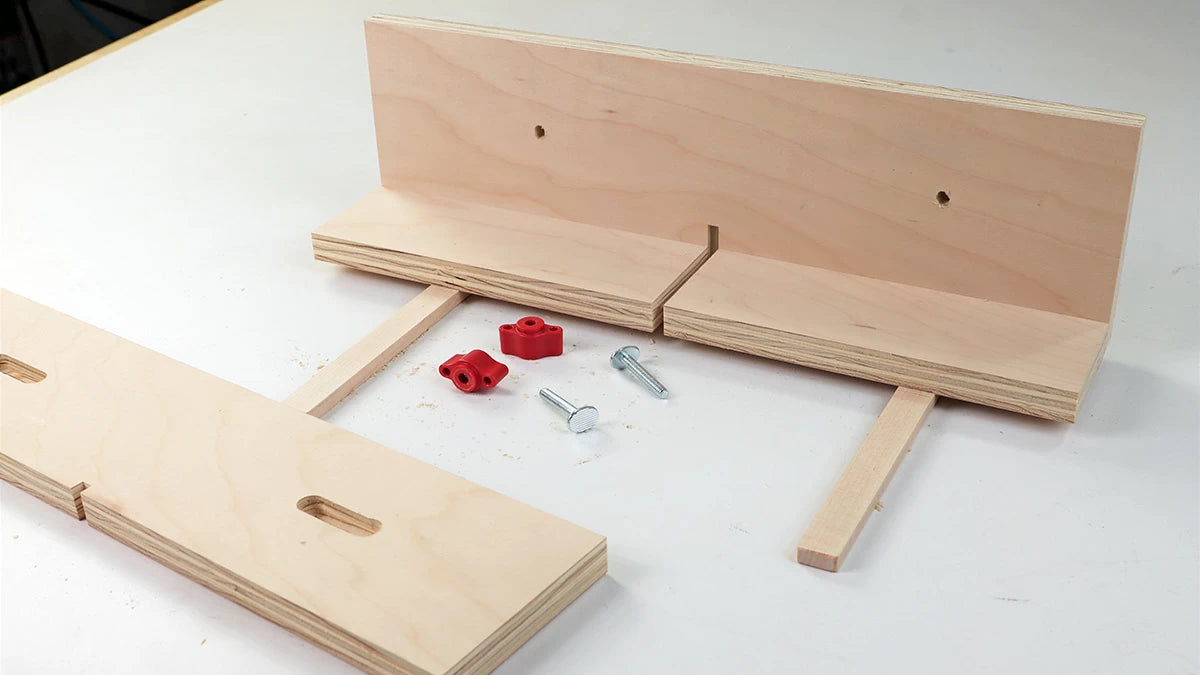
Mill and Attach the Movable Fence
The adjustable fence is the only part that needs any machining to speak of. Rout slots with a ½” wide bit at the router table to recess T-bolts. Then with the same router fence and stop block position, switch to a ¼” spiral bit and rout through slots as well. Finally, position the adjustable fence slightly offset from the fixed fence, and drill mounting holes through the fixed fence.

Add Registration Strip
Here’s the whole “key” to making a box joint jig work. Cut a kerf into the adjustable fence, and glue in a strip of hardwood. The key should fit snugly into the kerf, but not too tight. Just plane a scrap of maple down until it fits well. For this example, the registration key is 1-1/4” long x ¼” square. Glue it in the kerf, and set it aside to dry.

Build Whatever Size Jig You Like
This same jig concept works with a single 5/32” or ¼” blade. Or you can pair a 5/32” blade, 1mm spacer, and a ¼” kerf blade for a 3/8” box joint jig. Another option is two ¼” Flat-Top blades with a 2.3mm spacer in between, for a chunky ½” box joint jig. Once you have a Flat-Top blade or blade and shim package, you’ll be amazed at all the dados, grooves, tenons and general joinery they’re capable of!

Flat Bottom Cuts by Design
Each Flat-Top blade is 8” in diameter with a 5/8” arbor, which makes it functional on most any tablesaw. Better yet, it pairs perfectly with the dado brake on Sawstop tablesaws. The massive C4 micro-grain carbide teeth are ground perfectly flat – no alternating bevels or “Bat Ears” here. Plus, the neutral 0-degree hook angle makes this tiger purr like a kitten. Positive hook angles cut fast and aggressively, which may have its place on a construction site. For fine woodworking, and especially precision joinery and box joints, a neutral hook angle is preferred.

Set the Adjustable Fence Spacing
Use a length of your key stock to set the adjustable fence position. It should just fit between the blade and key that you installed previously. Once the spacing is correct, lock the knobs down on the back of the jig.

Optional Bonus Step!
I like my jigs to be ready to use at a moment’s notice. Mill a stopped groove in the top of the fixed fence, with the same blade you intend to use. This makes a nice storage slot for the spacer strip! That way it’s handy for setting the jig up next time.

Set it and Forget It
Once the adjustable fence is set, go ahead and snug the knobs on the back of the jig. The spacer strip neatly stows in the groove atop the jig.

Slide to the Left!
Set blade height for the stock you’re using, and index the first workpiece against the key. Make a first pass, then move the board to the left one cog for each pass.

Alignment is Automatic
There’s a nice rhythm to cutting box joints. Slide and cut, slide and cut. Once you get started, there’s really nothing to it. Did you know the jig will work perfectly the next time you use it – even without adjustment? It’s true! There’s no need to loosen the knobs ever again, even if your stock thickness varies for the next project.

Neighbors help Neighbors
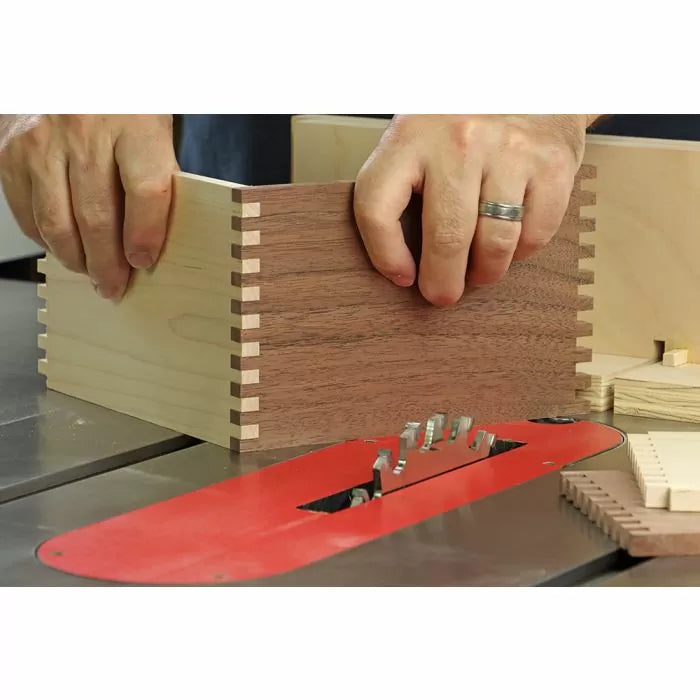
The mating board is maple, and it needs a little help to get started. Use the walnut board you cut previously as a spacer. Once the corner notch is made, remove the walnut board and proceed with multiple cuts on the maple board.

Perfect Offset
This simple process sets the spacing for the remaining cuts in the series. You’ll appreciate the cut quality of the Flat-Top blades, and the splinter-free cuts.

We’ve Tried Every Method
The Infinity test shops have tried every imaginable type of box joint. From dado blades to router bits and everything in between. While we can achieve satisfactory result with other methods, we’ve never seen cuts like this before! Flat, crisp cuts that lock together with an audible SNAP! These are the results you’ll get with Infinity’s Flat-Top blades and blade sets.