Friction Fit
Locking miter joints are one of those woodworking processes you have to try to believe. This type of joinery deserves a coveted spot on your all-time favorites list, alongside dovetail joints and inlay techniques. The beauty of this joint is the interlocking parts, that create a perfect friction fit. Plus, you’ll never have to struggle with plain miter joints again!
Choose Your Size
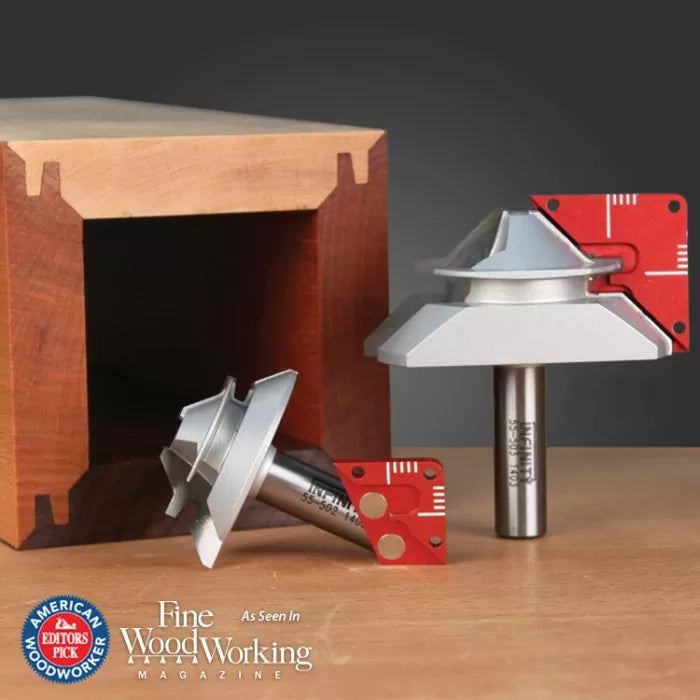
The Lock Miter Sr. Bit #55-503 handles stock thickness from 3/8” up to 1-1/8” thick. The Lock Miter Jr. Bit #55-502 handles a more typical thickness range of 3/8” through ¾”. Whatever size you select, these Infinity bits come with a patented Lock Miter Master Jig for quick and easy setup. In fact, I’d wager you’ll hit your mark on the very first try.
Master Jig Makes the Difference
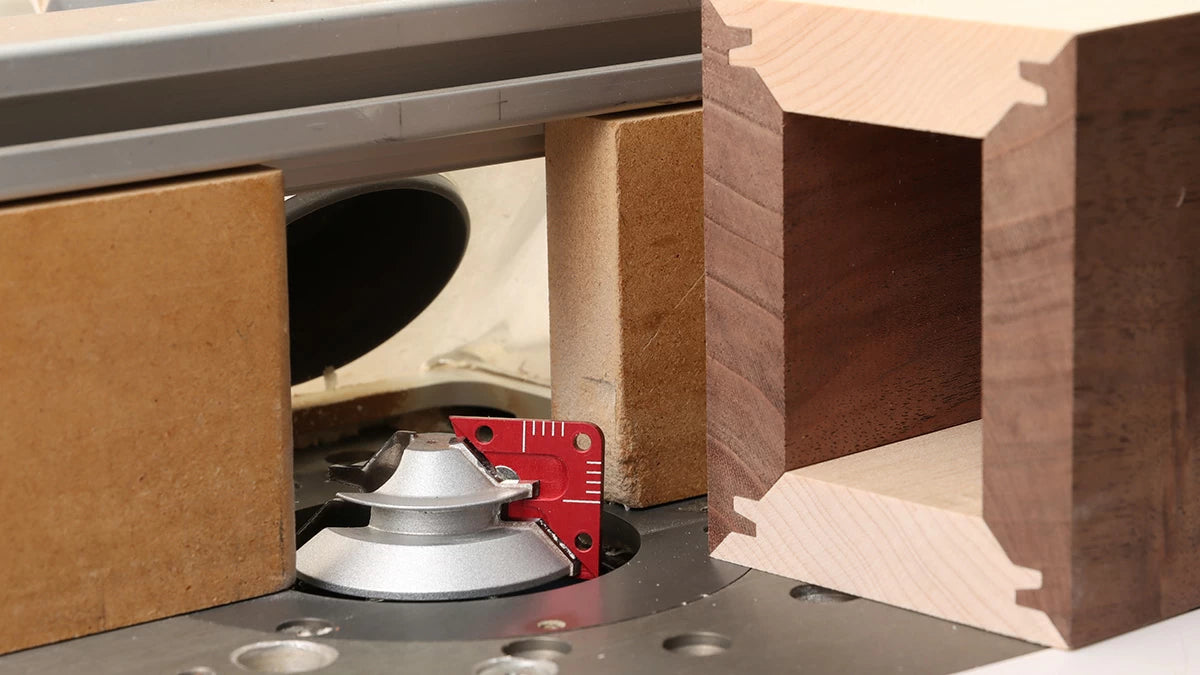
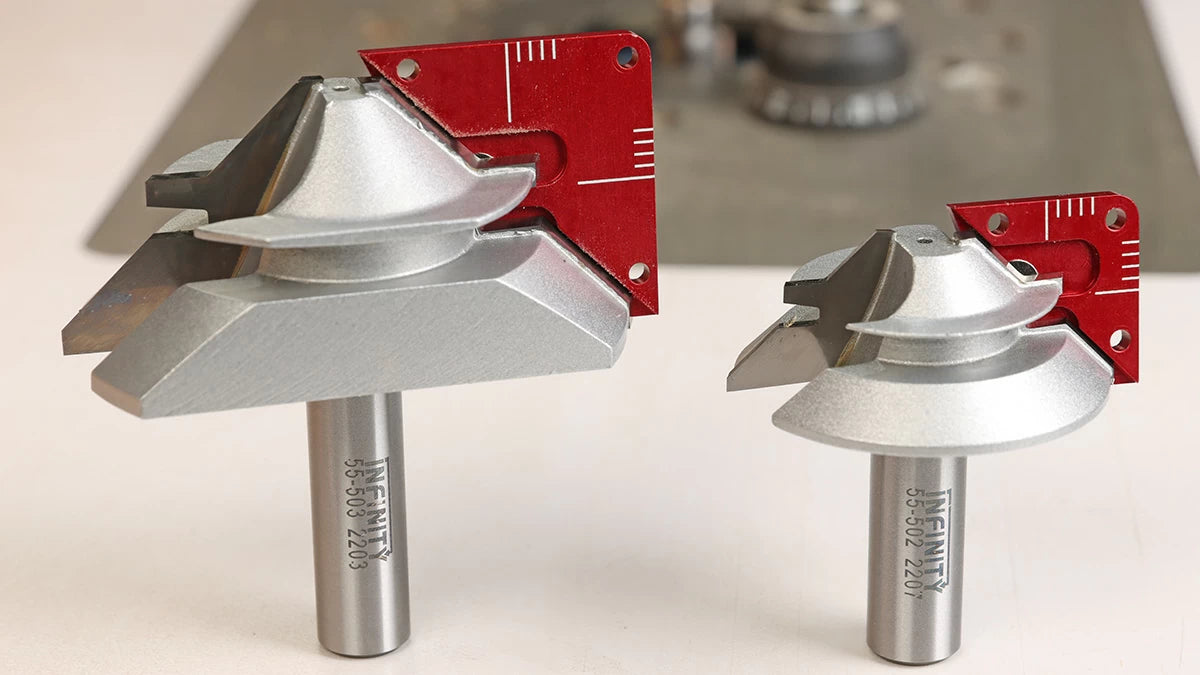
You see, unlike most lock miter bits that offer a setup block, the Lock Miter Master Jig works for any material thickness – even if that’s an odd dimension. Click the magnetic gauge in place on the bit, and make sure to slide it up the carbide profile until it contacts the underside of the cutter. Then simply adjust the bit height until the large hashmark on the gauge aligns with your center mark.
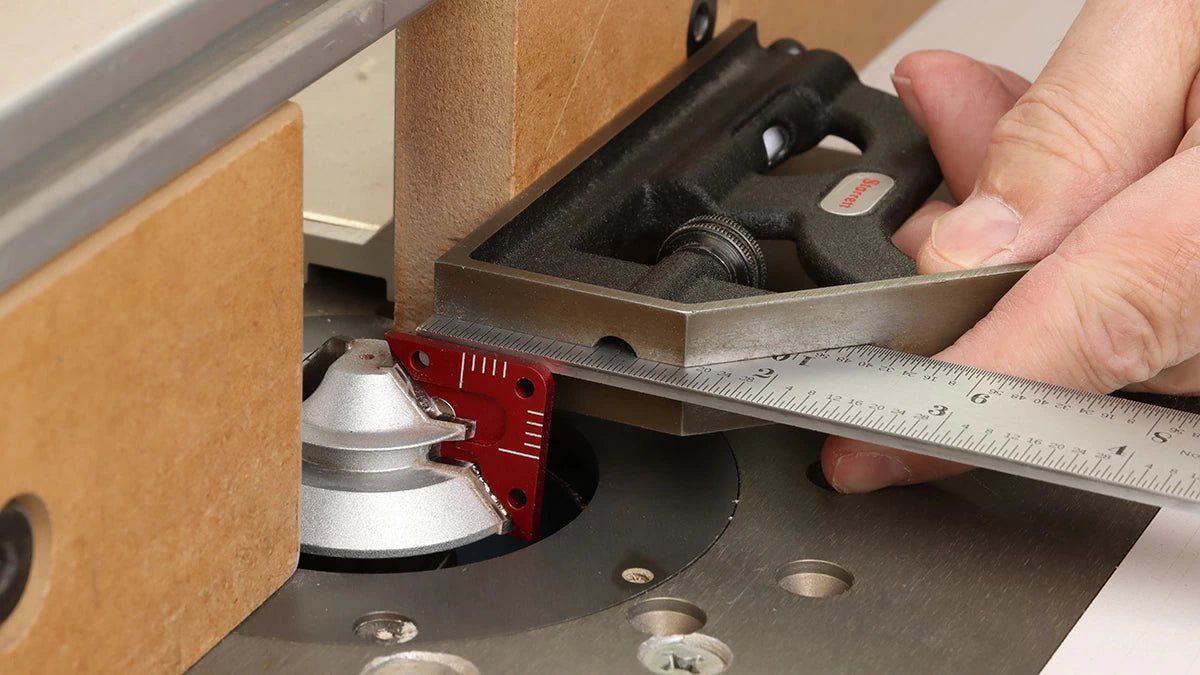
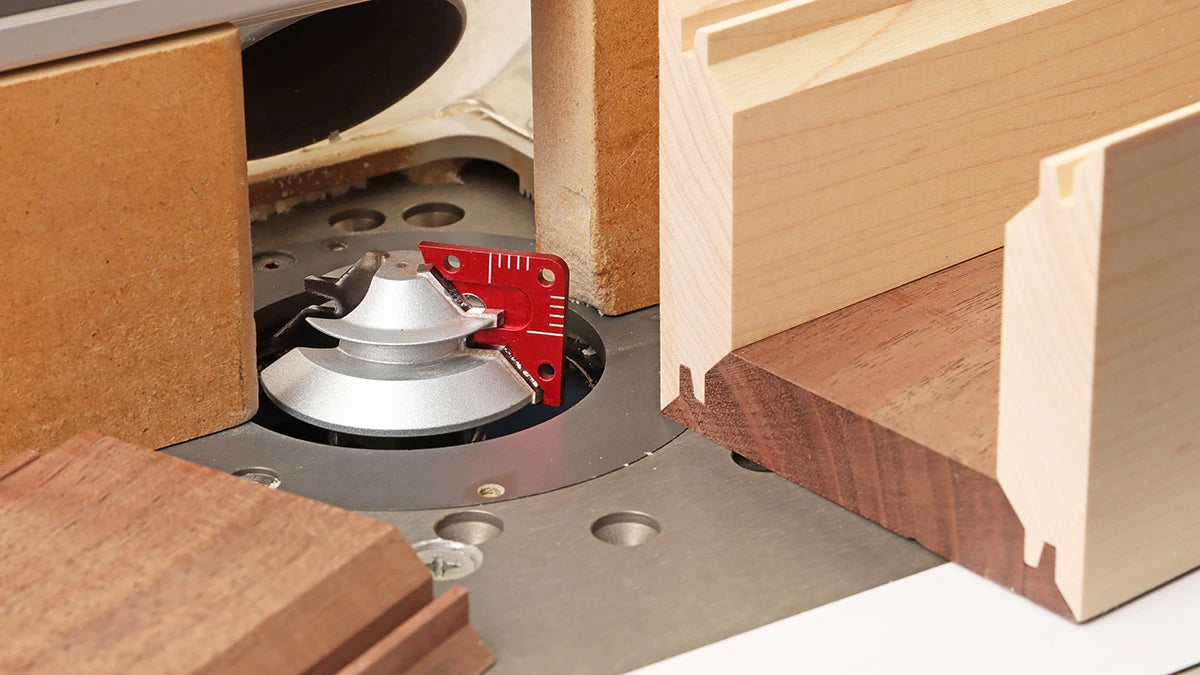
Start Square
Quickly square the jig to the router table fence, before proceeding to the next step.
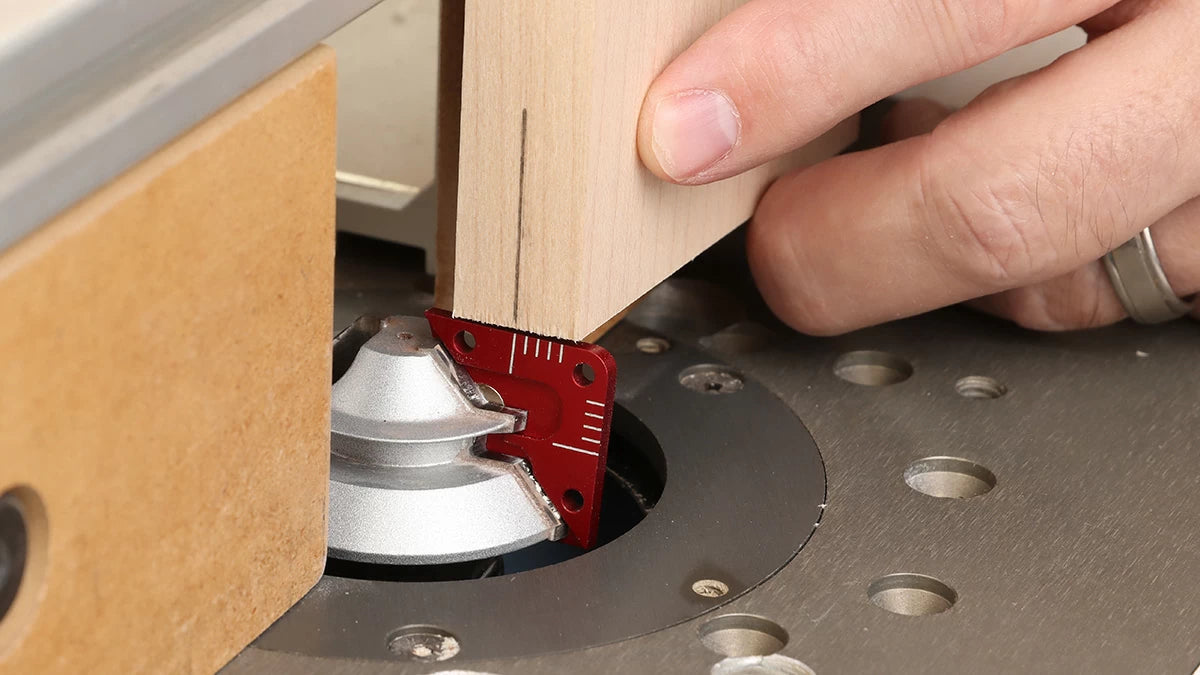
Fence Position
Quickly dial in the correct fence position by aligning the center mark with the large hashmark. At this point it seems too easy to be true, but just wait for those perfect test joints!

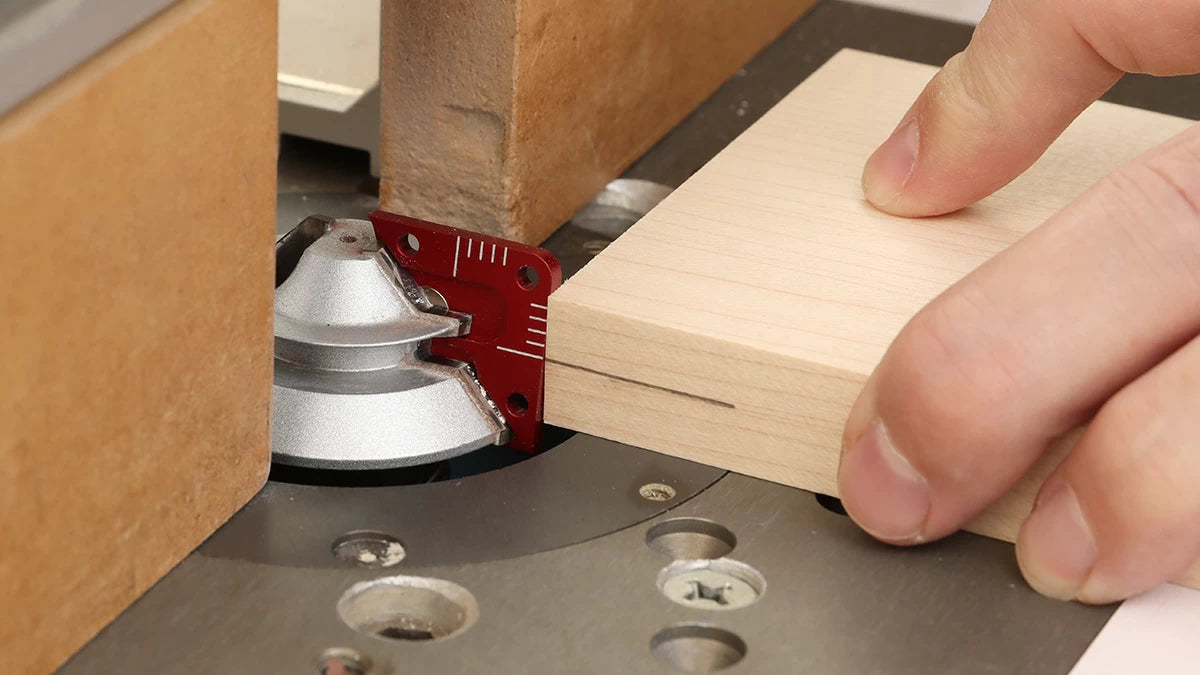
Slide it Up
Here you can see the finger-like projection on the red Lock Miter Master Jig. Slide the jig up the carbide profile until it contacts the bottom of the carbide tooth. You’ll feel a positive stop, and this is the correct position for any bit height or fence adjustments.
Pro Tip!
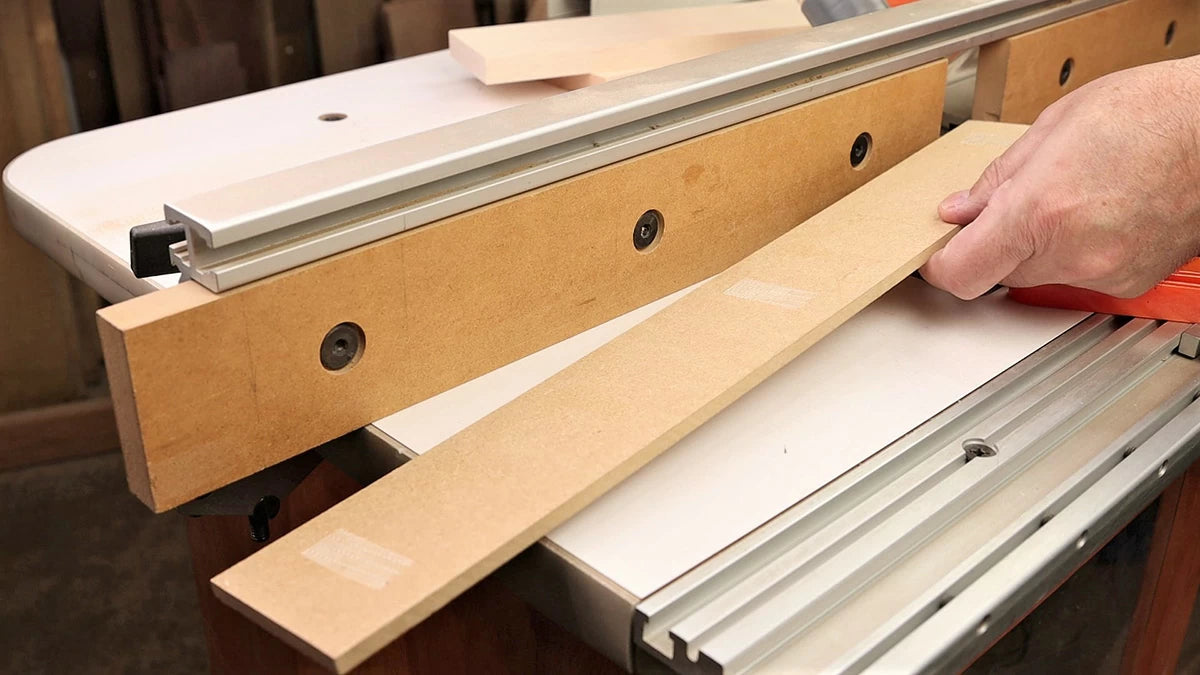
Here’s one of the absolute secrets to flawless lock miter joints every time. Attach strips of ¼” MDF to your router table fence with double sided carpet tape (AKA woodworking tape). Make the first pass on all workpieces with these strips in place. Then remove the spacers for the final pass. The result is less strain on your router, and crisp splinter-free profiles.
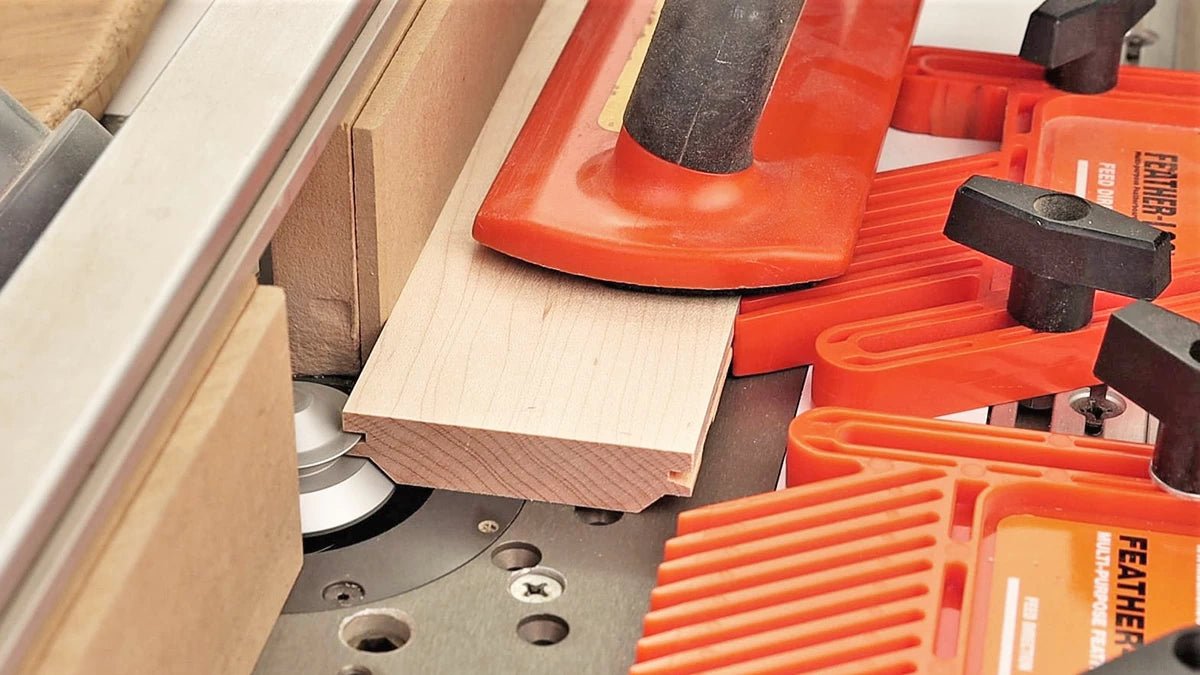
First Pass
The basic idea of a locking miter joint is to mill one board flat on the router table, and the adjacent board held vertically against the router fence. Here the spacer strips are in place against the fence for the first pass. Note the same profile is routed on both edges of the board.
First Pass on Vertical Parts
With the spacer strips still installed against the fence, readjust the feather boards for a vertical cut. Make the first pass in all of the vertical pieces, which are walnut in this case. Again, you’ll rout the same profile on both edges of the board.

Pro Tip #2 … Backer Board!
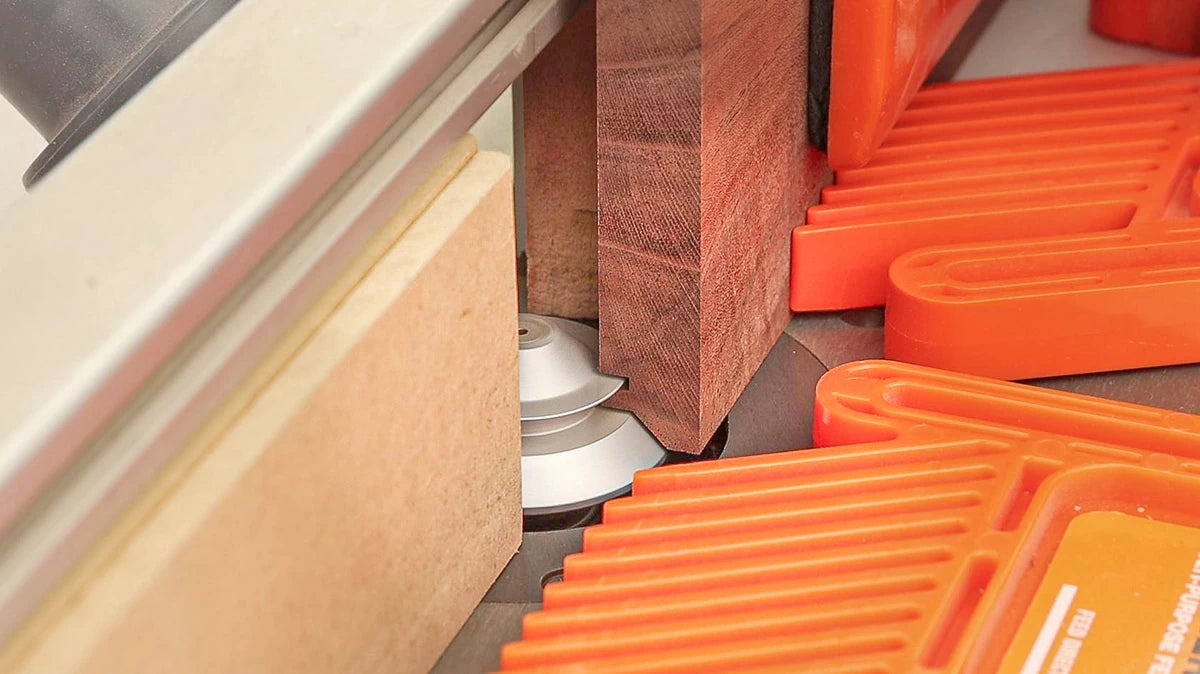
Now remove the fence spacer for all remaining cuts. This second pass develops the knife-edge profile we expect with a locking miter joint. While the ¼” spacer has been removed from the fence, you may notice a backer board has been added to the workpiece. This, as it turns out, is critical for supporting the knife-edge on the outfeed side of the bit. Like before, this strip of ¼” MDF is attached with double sided carpet tape.
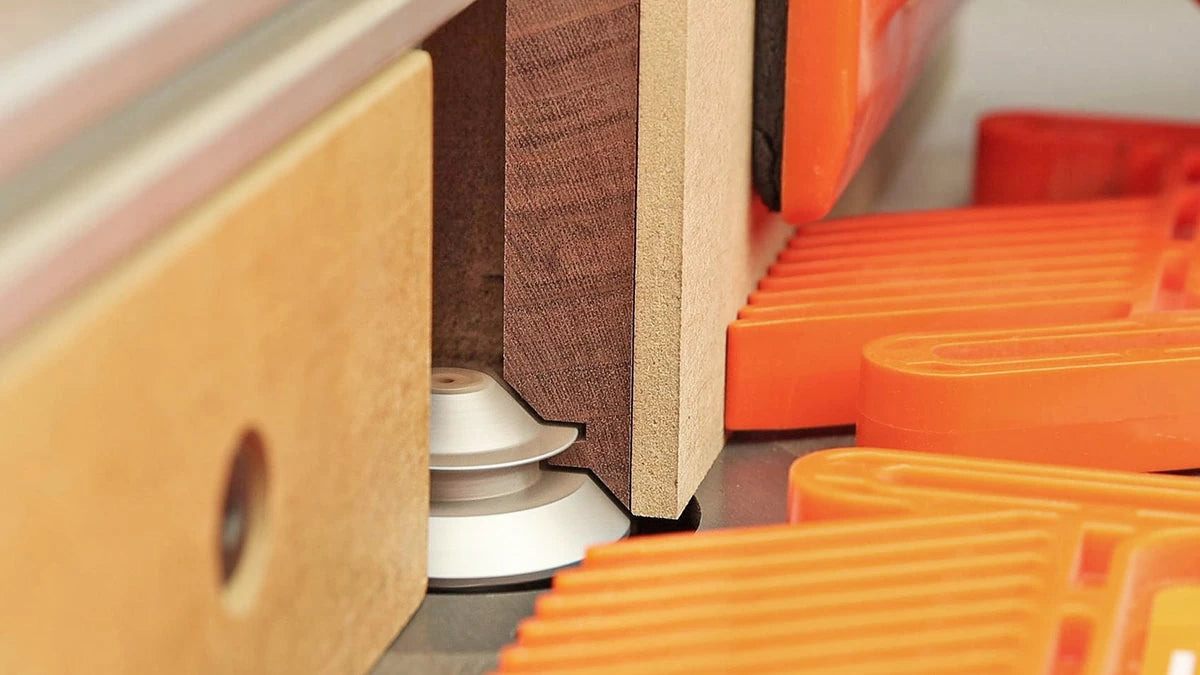
Second Pass on Vertical Parts
Just like the horizontal parts, add a backer board to the vertical parts and make the second pass. It’s worth noting that bit height and router fence position remain unchanged throughout this process. Just set ‘em and forget ‘em.
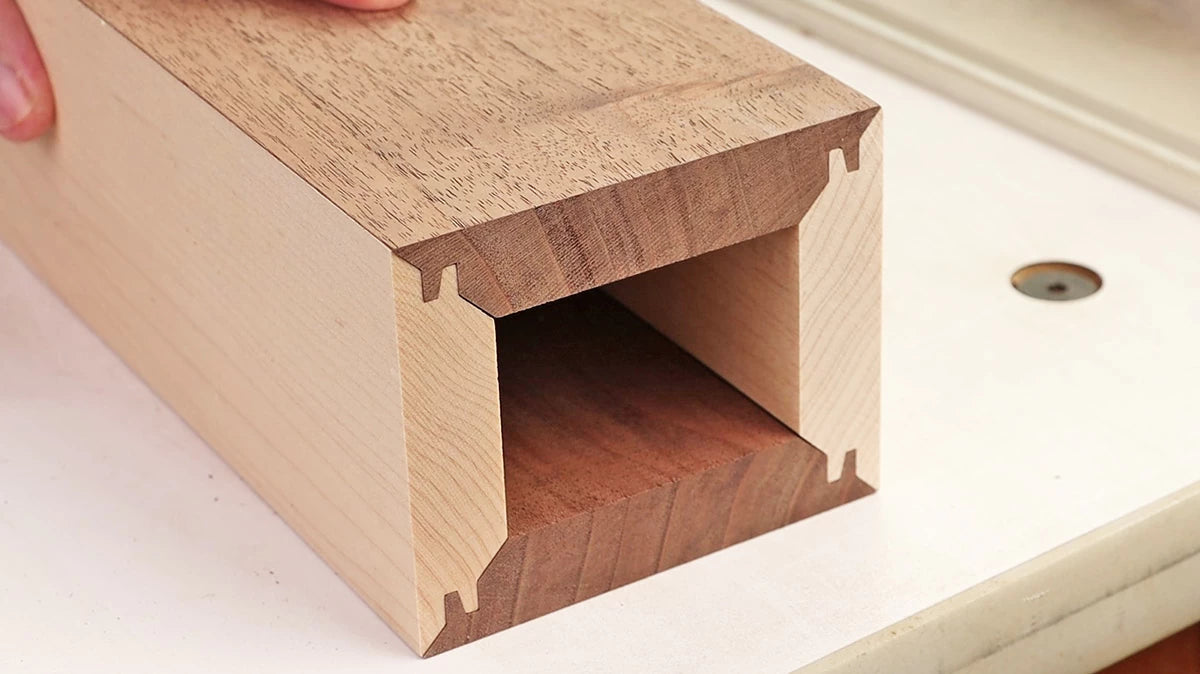
Unrivaled Cut Quality
Using this technique with an Infinity Lock Miter bit produces seamless corner joints and astonishing cut quality. No tearout. Zero snipe.
Plus, the long joints can be sanded or eased with a roundover bit – just like a solid wood post. Just imagine the possibilities for oversized furniture legs and fireplace mantels, all from common ¾” stock.
Amazing Just Became Amazingly Easy
With a carbide tipped Lock Miter router bit, these amazing joints are now effortless to setup – thanks to the patented Lock Miter Master Jig. If you’re the type of woodworker that likes to be prepared for anything, get the 4pc. set with both the Lock Miter Jr. and Lock Miter Sr. bits, with included master jigs for each.