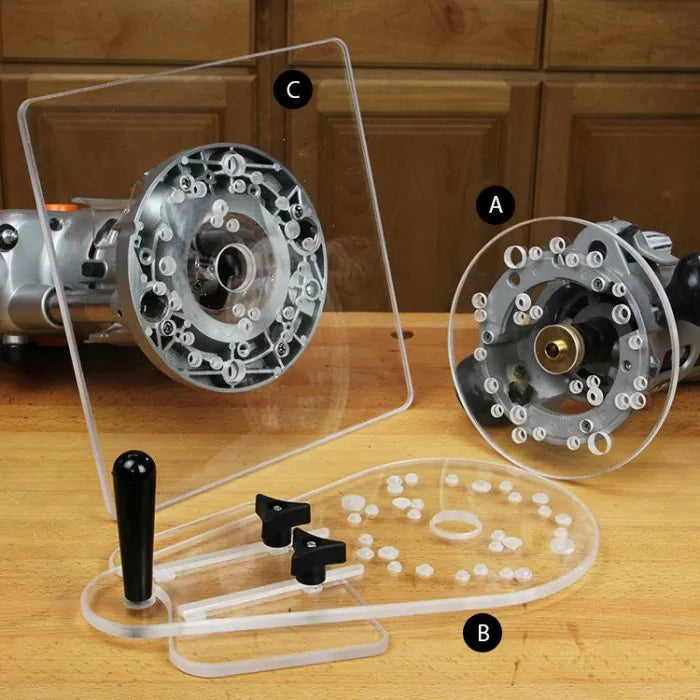
Our new custom, blank 11-1/2” x 11-1/2” x 3/8” router base plates (115-022) are clear, scratch and impact-resistant (as with all our heavy-duty plates), but you create the holes in this one to perfectly match your original router base. Using our Base Plate Alignment Kit (115-040) you’ll get a perfect fit, and years of quality performance.

Working with a template with larger "voids" in the pattern make a large base plate a necessity to avoid falling into a hole. This is only one example where extra base support improves your router's performance. A clear base makes it possible to see what you're doing!

Our custom router base plate solves the problem for any router... Using your dad's old Craftsman router? No problem. This base is completely custom in that YOU drill the mounting holes ... so this base will work with ANY router!

The 11-1/2" x 11-1/2" base gives you ample support for any routing task, while the 3/8" thickness gurantees stability and flatness.

To get a perfect fit to your router, you want to center the new base plate exactly over the existing woodworking router base. There are a number of centering devices, but we use the optional Base Plate Alignment Kit. This kit includes a 1/4" centering rod, making it possible to add a custom base to even your trim router, if that's your choice.

The first step is to remove the old router base plate, but hang on to the screws because you'll use them again!

With your centering device snug in the router plate, and with the collet on the router just allowing the 1/4" centering rod to slide into place, orient the woodworking router base plate over the router base.

With a dark marker, make dots locating the screw positions on the base plate. Be as accurate as possible, but you'll be making the holes slightly oversized for ease of adjustment.

Drilling the holes is a two-step process. Start with a small Forstener bit to create a recess in the base plate to allow the screw head to fit below the plate surface. Figure out your required depth for this and set a stop on your drill press to make things easier. Check your screw head against the recess to make sure it won't interfere with the plate's surface.

The second drilling step is to cut the hole the rest of the way through the plate using a brad point bit. The diameter of this hole should be slightly larger than the screw's body, but don't make it too big.

And that's it! Attach the new plate to your router base, and use the centering jig to make sure everything lines up perfectly. You'll be impressed with the stability and visibility added to your router with this custom base. In fact, you may just want to get a few of these, while you're at it!