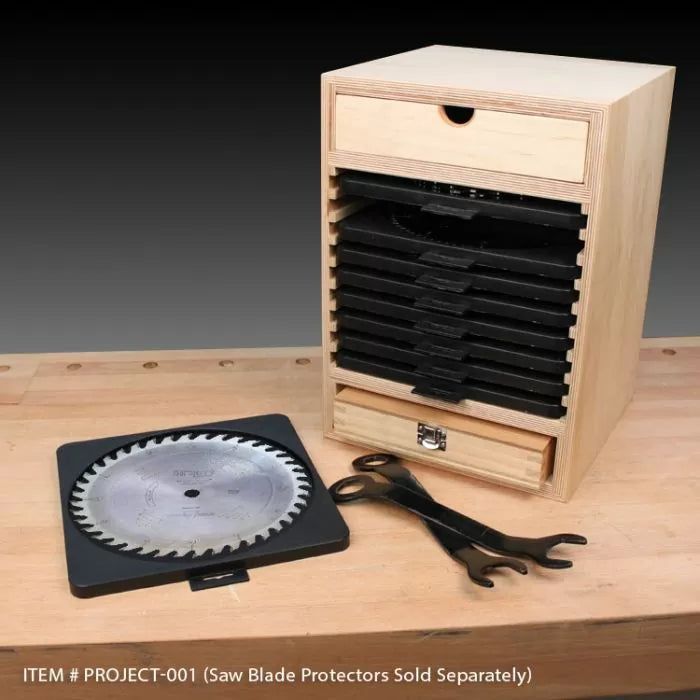

In this post, I'll step you through building the Saw Blade Storage Cabinet you see here. At the bottom of this post, you'll find a couple of helpful videos plus links to download plans and a 3D SketchUp model of the project. You'll also find a complete list of all of the products from Infinity Cutting Tools we used to build this handy storage cabinet.
In my shop, I've had a saw blade rack right next to my table saw. I got the idea from an old issue of ShopNotes magazine, No. 107. It was a simple cabinet with hardboard trays. Each tray was made from two layers of 1/4" hardboard. The top layer had a circular cutout just a hair over 10" in diameter to accommodate the blade. The trays slid in dadoes cut into the cabinet sides.

Over time, this old saw blade rack became less useful. I had acquired more blades than it would hold. Plus, there was no storage for my dado stack. And all the little doodads like dado shims? Well, they were relegated to a small plastic tub that kept getting full of sawdust.
So I decided it was time to come up with a better solution for storing my saw blades and related accessories.
For my new saw blade storage cabinet, I wanted to use the Infinity Cutting Tools saw blade protectors for 10" saw blades (100-142) to store each of my saw blades. They're meant to be standalone "carriers" for storing and transporting your saw blades without fear of damaging the carbide teeth. But I thought they would make ideal trays for my saw blade cabinet.
I also wanted to use Infinity's Case For 6" & 8" Stacked Dado Blade to store my dado stack. So I needed to make room for that in my new design.
As an added bonus, I wanted a place to store table saw accessories like dado shims and wrenches. I incorporated a plywood drawer, or tray, for this purpose
Before you get started, you'll want to have the blade protectors and dado case on hand. This way, you can size the parts of the cabinet and all of the joinery for a proper fit.
Case Assembly
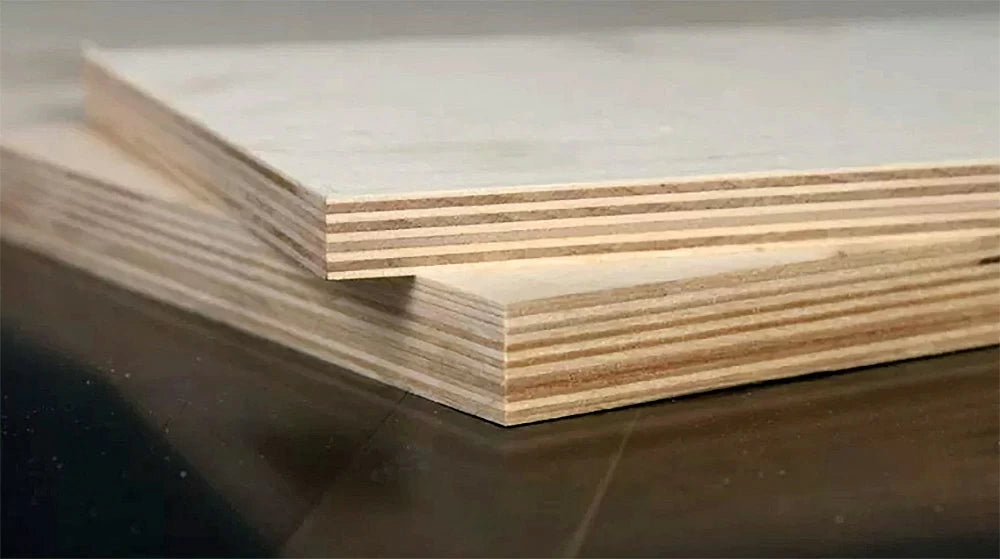
For my cabinet, I used Baltic birch plywood. Baltic birch has become a favorite of mine because it's flat, void-free, and stable. Plus, because of its multiple, thinner plies than standard plywood, it's a lot stronger. In some areas of the country, it may be hard to find. It that's the case, look for plywood distributors in the area.
When cutting plywood, I like to use a blade that will minimize tearout and chipping of the thin face veneers. I used an 80-tooth crosscut blade (Item 010-080). It leaves a smooth edge without chipping. It's also beneficial to use a zero-clearance insert on your table saw. This helps support the wood fibers as the blade exits the cut. I also like to use Jessem's Clear-Cut Stock Guides when performing ripping operations at the table saw. The guides help hold the workpiece down on the table while keeping the workpiece tight against the rip fence. This helps ensure smooth cuts.
I ripped the plywood to width to match the width of the cabinet sides, top, and bottom. Then I crosscut the pieces to final length using a miter gauge and a stop block clamped to the rip fence. Using a stop block guarantees that the opposite sides of the cabinet will be identical in length. This is critical for a square assembly.
Case Joinery
I want to stop for a minute and talk about the joinery used to assemble the cabinet sides, top, and bottom. You'll want to make this decision before you cut the top and bottom pieces to final length. The reason for this is that after you cut the dadoes in the cabinet sides that house the 10" sliding trays for the blades, you'll want to make sure the distance between the bottoms of the dadoes provides for a sliding fit of the trays without being too sloppy or too tight. For my case, I wanted to use a lapped miter joint. It's great for use on plywood because it provides plenty of glue surface. An added benefit is that the plywood veneers don't show on the outside of the mitered joints.

If you're looking for simplicity, you can use a variety of other joints such as butt joints, rabbets, pocket holes, or tongue and dado. Whatever joinery method you use will dictate the final length of the top and bottom of the cabinet pieces.
A Series of Dados
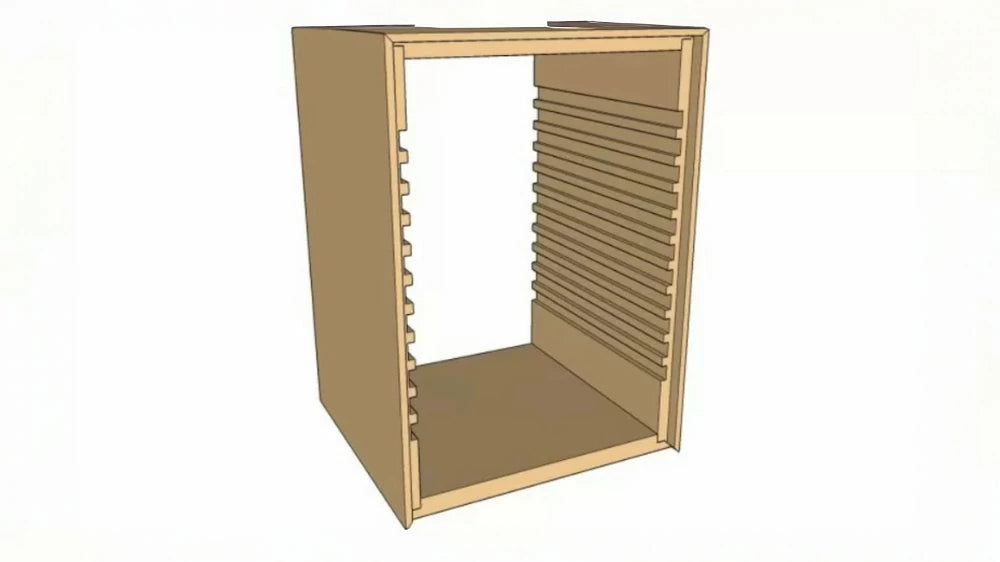
The next step in the process involves cutting a series of mirrored dadoes in the cabinet sides. The upper and lower dadoes support two plywood shelves, or dividers. The remaining dadoes in between accommodate the sliding trays for the blades.
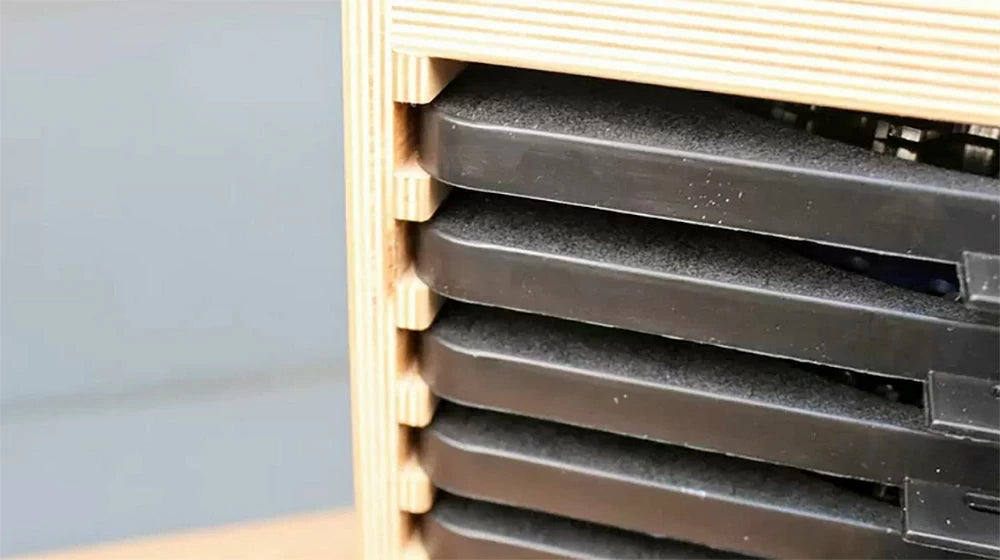
The dadoes are 1/4" deep and 5/8" wide. They're spaced 1" on center, leaving 3/8" of material between the dadoes. I used Infinity Tool's Dadonator dado blade configured for 5/8" width. After laying out the location for the first dado, I set up the rip fence on the table saw to act as a stop to position the workpiece for this first cut. Remember to cut the dado on each cabinet side before adjusting the rip fence for the next cut. I used the miter gauge to help feed the workpiece while keeping the end of the workpiece against the rip fence. I simply used the measuring tape on the rip fence rail to adjust the rip fence in 1" increments to cut the remaining dadoes.
Rabbetted Back Edges
For the back of the cabinet, I used 1/2" Baltic birch. The back fits into rabbets cut into the sides and top along the inside back edge. The SketchUp illustration below shows what this looks like. I trimmed the bottom of the cabinet to fit flush with this rabbeted edge so that the back overlapped the bottom.
To cut these rabbets, I used the dado stack still installed on the table saw. I made an auxiliary, sacrificial rip fence and slightly buried the blade in the fence so that it left 1/2" of the blade exposed. (Watch the project video below to see how this works.) After adjusting the height of the dado blade to 1/2", I cut the rabbet in the three case sides. Then I switched out the blade to the crosscut blade to trim the case bottom.
Lapped Miter Joints
You're ready to make the joinery used to assemble the case sides, top, and bottom. As I mentioned, I used Infinity's Lapped Miter Router Bit Set (55-505). This set consists of two router bits to create matching profiles and a setup block to help you set the bit height and fence position for each cut. In our shop, we also have Jessem's Clear-Cut Router Table Stock Guides installed on our router table. I have to say I've gotten a little spoiled using them. Like the table saw version, they act as helping hands to help keep the workpiece tight to the table and against the router table fence.
Case Assembly
Regardless of the joinery you've chosen for the case, it's time for glue-up. The video below shows a cool technique for gluing and assembling the case if you use miter joinery. I dry-assembled the case to obtain the dimensions for the back and cut it to final size. This way, you can use the back to help square up the cabinet assembly after you apply the glue and start adding clamps. With the cabinet face-down on the workbench, the back is simply glued in place. (I used a 10-lb. dumbbell as a weight to "clamp" the back in place.)
Measure across the diagonals to check the assembly for square. If the dimensions match, go ahead and tighten the clamps. If the diagonals don't match, tweak the cabinet assembly until they do match. It's important to try to get all of this done before the glue starts to set, so you'll have to act quickly.
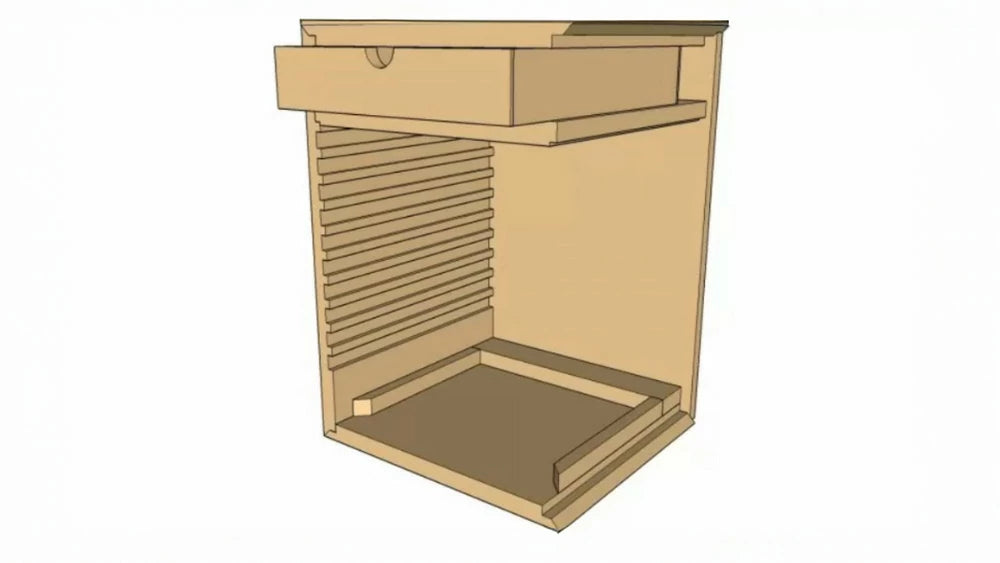
Shelves
You'll work on the two plywood shelves, or dividers, next. They create the storage spaces at the top and bottom of the cabinet. The top space houses the removable tray for storing accessories. The bottom space is reserved for storing your dado blade.
Measure between the bottoms of the dadoes in the cabinet sides to obtain the length of the shelves. Measure from the inside back of the cabinet to the front edge for the width of the shelves, then you can cut them to size. Because the shelves are 3/4" thick, I cut a shallow rabbet to form a 5/8"-thick tongue to fit into the dadoes. After testing the fit of the shelves, I applied a little glue to the first couple of inches of the dadoes before tapping the shelves in place with a mallet and wood block.
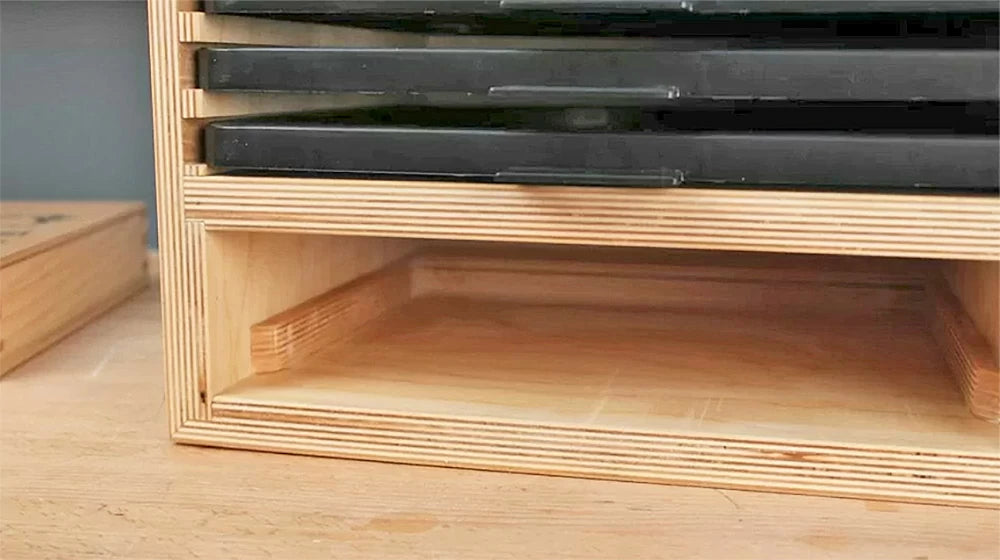
Drawer Runners and Stop
You'll notice in the photo above I added a pair of runners and a stop in the bottom storage area. These are sized for the dado case I'm using. Your dimensions may vary. The SketchUp illustration below shows these parts more clearly.
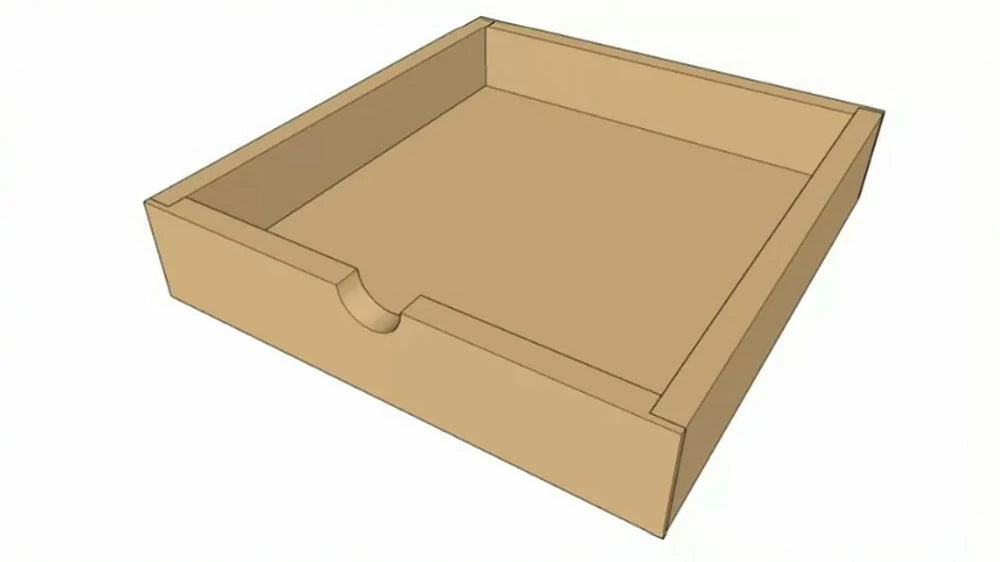
Storage Tray
The last piece to build is the storage tray. I made mine from 1/2" plywood. The tray front and back are rabbeted to accept the sides. I sized the parts so that there was a 1/16" gap between the tray front and the opening. The tray front sits flush with the cabinet, so this will dictate the length of the tray sides.
There are a couple of things to do before you can assemble the tray. I cut the front and back of the tray to size first. Then I cut the rabbets on the ends. This way, I can get an accurate measurement for the length of the sides before cutting them to size. The next step is to cut a groove on the inside face of all of the parts to accept a 1/4" plywood bottom. I positioned the groove 1/4" from the bottom edge.
For the front of the tray, I made a finger notch by using a 1-1/4"-dia. Forstner bit at the drill press. The trick to making the 1/2-circle notch is to drill with the center spur of the bit just barely engaging the edge of the workpiece and making sure the workpiece is clamped securely before drilling.
The final step before glue-up is to round over both the inside and outside edges of the finger notch with a 1/4"-rad. roundover bit. After assembly, I used this same bit to round over the top, inside edges of the tray. A little trick I used to ensure the tray seated all the way into the opening is to round over all four edges of the tray back. This way, if there's any dried glue or sawdust in the back corners of the opening, the tray will still slide all the way in.
Sanding & Finishing
To finish the cabinet, I used Mirka Abranet Sanding disks on my random-orbit sander and sanded through 220-grit. I applied a coat of Odie's Oil just to provide some added protection. Plus, the oil finish just makes the cabinet look nicer.