Crown molding is one of the easiest ways to add the perfect finishing touch to small and large projects alike. It's called crown molding because it adorns the top of a cabinet or finishes off the junction between a wall and ceiling. While there is a lot of information available that covers how to install crown molding, there is little available on making it. In this blog post we dive into what makes our new router bit set unique and we show you how easy it is to make custom crown molding for your next project.
One benefit of using our set that I want to make clear is that all of these router bits are designed to be used with your workpiece flat against the router table. That means you won't be making any tricky cuts with your boards riding against the fence, all cuts are made with the boards fully supported by your router tabletop. This makes the process much easier and you're virtually guaranteed to get good results. And as an added bonus, you'll notice that we've included a custom wood box to help keep this set safe and organized for years to come. Ok, now that we've got that out the way, let's take a look at how easy this set is to use.
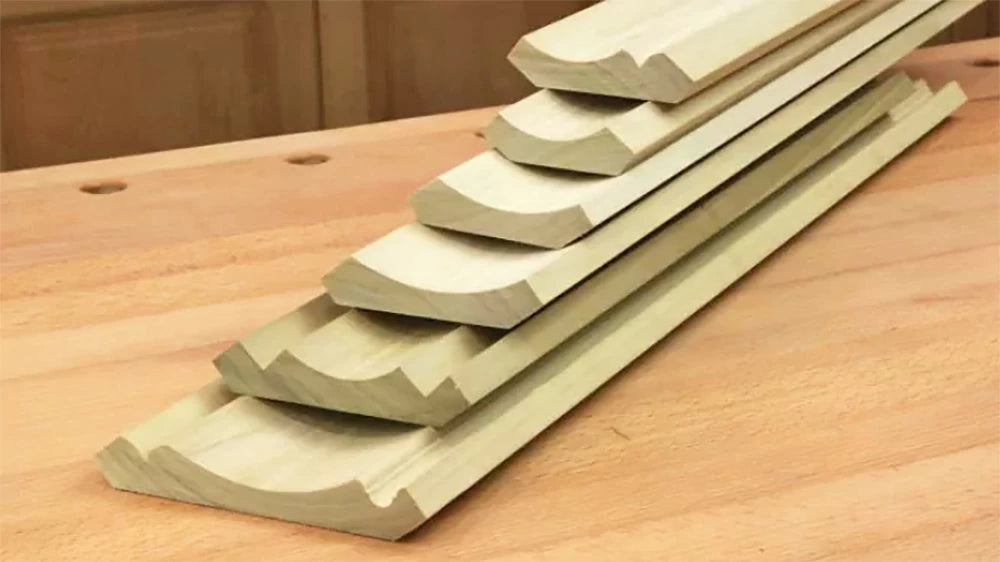
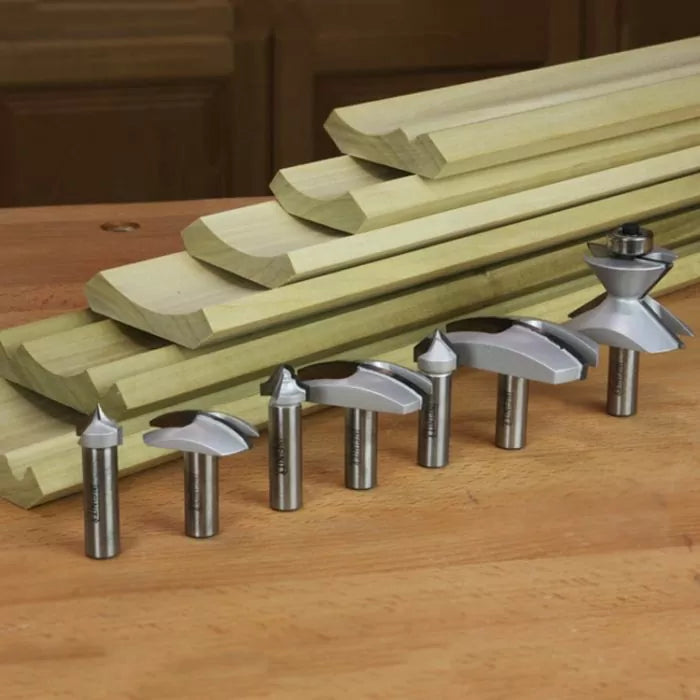
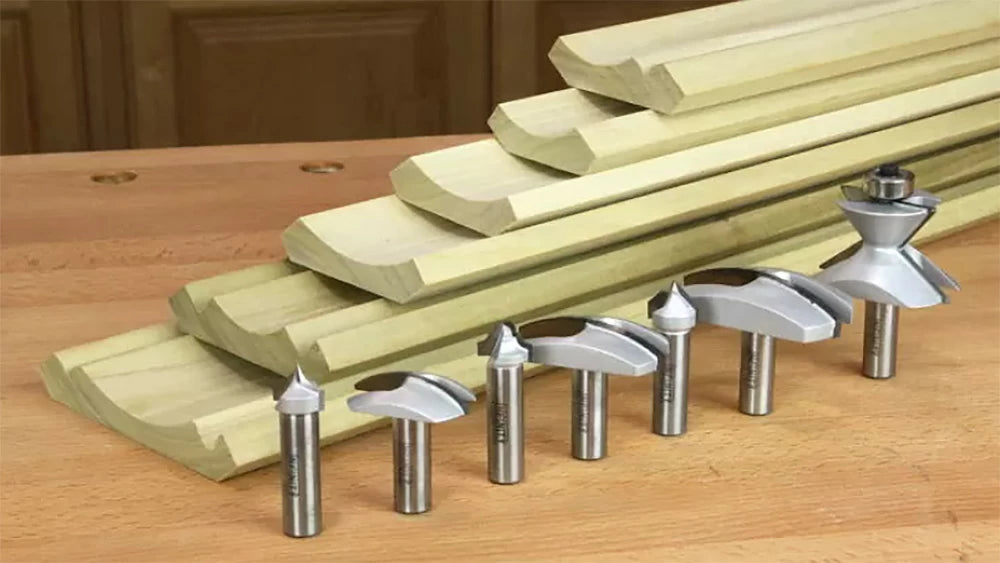
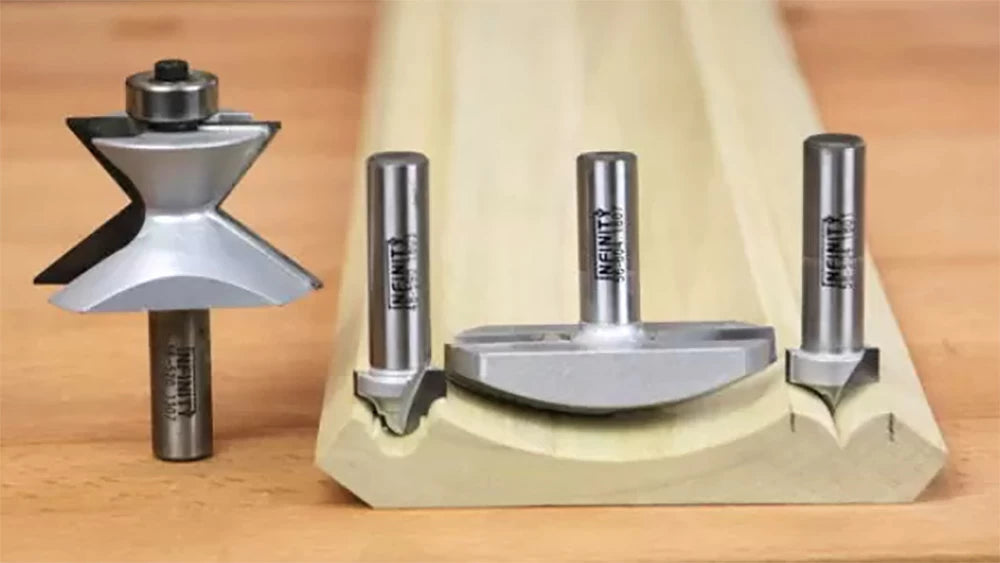
The first couple steps in making your own custom crown molding is to layout your design and calculate the width of stock you'll need to make your molding. With the Infinity 7-Pc Master Crown Molding Set, (00-567), you have many profile options, ranging from simple to complex. So start by choosing the router bits you would like to use to create your profile. From there, it's easy to figure out how wide your workpiece needs to be.

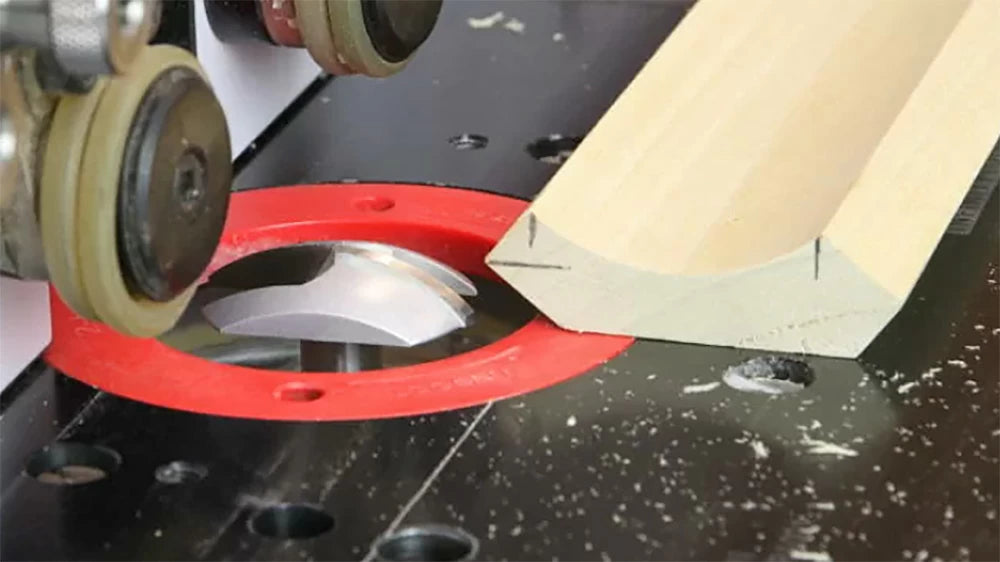
The cornerstone of our set is the unique Crown Molding Edge router bit, item 56-520. This router bit creates the correct 38° and 52° chamfers that form the proper "spring angle" for the crown molding. To get the best result with this bit you'll need to know the thickness of material you'll be using for your crown mold. The thickness of your stock is the same as the amount of width you need to allow for the crown edge profile. For example, we wanted to make a 2-1/2" wide x 3/4" thick molding so we knew we would have 1-3/4" for the profile and 3/4" material for the Crown Mold Edge. A picture is worth a thousand words, see below for a clear explanation.
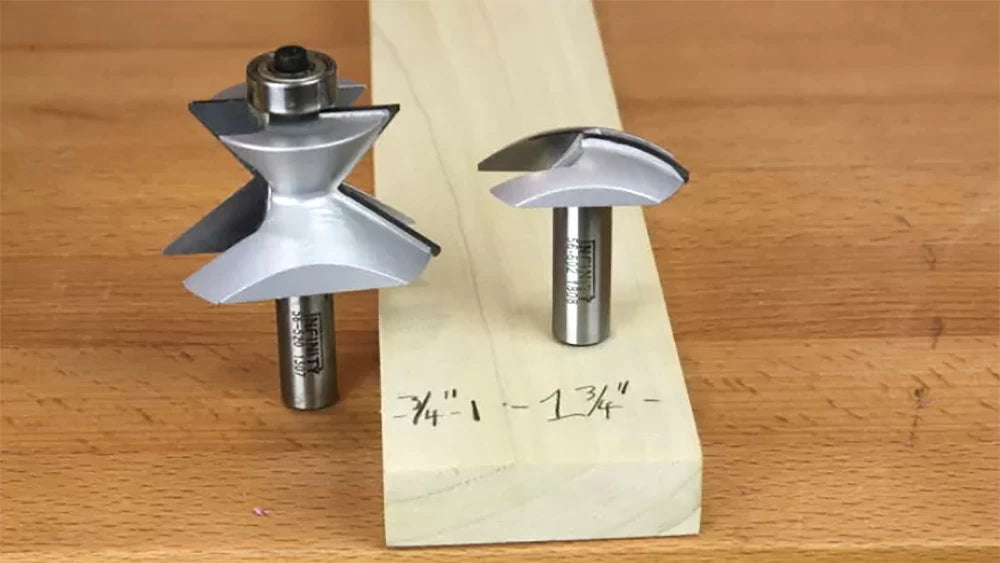
The next step is to add together the cutting width of all the profile router bits we are using to make each crown molding. If making the simple cove crown pictured above you would add 3/4" for the Crown Edge router bit and 1-3/4" for the small cover crown molding router bit (56-602). This gives a total width for the molding blank of 2-1/2" wide by 3/4" thick.

The next step is to add together the cutting width of all the profile router bits we are using to make each crown molding. If making the simple cove crown pictured above you would add 3/4" for the Crown Edge router bit and 1-3/4" for the small cover crown molding router bit (56-602). This gives a total width for the molding blank of 2-1/2" wide by 3/4" thick.
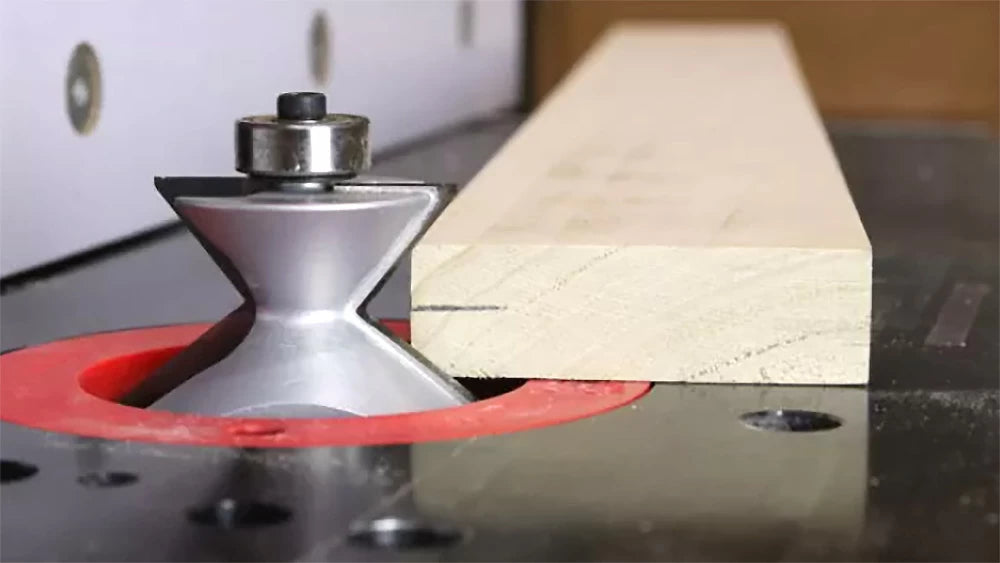
Next, it's over to the router table to start milling. Regardless of your chosen design, you'll always start with the Crown Molding Edge router bit 56-520. Setup is straightforward; find the center-line of the workpiece and adjust the router bit height so the "V" in the router bit aligns with the centerline of your work-piece.

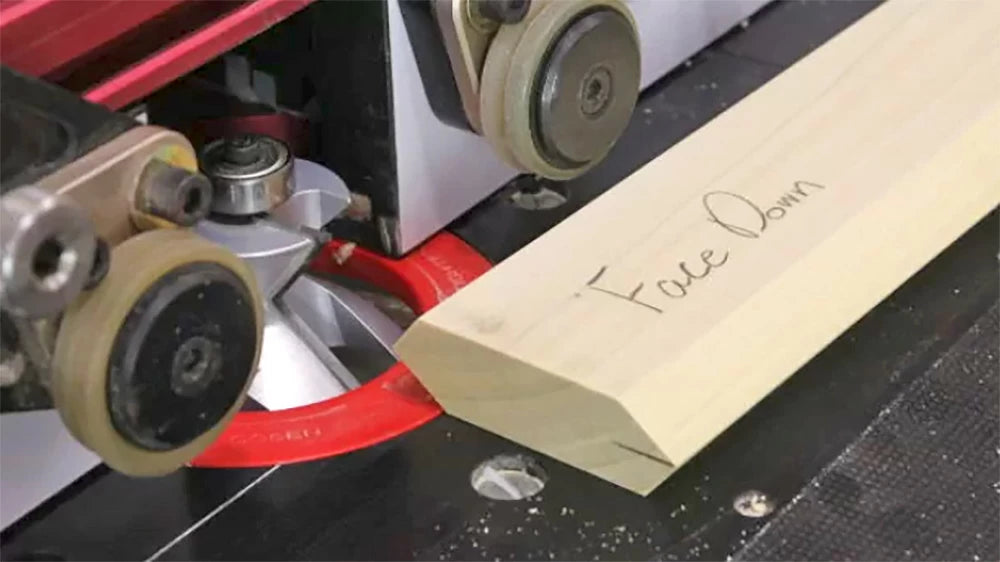
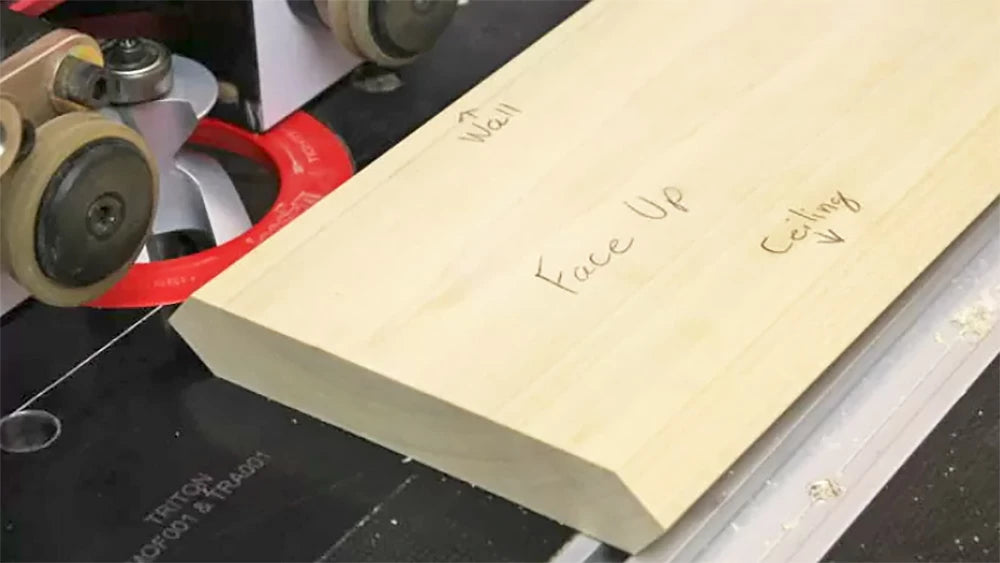
The edge milled with the workpiece face up will go against the wall, and the edge milled with the workpiece face down will go against the ceiling.
Be sure to always use proper work holding techniques. My two favorite router table accessories are a pair of Jessem Clear Cut Stock Guides and the Bow Products Feather Pro feather boards. I consider both a must-have in your shop when woodworking at the router table. Proper work holding is not simply a safety consideration but also improve the quality of your work. Tools like the Jessem Clear Cut Stock Guides and Bow Products FeatherPRO allow you to make a cleaner cut and extend the life of the router bit by reducing heat and vibration at the cutting edge.
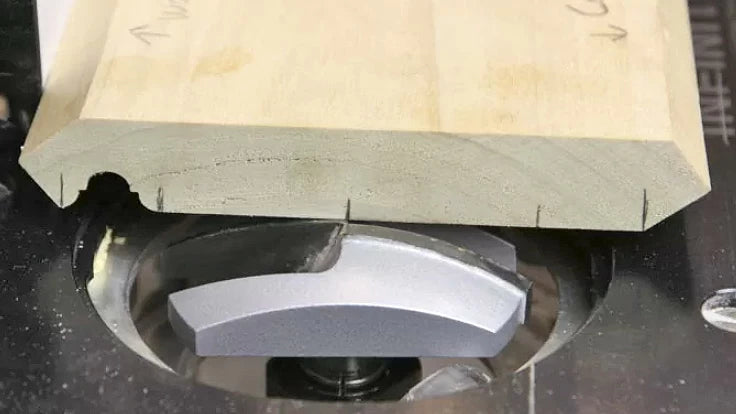
For a simple crown molding, the next step is to install the Infinity Cove Crown Molding router bit (56-602) into the router table and set the fence. Find the center of the "field" or profile portion of the stock by marking the edges created by the Crown Molding Edge router bit, then split the difference to find the center. Set the fence so that the center mark on the workpiece matches the center of the router bit and double-check the edges at the same time. You should have a mark for each edge of the router bit as well as one for the center.
For a simple crown molding, the next step is to install the Infinity Cove Crown Molding router bit (56-602) into the router table and set the fence. Find the center of the "field" or profile portion of the stock by marking the edges created by the Crown Molding Edge router bit, then split the difference to find the center. Set the fence so that the center mark on the workpiece matches the center of the router bit and double-check the edges at the same time. You should have a mark for each edge of the router bit as well as one for the center.
Take your time and make the cove in several passes. Depending on the size of the router bit and the species of wood being milled, making 3 or 4 passes is recommended. Once the profile is cut to full depth this simple molding is complete.
For complex moldings I follow the same process. Start by marking the edges of the field after the crown edge profile is cut. Remember the Crown Edge will take 3/4" on each side of your board. Then I mark the width of each bit to be used, finding the center of each. From here it's a matter of following the same procedure to create each element. Set the fence, make multiple passes to expose the profile and repeat for each router bit being used.
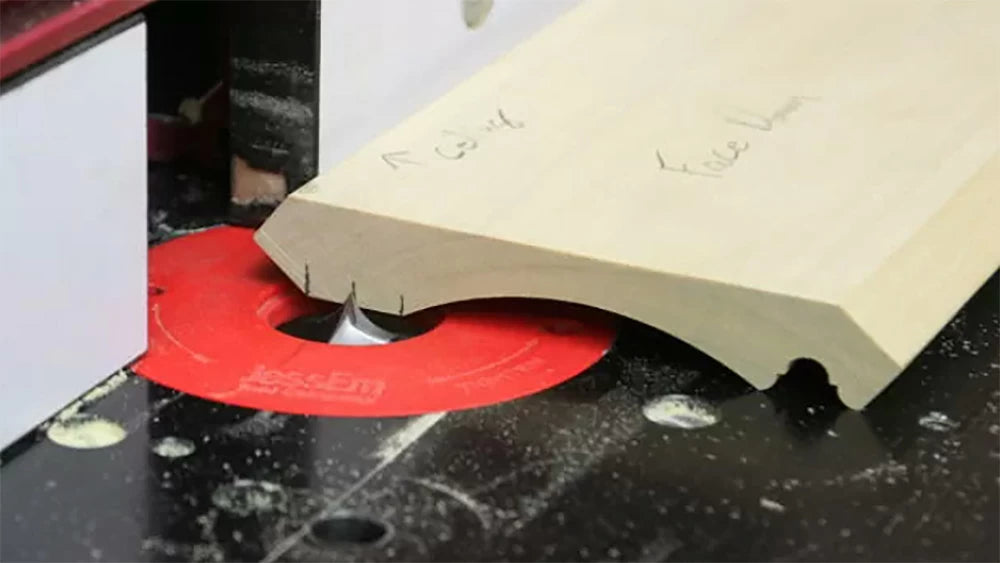
Remember when making complex moldings that use at least two profiles is how the crown will sit at the wall. Since the Crown Edge router bit (56-520) produces the common 38° and 52° angles, the molding will either extend further down the wall or further across the ceiling when installed. I prefer the traditional look with the molding extending further down the wall. In this case, I label my workpiece accordingly so the edge milled with the workpiece face up will go against the wall, and the edge milled with the workpiece face down will go against the ceiling.
When designing a complex crown molding take into account where you want each profile located and mark your stock accordingly. You don't want to reverse the profiles during the milling process.This is important because it will allow you to decide where on your molding you want each decorative element. You don't want to mill the individual profiles in the wrong place because it will cause your molding to be upside down.
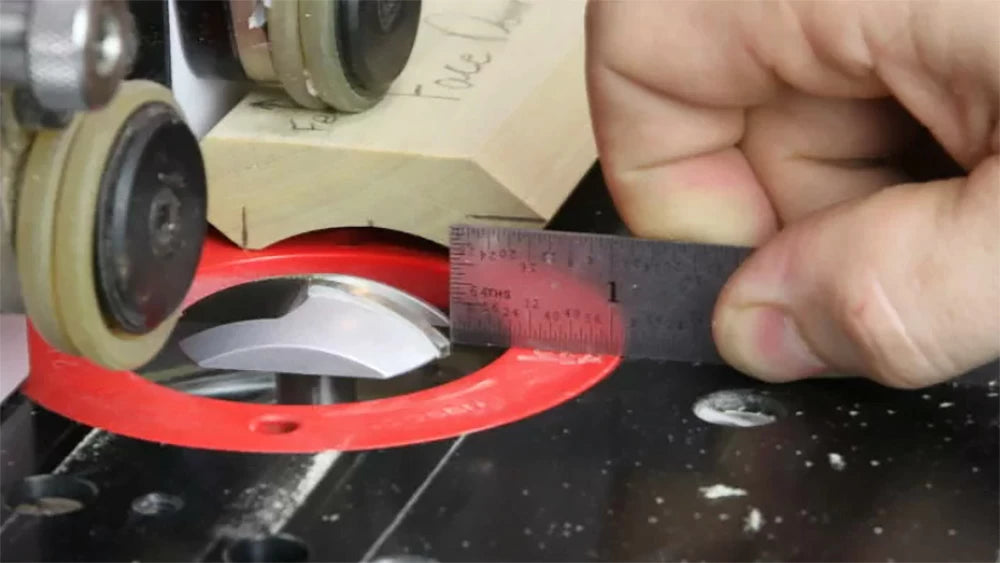
A trick for setting the bit height for the final pass of a profile router bit is to use the edge of a ruler to align with the edge of the bit. This makes it easy to dial in the router bit height for an accurate final pass.

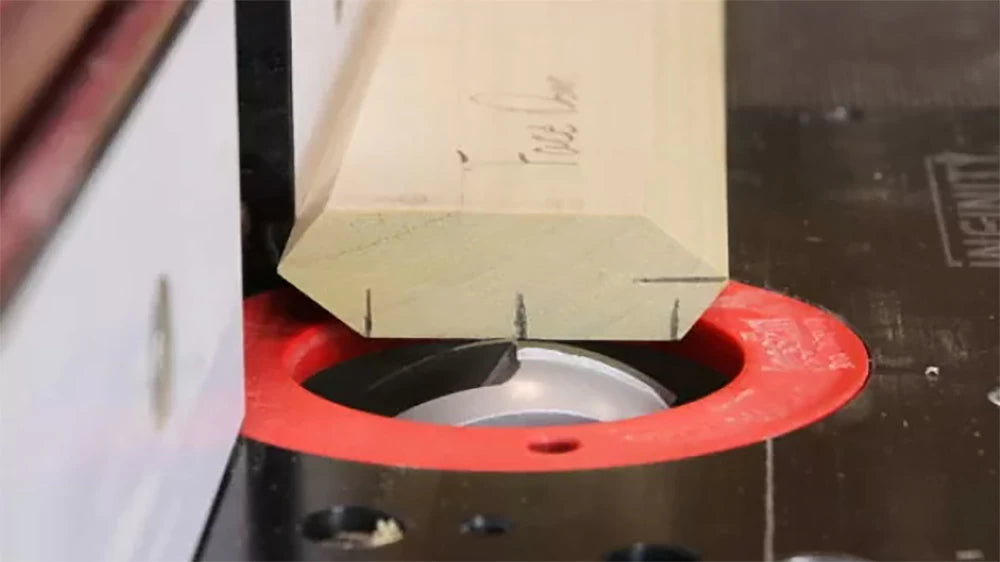
Another trick for making sure that each element is properly located is to make a shallow first pass then come back with a pencil and mark where the edges of the bit are meeting with the still flat field. This will give a pair of lines on either side of the emerging profile that can be measured. If one side is wider than the other the fence can be adjusted to ensure the profile is properly located when cut to full depth.
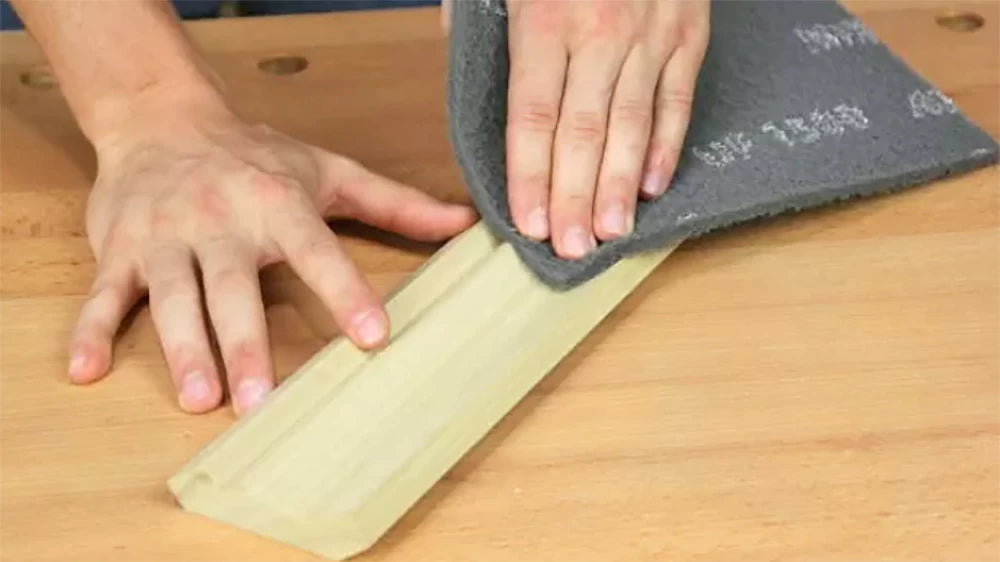
When making molding use a non-woven sanding pad like the Mirka Mirlon we offer on our site. These pads help get into difficult-to-reach areas to smooth the profile without rounding over all those nice details you just created.
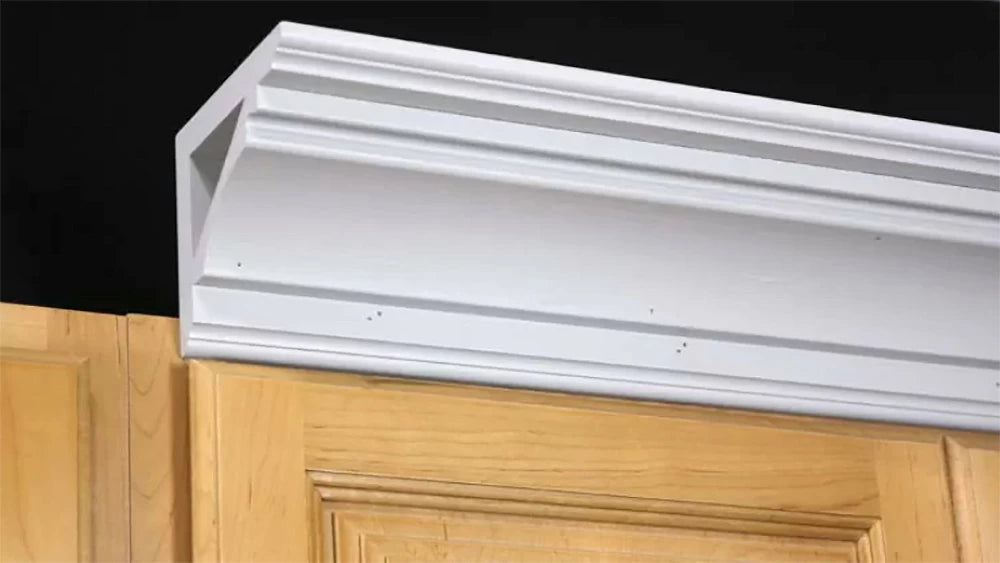
If you want to take your crown molding to the next level use an edge profile router bit like an Infinity Double Classic Ogee router bit (44-787) on a pair of flat pieces of stock. Attach the base molding to the wall and ceiling, then attach the crown molding. This creates an easy-to-make super fancy detail for any room in the house.