
Rail & Stile Router Bits for Cabinet Doors, w/Set-Up Block
Our Rail & Stile matched router bit sets produce cope and stick joinery for professional results. Manufactured using the latest CNC technology, these router bit sets create perfect-fitting joints right out of the box.
Why Rail & Stile?
Rail and stile door construction is an elegant solution to the ever-present problem of wood movement. If a door is made from a solid piece of wood or multiple pieces glued together edge-to-edge, the door will have a tendency to warp, expand, and contract at different times of year Rail and stile doors can help alleviate these problems. The frame of the door eliminates concern of wood movement and cross-grain joinery. The frame captures the panel and keeps it from warping while still allowing it to expand and contract with seasonal moisture changes. The fact that rail and stile doors are as good-looking as they are strong is an added bonus.
Making these strong and beautiful doors is easy with a set of Infinity Rail and Stile router bits and a little know how. A lot of woodworkers have questions about how to make their own doors so let's dive in a take a look at exactly what is needed and how to get professional results.
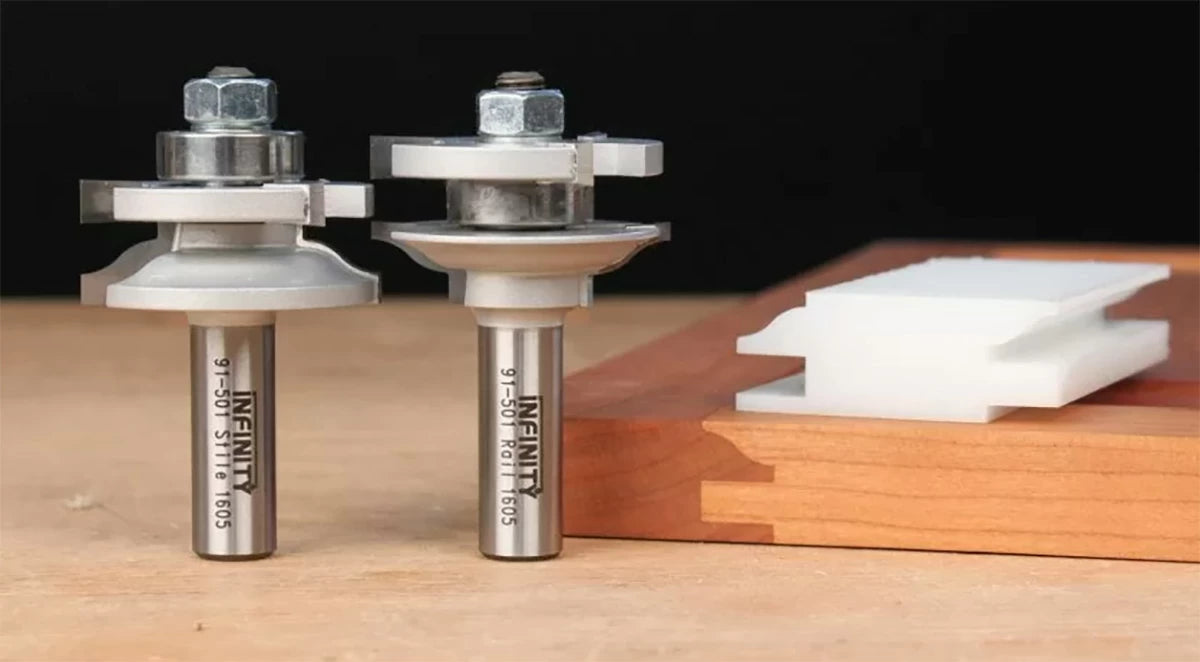
The first thing you need is a rail and stile router bit set. Infinity tools has several options to choose from. I recommend a 2-piece rail and stile set. They offer a ton of flexibility depending on the type of panel you want for your door. They're also available in several different profiles so you can get that perfect look for your project. These sets include both a rail bit and a stile bit perfectly matched to make frames with a 1/4" groove to accept the panel. There are also kits available to adapt these for plywood panels, but more on that later.
In a traditional door, the rails are the parts of the frame that run horizontally and the stiles are the pieces that run vertically. The difference is that the rails have what is called a "rail" or "cope" cut made in each end to fit into the profile on the inside edge of the stiles. Both the rails and stiles have the "stile" or "stick" cut which creates the attractive profile and the groove for the panel to fit into. The real beauty of this system is that it creates a good deal of glue surface to add strength to the door. This, and a good woodworking glue like Titebond II Premium Wood Glue, makes the need for an extended tenon obsolete.

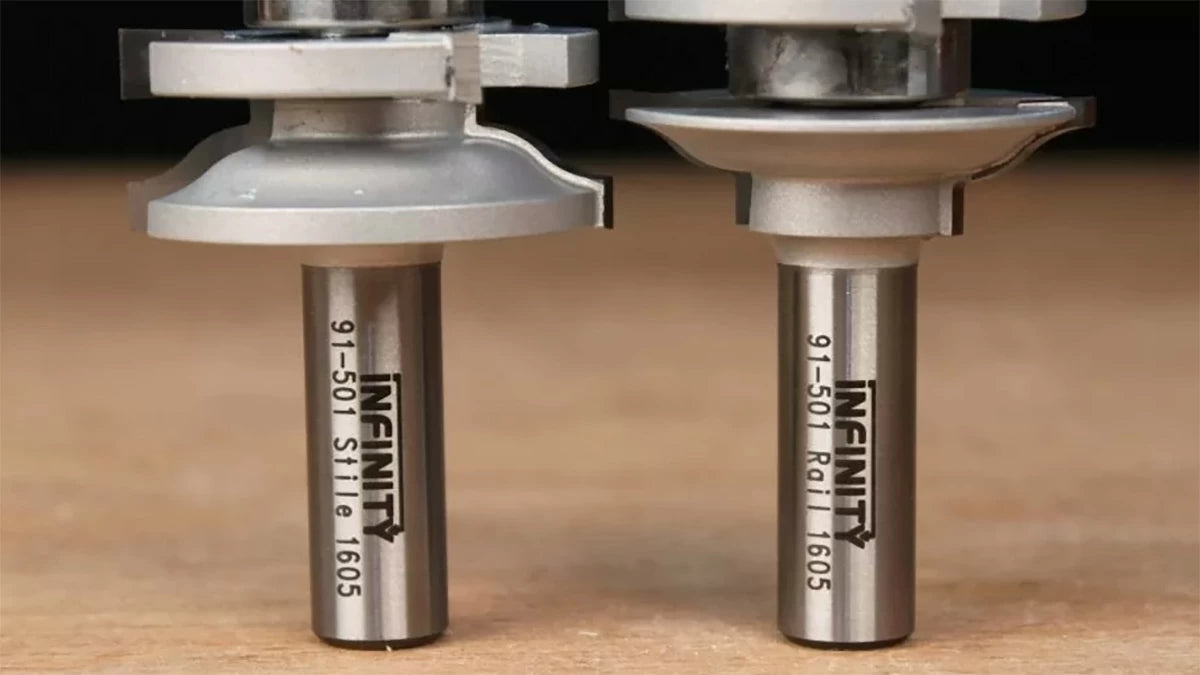
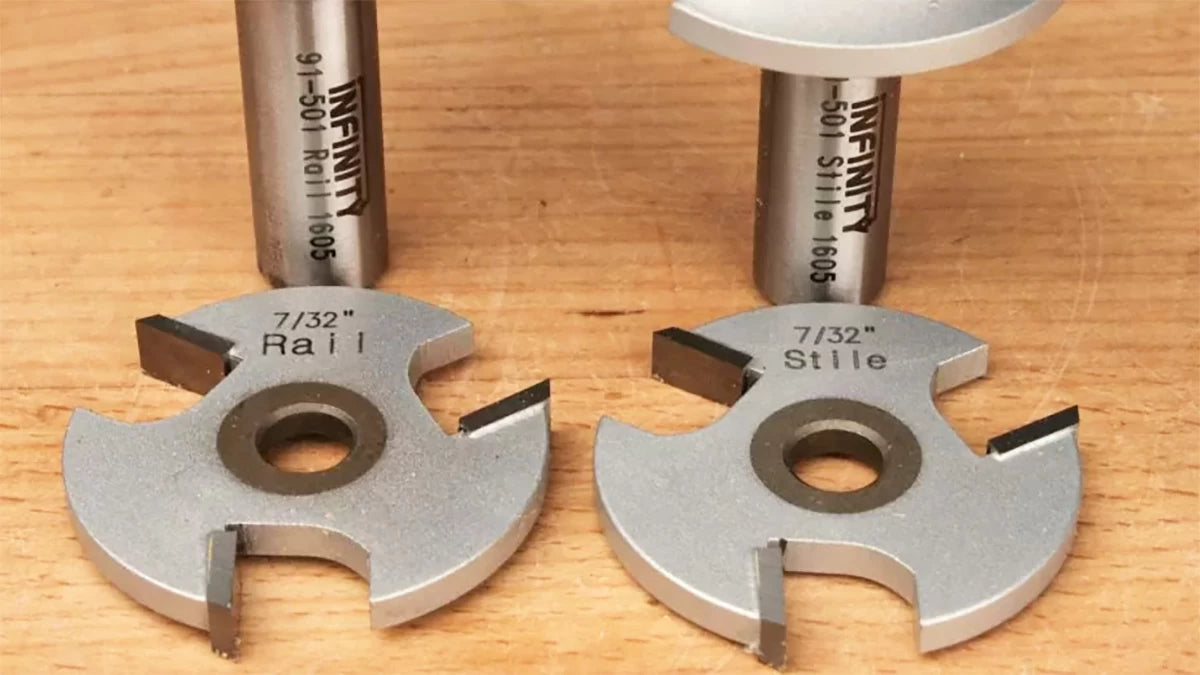
All of the Infinity rail and stile router bits feature a 1/2" shank. This is important for both durability and cut quality. The larger shank ensures that the bit won't flex or vibrate in use and produces a cleaner cut and tighter-fitting joint. The shanks are also laser-etched to identify which bit is used for the "rail" cut and which is used for the "stile" profile cut. While a big powerful router is always nice, a 1-3/4HP router is suitable for making rails and stiles. Here, we're using the Infinity Professional Router Table Package that includes a router.
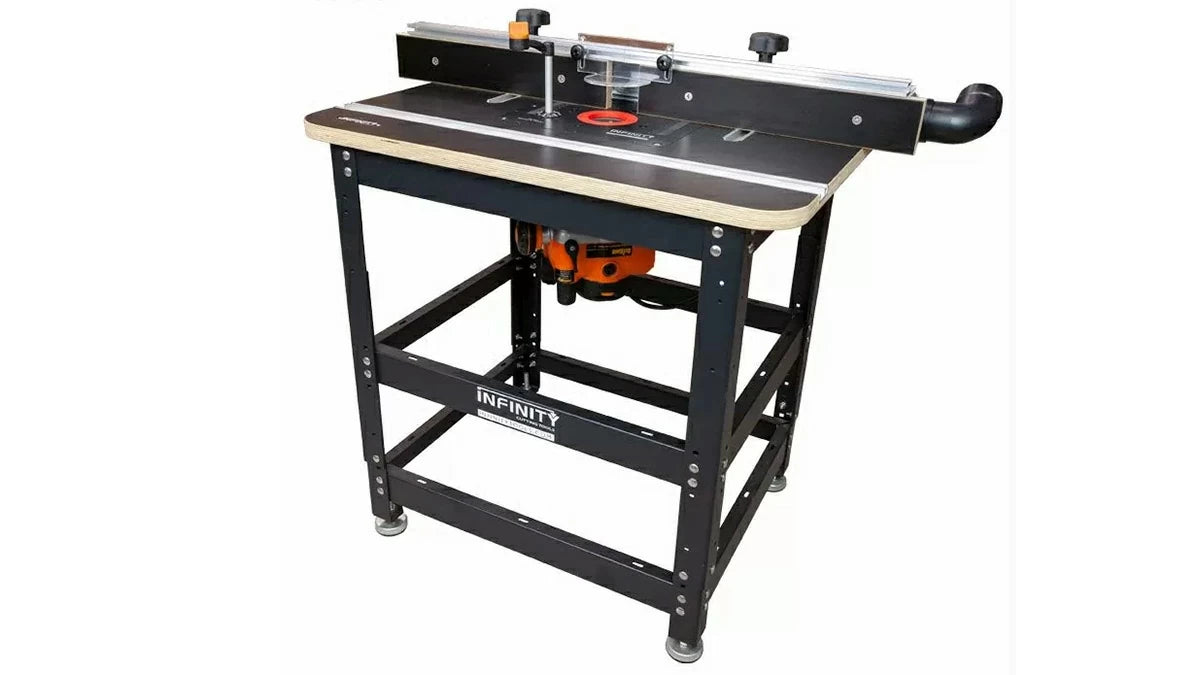
A Good Router Table is Essential
A good router table is required to make rail and stile doors. You don't want to use a rail and stile router bit in a hand-held router. While there are a huge number of options available Infinity has put together a really nice option combining great components at an exceptional price. The package includes a 3.25HP Triton Plunge router, an aluminum mounting plate and sturdy steel stand, a professional fence with built-in dust collection and Infinity's router table top with Micro Dot surface. If you are in the market I definitely recommend you take a look. We use this router table here in our shop and it has been going strong for more than 2 years now no matter what we throw at it. It has seen a lot of use.
With tools in hand, let's get to work.
The first step in making a rail and stile door is to size all your pieces. First, determine the overall dimension of the door, then decide on the width of the rails and stiles. A common size door for a kitchen cabinet would be 18" x 24" and would have 2-1/4"-wide rails and stiles. Determining the length of the stiles is easy, they run from top to bottom of the door and equal the overall door height (24" in our case).
The rails require a little math. They're captured between the stiles and interlock with the profile routed in the edge of the stile. To determine the length of your rails you need to know the profile width of your rail and stile router bit set. For most Infinity rail and stile router bit sets, the width of the profile is 7/16". Now, subtract the overall width of the finished door and subtract the width of both stiles, 4-1/2" (2-1/4" x 2). Then add back in the profile width of the router bit set for each end, 7/8" (7/16" x 2). This gives a rail length of 14-3/8" for an 18" wide door using 2-1/4"-wide stiles. It's really not that hard to figure out if you know the profile with of your router bit set.
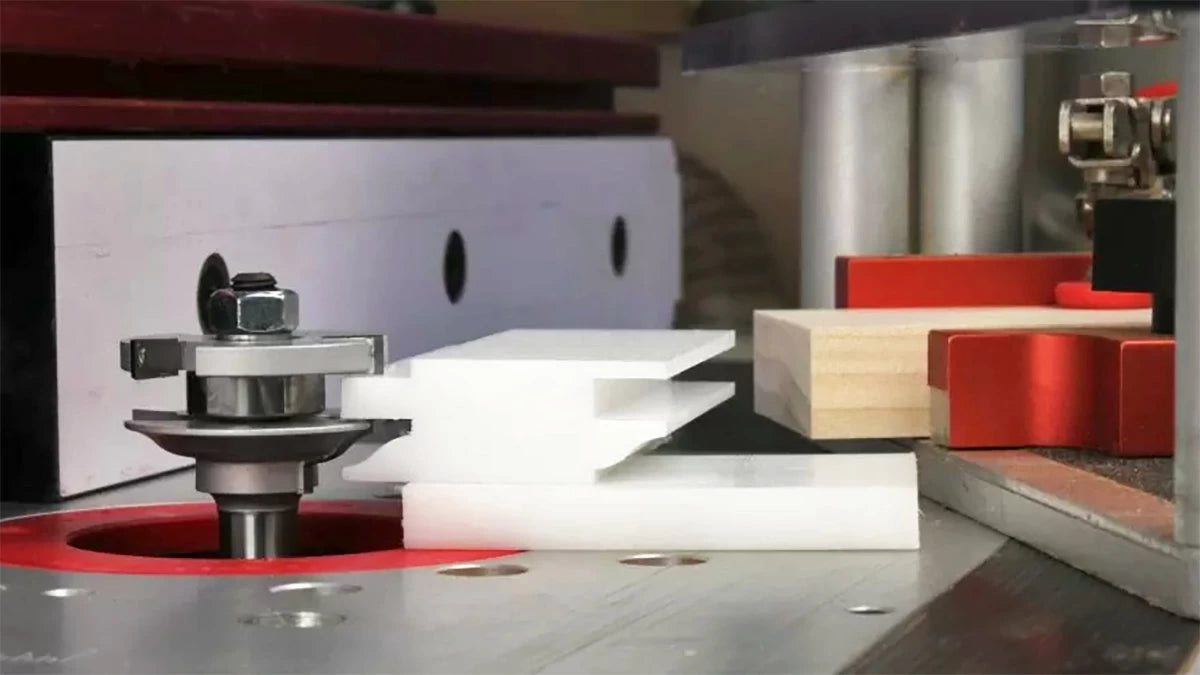
With all 4 pieces of the frame cut to size I like to make the rail cut first. This is the tricky cut because we are cutting the ends of the rails. A tool that makes this easy is a coping sled. Infinity makes a couple of different coping sleds that make this tricky cut safe and easy. The coping sled holds the workpiece while a backer block greatly reduces tear out when cutting end grain. The coping sled also references off the router table fence which makes it easy to set up and make the cuts accurately. One thing to note is that most of the Infinity tools rail and stile router bit sets come with a matching setup block. This block helps set the height of the router bit. From there you can fine-tune the bit height to suit your project. Infinity also offers a setup block (SET-COP) that matches the thickness of the coping sled's base, making the setup that much easier. There's a reason I recommend making the rail cut first. If there's a little bit of tear out at the end of the rail cut, the damage will often be removed when making the stile cuts.

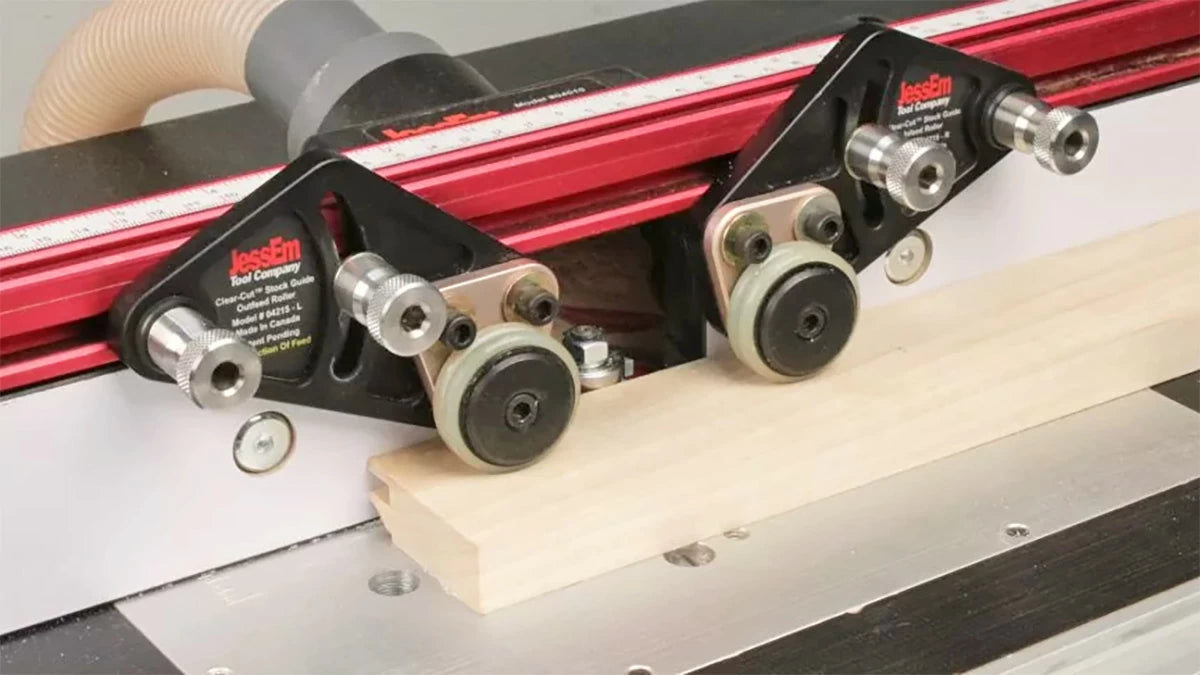
The stile cut is even easier. Because the cut is made down the length of the work piece there is plenty of material to reference off of the fence. Also cutting with the grain is much easier than cutting across it. I always recommend using some form of hold down when making the stile cut because the router bit is trapped in the wood and vibration will cause poor cuts, kickback and even damage to the router bit. My all time favorite hold downs are the Jessem clear cut stock guides. They are easy to set, they only work in one direction so they eliminate kickback, and they hold the piece down to the router table and tight to the fence. At the very least I strongly recommend a good pair of feather boards. They are perfectly sufficient but not as user-friendly as the Jessem Clear-Cut Stock Guides.
With the stile cuts made in all four pieces of the frame, all that's left is to apply glue and clamp the frame up. Of course you will want to install a panel before adding glue. The main types of panels are raised panels, flat panels, and glass. The key with all of these is to not glue the panel in place. The panel should be able to float so that it can expand and contract. While raised panels themselves deserve their own spotlight, plywood flat panels are easy. Now, there's some debate about whether you should glue the plywood in place to create a strong door assembly. The supporting argument is that plywood doesn't expand and contract with seasonal changes in humidity.
If you prefer not to glue the plywood, and when using solid-wood panels, cut the panel to fit inside your frame with about 1/8" of room to breath, and glue up the frame, without gluing the panel. A trick to keeping a panel from moving around in the frame is to pin it from the back with a small brad. One pin at the center of the rail and the top and bottom is all you need — you want the panel to still be able to float.
The big problem with using plywood for cabinet door panels is it is rarely 1/4"-thick. Often it is 5.5mm or 5.9mm thick. Since the rail and stile router bit sets cut a 1/4"-wide groove, this means that the groove in the rails and stiles will be too wide and allow the panel to rattle.
Infinity has the solution for this by adding a plywood panel kit to the standard rail and stile router bit set. These kits allow you to change the cutters in the bits to produce the correct size groove for your plywood panels.
Changing out the cutters is easy. By removing the nut on the top of the bit and removing the slot cutter and replacing it with the correct cutter from the plywood cutter kit, you can create a groove perfectly sized for you plywood panels. Simply match the "Rail" or "Stile" marking on the slot cutter with the "Rail" or "Stile" bit. While there are a couple of shims installed on the rail and stile bits, all that is required it to put them back in the same order as they came off. Tighten the nut back down and you're ready to go.


