3-Pc. Planer's Package for Routers
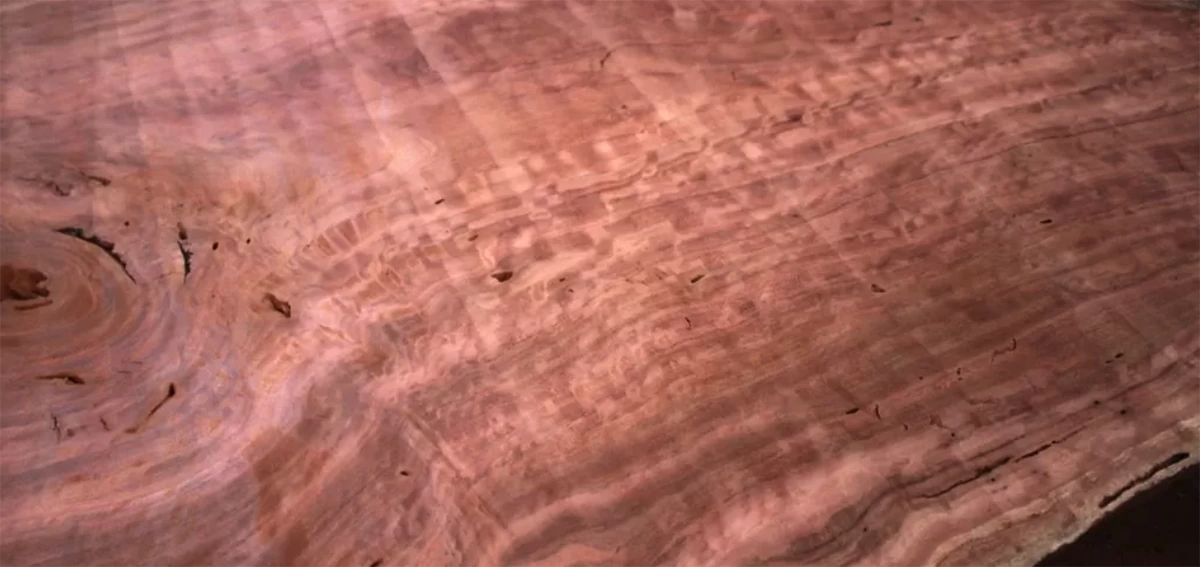
If you have a workpiece that's just too large for your existing planer and jointer, there is still a way to make relatively quick work of your milling nightmare. This kit has everything you need to flatten large wooden slabs and all manner of woodworking projects!

It certainly is a great time to be a woodworker. There are companies that specialize in all types of different lumber including slabs and, with a little digging, salvaged slabs to boot. As woodworkers, I think we all have the desire to work with the big stuff but it definitely can be intimidating. It's not like we all have wide-belt sanders or CNC machines large enough to handle a slab the size of a dining room table, or even the size of a coffee table for that matter. Just about anyone can flatten and thickness even the largest slab. If your interested in working with the big stuff, stick around and I'll show you how to go about flattening a slab using nothing more than a sheet or two of MDF, a Trition 3.25hp Plunge Router, and Mega Dado & Planer Router Bit.
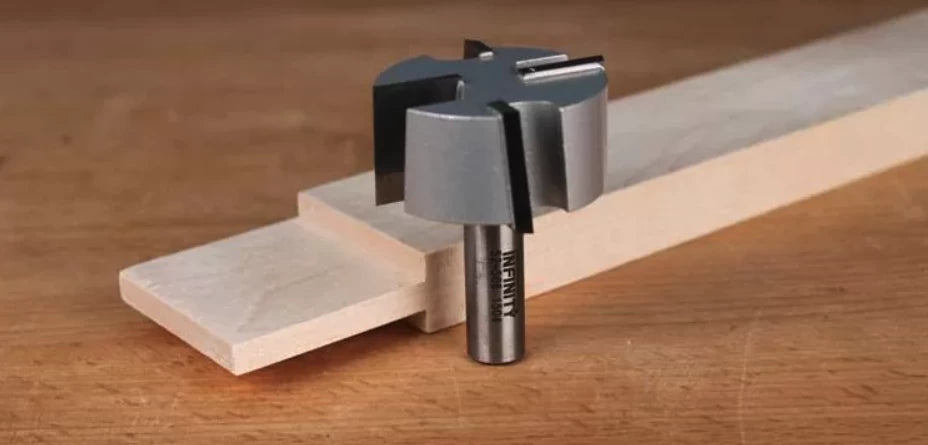
The 2" cutting diameter of the Infinity Mega Dado & Planer bit make it perfect for flattening large surfaces like a live edge slab. or any other large surface that will not fit through the planer.
The obvious first step to any slab project is to obtain a slab. This may be the hardest part but with urban lumber becoming more popular and available, there's a chance that there's a company salvaging and cutting slabs in your area.
But be careful when choosing a slab. Good slabs take time and experience to be properly cut and dried. Depending on the size and species, a slab may take as many as two years of air drying before it can make its way into a kiln. The old adage of drying lumber for one year per inch of thickness goes out the window for air-dried slabs as well. I've found it can take double that for such large chunks of timber. This goes for both urban/salvaged lumber and slabs from more traditional sawmills alike.
Don't forget that once you have the slab, give it time to acclimate to your shop just like any other piece of lumber. Because slabs are typically larger and thicker I try to give them at least a week of acclimation per inch of thickness before I start cutting. If I plan to cut the slab down to a smaller size or even into a couple of pieces I try to give at least another week to acclimate after the initial rough cutting to allow the slab to adjust to its new form. I also rough-cut the slab to size because I don't want to waste time and energy flattening large areas that will just be cut off later.
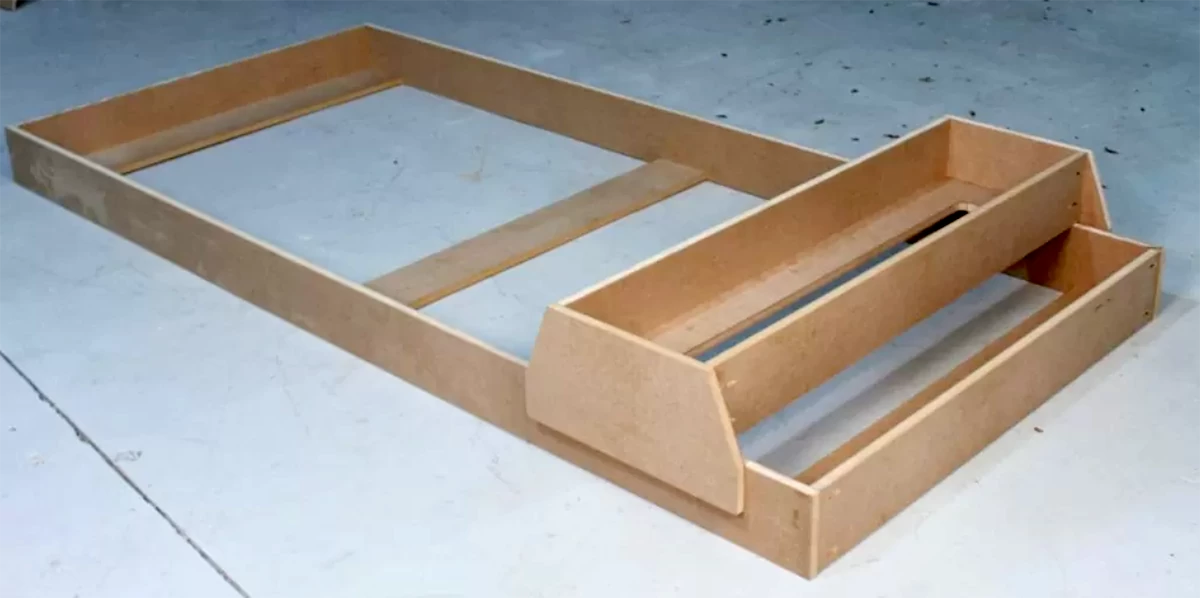
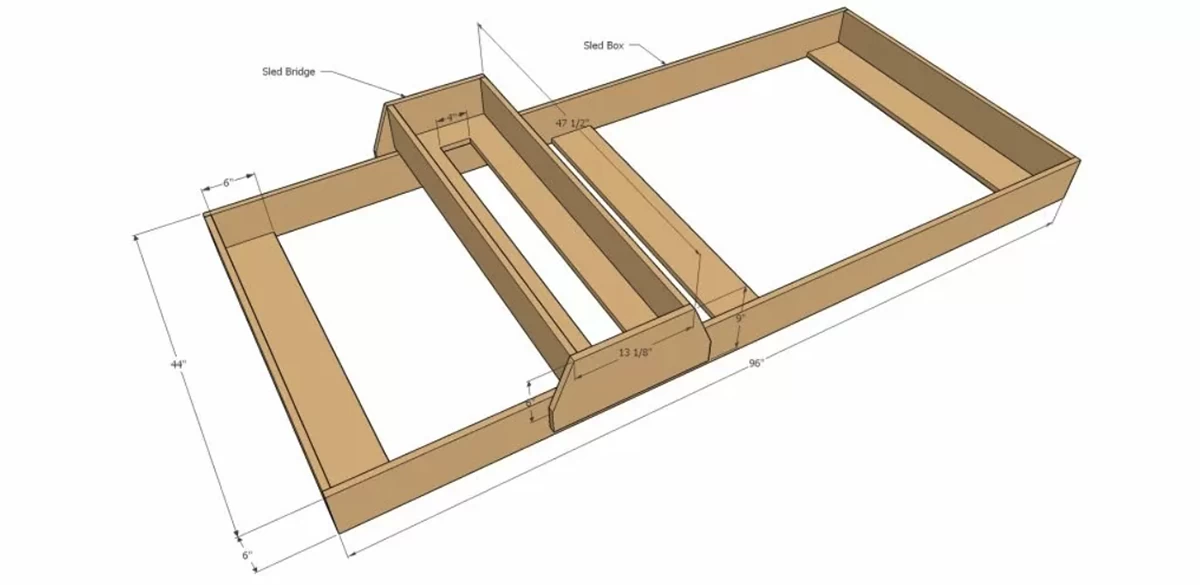
A planing sled can be as simple as a sled box and sled bridge. The box acts as a pair parallel rails and the bridge holds the router and allows it to slide back and forth along the rails, creating a flat surface on the slab.
One way I have found to rough a slab to length is to use a circular saw or track saw to cut as deep as possible. Follow that with a reciprocating saw to finish the cut. The saw kerf from the track saw makes it easy to finish the cut without wandering. A jigsaw can get the job done, as well, if needed.
With the slab in the box you can shim the slab to make the top of the slab as level as possible. Use the bottom edges of the bridge as a reference to make sure the slab is where you want it.
Once the slab is acclimated and to rough size it is time to build a planing sled. A planing sled is basically a set of rails that are co-planer and a bridge that holds a router so that the bit in the router can cut a flat surface without following the highs and lows of the slab. Because I don't work with slabs all that often, I build my planing sleds out of MDF. Once I'm done flattening the slab, I'll find other uses for the MDF such as making jigs. When the next slab project comes along, I'll just build another sled.
I use pocket screws to build my sled, they are perfect for this type of project. Pictured is the bottom of the Sled Bridge.
The sled itself is simple. The size of the sled box depends on the size of the slab. My slab measures 3" x 32" x 84". I like to make the box 12" larger in both length and width. The extra width is so that the bit does not stop over the slab which helps eliminate any chance of burning or swirl marks from the bit spinning over the slab. The extra length ensures that the sled bridge is supported fully when planing the very ends of the slab. I also make the box at least 6" deep. This provides plenty of material to tie the box together and gives room to shim the slab. I used a Kreg Pocket Screw System to put all the pieces together. My box ended up being 6" x 44" x 96" which was perfect to get it out of one sheet of 3/4" MDF and still have enough for the bridge.
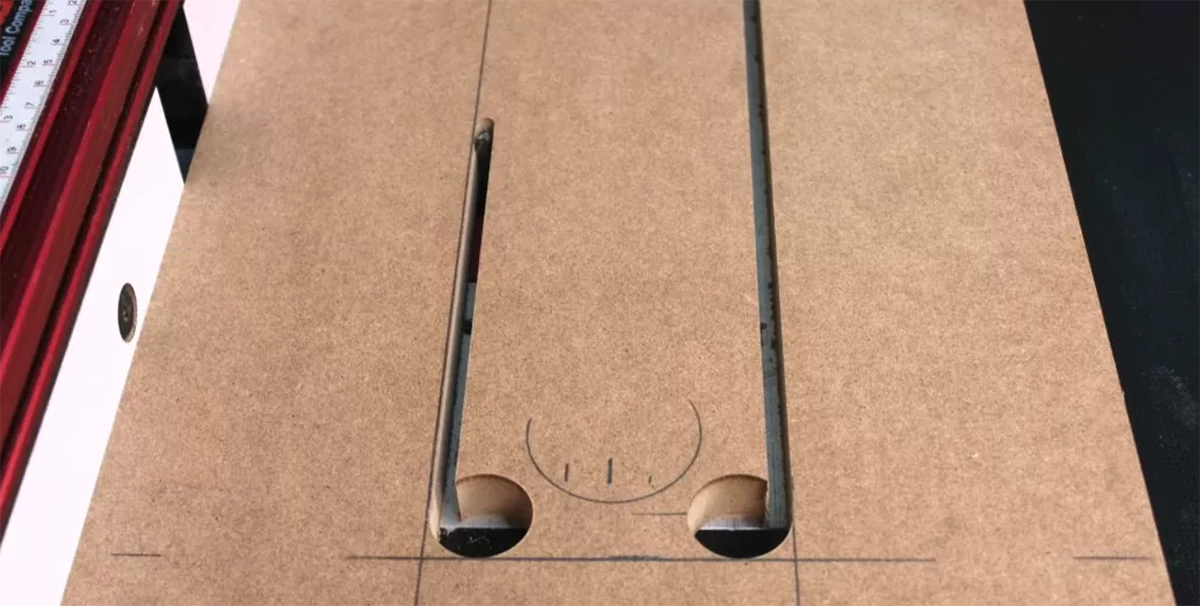
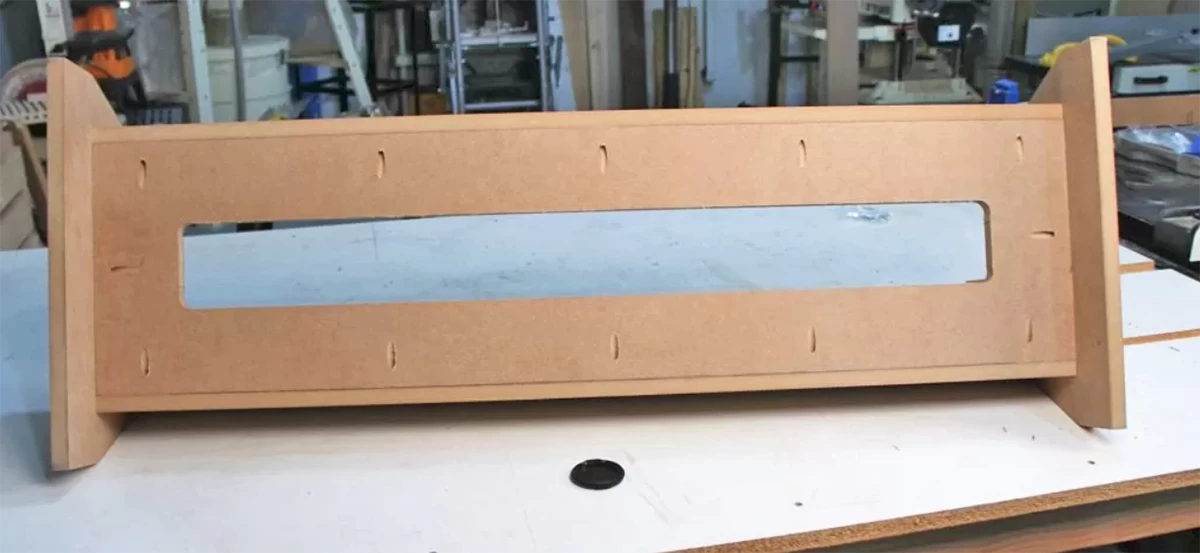
The second part of the sled is a bridge that holds the router and rides on top of the sled box. This bridge is also just a fancy box. It's wide enough to securely hold the router mounted to an Infinity large router blaseplate (11-5/8" square). The bridge is long enough to straddle the sled box. The ends of the bridge overlap the box sides to allow clamping the bridge in position with each router pass. The bridge also has a slot for the router bit. You can use the Mega Dado Planer Bit to make a zero-clearance slot. I like to have a little more room and make the slot 4" wide and long enough so that the bit doesn't interfere when the router is at either end of the bridge. I made this slot by marking out the opening, drilling a 1" hole at each corner and cutting the rest with an Infinity 1/4" Spiral Up-Cut router bit at the router table. There's a 3D SketchUp model you can download from our website and modify to suit your needs. The dimensions can easily be modified for a slab of just about any size.
The Planing Sled can be tailored to the slab or project being flattened. The key is to oversize the sled in all three dimensions so that the router can plane the entire surface. You can see that my sled is made almost entirely of 6" wide strips of 3/4" MDF.
The final piece of the sled is the router itself. I use a Triton 3.25 hp router mounted to an Infinity Large Router Baseplate. An Infinity Mega Dado & Planer Router bit is my bit of choice for this task for a number of reasons. I wrote a blog specifically about this router bit titled "Go Big or Go Home" definitely check it out if you want the finer details on this awesome router bit. The base plate is important because it keeps the router on track as it slides back and forth across the sled bridge and allows the router bit to do its thing. I have never had a problem with the router bouncing or bucking but you could add a set of hold-down strips to the bridge to keep the base plate from lifting. Because the router bit cuts from the side and not straight down like a drill bit I have never found the need for the hold downs, but could be helpful to keep the router on track, especially on wider slabs. I also use a Router Collet Extension to increase the reach of my router. The router bit has to reach through the large router base plate and the 3/4" MDF base of the sled bridge. combined that is over an inch of plunge just to clear the bottom of the bridge. With the router collet extension, I can ensure that I have the full engagement of the router bit in the extension and the extension in the routers collet. The last thing I want to do with a 2" diameter router bit is cheat the amount of router bit shank I have in the router collet to reach a little deeper. The router collet extension solves this problem.
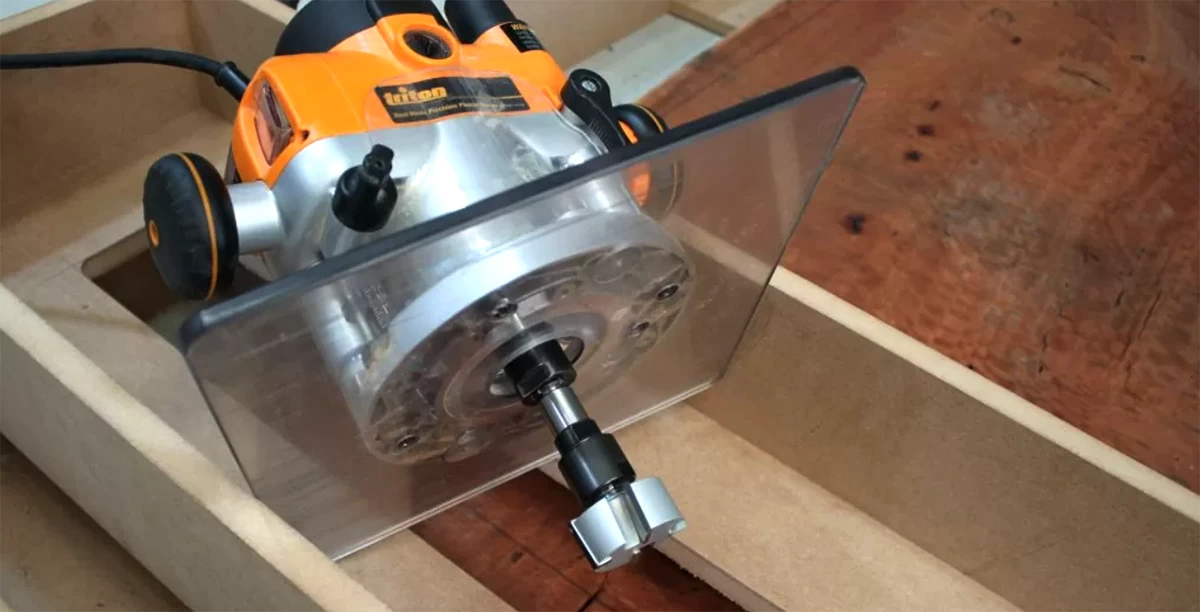
The Infinity large router baseplate keeps the router on track in the bridge and the router collet extension ensures that the Router bit can reach the workpiece.
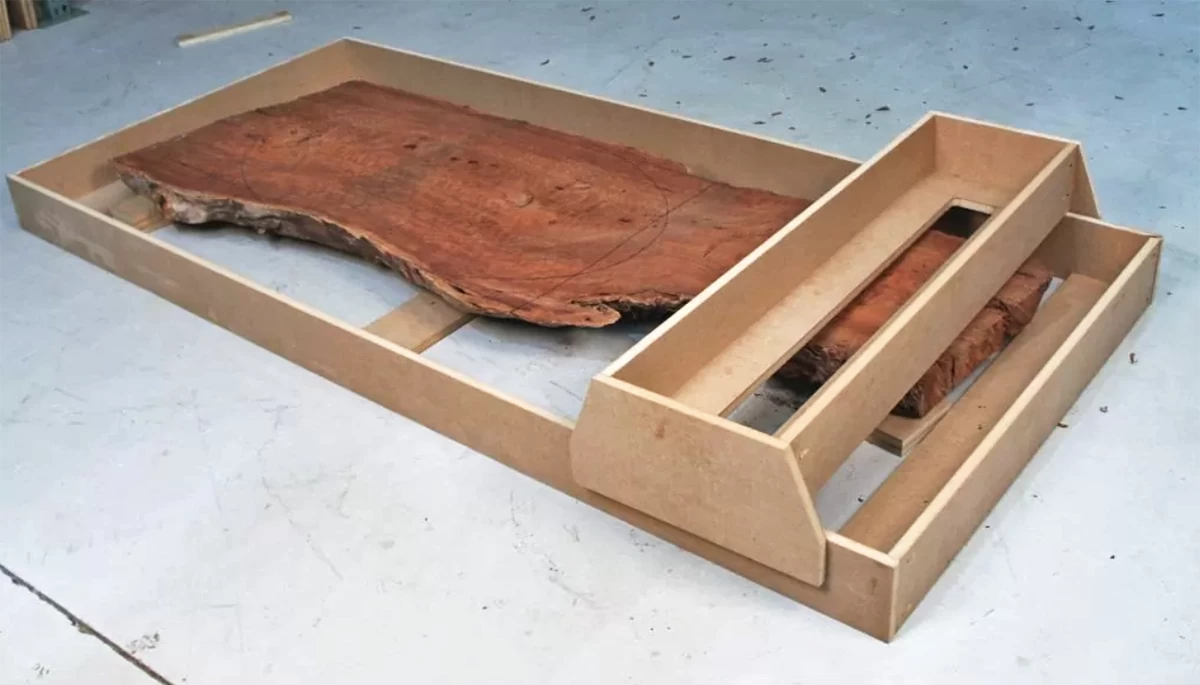
With the sled built, the slab must be positioned and leveled inside the sled box. The most important thing is to make sure that the top surface of the slab is as level as possible in relation to the top of the sled box. This is most important on slabs with twist to minimize material loss. If one corner hangs lower than the other three, the three high corners will have to be planed to match the lowest. There are a lot of different ways to shim the slab level and it's important to ensure that the slab doesn't rock or move while routing. While large slabs are not likely to move around due to their weight, I like to shim the slab in such a way that it doesn't shift in the sled box. To do this, I cut a couple of MDF strips the same length as the inside width of the box. Then I cut 4" squares of MDF to use as shims. I place the squares on top of the strips and screw them in place with a drywall screw so they won't move. I keep adding blocks under each corner of the slab until the slab is level.

Measuring from the bottom of the bridge to the top of the sled is the easiest way to check that the slab is shimmed properly.
I measure from the bottom of the sled bridge to the top of the slab to check my progress. I know I'm done when the low spots and high spots are even with each other. Most of the time, the MDF squares will get you close but you may have to switch to thinner shims or wedges to get everything perfect. Once the slab is leveled to my satisfaction I add one more block to each stack that simply pushes against the side of the slab and traps it so that it can't slide around.

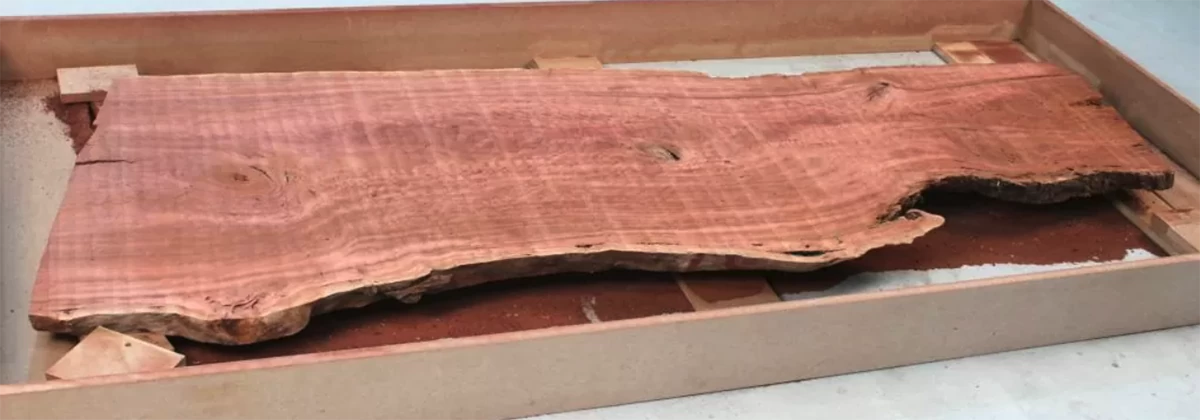
A long MDF strip and blocks for shims make quick work of leveling the slab and raising it up in the sled box so that the router bit can reach. Thin wedges can be used for fine-tuning. Blocks fastened tight against the sides of the slab keep it from moving if gravity fails. Drywall screws tie all the blocking together.
With the sled built and the slab leveled it is time to start planing. I start slow, looking for the highest spot on the slab and working my way down in 1/8"-deep passes until the entire slab is flat. When the first side of the slab is flat, simply flip the slab over and repeat the process. If I run out of travel with my router and the bit won't reach, add another square of MDF to the bottom of each shim stack to raise the slab up. The second side is easier because you have a flat surface to act as a reference. Make sure you keep the flattened side parallel to the planing sled. Usually all that's needed is to make sure each stack of shims is the same height.
If you end up with a slab that has a lot of twist or cup, I recommend doing the flattening in a few stages, flipping the slab over a few times. Twisted or warped slabs have a lot of tension and if you flatten one side then flip and flatten the other, the slab can continue to twist and lead to frustration. It's best to do about 50% of the flattening, then flip and repeat. I recommend starting with a slab that's reasonably flat, but sometimes you get a deal that's too good to pass up and this method can often save a slab from the firewood pile.
My slab started with 3/4" of twist overall and I feel comfortable doing all my flattening from one side and than flipping once to do the other. If my slab had an inch or more of twist I would do the flattening in stages. With a 3"-thick slab I should be able to get a at least a flat 2" thick slab when all is done. Since I'm planning to make a table from the slab, the bottom doesn't necessarily need to be perfectly flat.
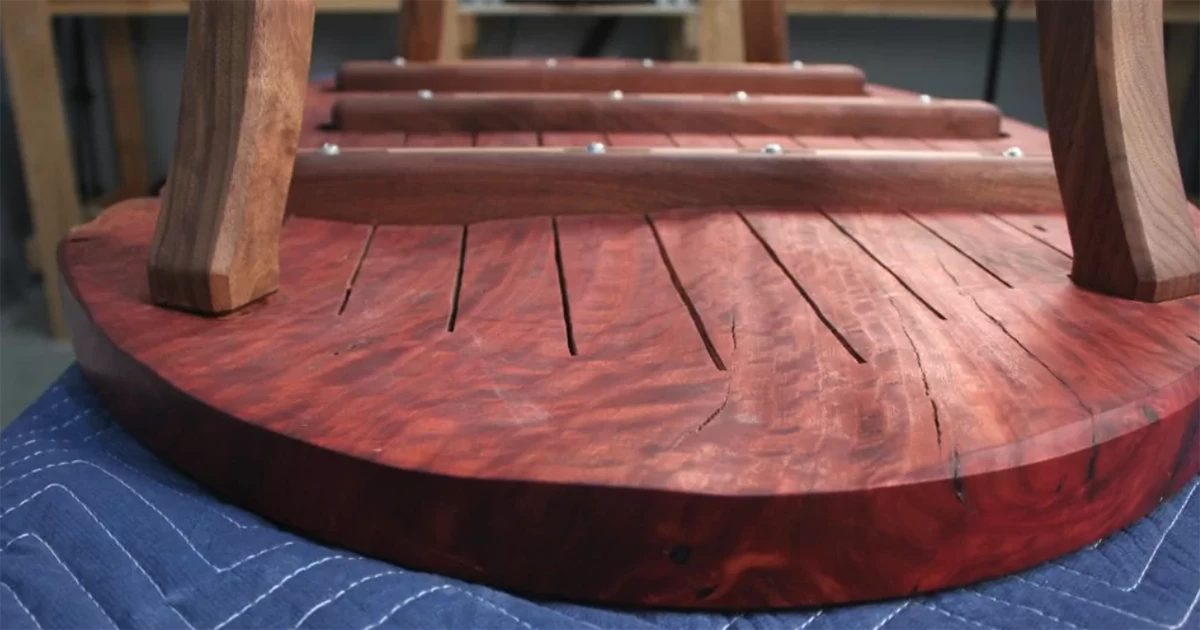
The bottom of my coffee table did not end up perfectly flat because the slab had a lot of twist. To help keep the slab flat I made kerf cuts down the length of the slab to help relieve some of the internal tension. I also added some cross braces to keep the slab from cupping. The braces sit in oversized dadoes in the slab and are held in place by screws that pass through slots in the cross braces. this ensures that the slab can expand and contract without cracking.
The flattening process itself is pretty straightforward. I set the bit height to remove about 1/8" of material per pass. You can go a little deeper (about 3/16" or so), especially on the first pass or two where only the high spots are being hit. With the 2"-diameter Mega Dado Planer bit I like to take 1" wide passes. This eliminates any issue with climb-cutting. I also found with my red eucalyptus slabs that setting the router to 16,000 rpm seemed to be a good speed. I marked out index lines spaced 1" apart on the top edges of the sled box. These lines provide a reference for locating the sled bridge for each router pass. I use a pair of spring clamps to hold the bridge in place during the cut. This makes it easy to step over for each router pass. It's simple and effective.
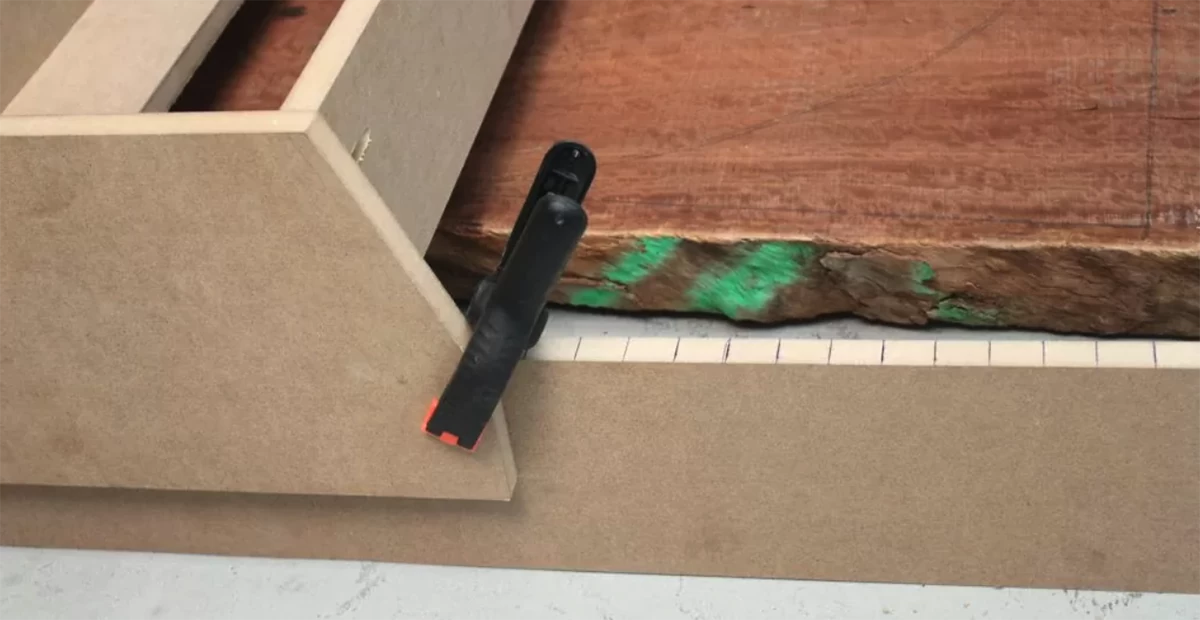
Index lines drawn on the edge of the sled box at 1" intervals make it easy to position the sled bridge for consistent passes with the router. A pair of spring clamps keep the bridge square to the box and prevent it from moving during the cut.
Dust collection is tricky and there will be a lot of it. I keep a dust collector handy to vacuum up the shavings, but I make sure to wear a respirator, safety glasses, and hearing protection. Most of my sawdust ends up as mulch around my trees and plants, as long as the species is suitable. I also try to aim a portable fan to keep the airborne dust moving away from me whenever possible and keep me cool in the Florida heat.
That's it! No magic required. Just a big hunk of wood and a can-do attitude. All in all this slab took me about 4 hours to flatten. If you are wondering what I plan to do with this slab, stay tuned. This slab will become a live-edge table with a Shaker-inspired base. In Part 2 I'll be sure to show you the final design, the build, and the process I use for sanding the "live edge" to get the slab tabletop ready for finish.