The next part of the cabinet box that needs to be made is the face frame. For our project we made face frames from 1-1/2" wide strips of maple. We started with rough-sawn lumber for all the hardwood parts of our cabinet project which means we needed to dimension the lumber. If you don't have a joiner and planer there is a good chance you can find a local lumber supplier that can do the job for you for a small fee. We do have the necessary machines in our shop and decided to do the work ourselves.
Dimensioning lumber is a fairly straightforward process. First the jointer is used to make one face flat. The flat face is placed against the jointer fence and one edge is milled straight. From here, the planer is used to mill the other face flat and parallel to the first and to bring the board to final thickness.
At this stage we have boards that would be referred to as S3S or surfaced three sides. If you need to purchase your lumber already milled this is how you would order it from your lumber supplier. The final edge is ripped straight at the table saw to give you a fully dimensioned piece of material that is ready to be cut to length.
One tip I will add is that when milling lumber I like to work with pieces that are relatively short. I cut my lumber to rough length before milling, being sure to leave a few extra inches to get rid of planer snipe when bringing the pieces to final length. Rough-cutting lumber to length first makes the pieces easier to handle and allow for thicker finished boards when desired.
Face Frames
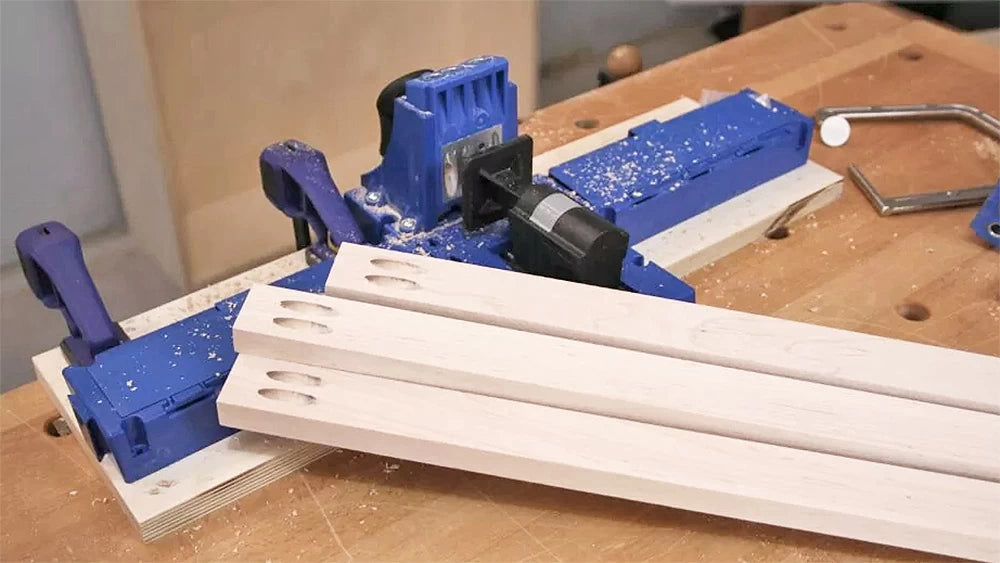
Face frames are fairly easy to build using Kreg pocket screw Joinery. Kreg pocket hole jigs have a pair of drill bushing guides set close together that allow two screws to be used in each joint.
The upper cabinet face frames are very simple: It's a rectangle made of four pieces. The face frames for the lower cabinets have two dividers that make up the drawer openings, so the frame consists of six pieces. To locate these inner dividers I make spacers to help ensure that they are located properly without having to use a tape measure. Make sure to label the spacers so not to throw them away or use them somewhere else.
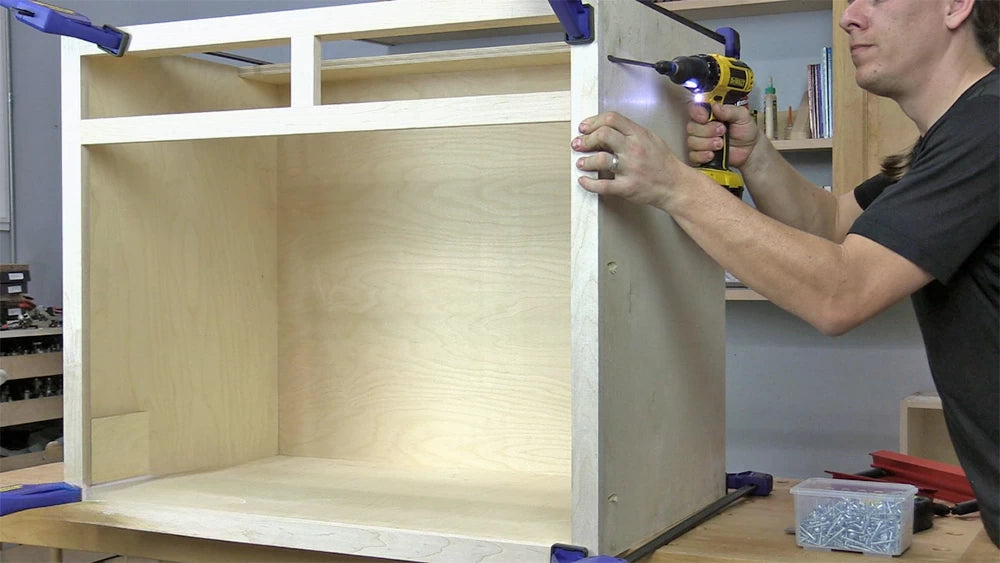
The face frames are attached to the box with pocket screws via holes drilled before the box is assembled. If you forget to drill the holes for the face frame use can use the drill guide from the K700 pocket hole jig or a Kreg R3 jig. These are portable and are clamped to the assembled box to drill pocket holes. You'll want to use a Kreg wood project clamp with either of these solutions.
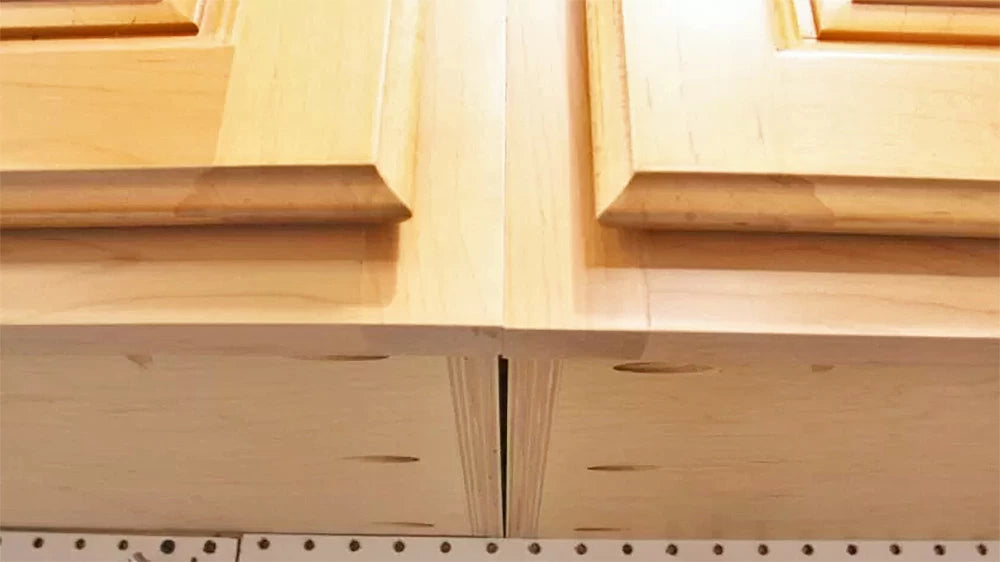
One last thing to note. I like to make the overall width of my face frames just a bit wider than the cabinet box so that the frame overhangs by about 1/32" to 1/16" on each side. I also size the frame so that there is no lip at the inside bottom of the cabinet box to catch things being put into or taken out of the cabinet. In order to do this you either need to undersized the width of the cabinet or oversize the width of the frame.
The reason for making the face frame extend beyond the sides of the cabinet becomes apparent when it's time to install the cabinets. Walls are not straight so when adjacent cabinets are installed, this overhang provides adjustment to make sure there is no gap between the cabinets at the front (see photo above).
If the side of the box is to be exposed I make the face frame a little wider (about 3/8") on the side to be exposed and add a piece of 1/4" ply to cover all the pocket screw holes. The same method can also be used if the back of the cabinet boxes is to be exposed to give a nice finished appearance. This is an ideal method for projects that will receive a clear or stained finish as you can choose a veneered plywood to mach the solid wood parts of the cabinets, drawers, and doors. Applying a plywood filler to the bottom side of the upper cabinets will hide screw holes and gaps between boxes. This can also really dress up the bottom of the cabinets, and make it easy to hide wires for under-cabinet lighting.

Another option is to use a Kreg pocket hole plug cutter (116-220) that allows you to make plugs for the pocket holes out of hardwood that matches the cabinets. Or you can use an inexpensive wood if the cabinets are to be painted.

The type of joinery you decide to use is going to depend on the type of material you make the drawer boxes from. For our shop cabinets plywood was just fine, if you are building a high-end kitchen, bathroom or built-in you may decide to go with solid wood and dovetails. dovetails are definitely a classic touch when using solid wood for the boxes, and the Leigh RTJ400 (100-032) is definitely worth a look if you're going this route it is known to be one of the easiest jigs to use to make both half-blind and through dovetails.

As I said we went with simple Plywood boxes for both our drawer boxes and sliding trays. The drawer boxes being smaller we made from 1/2" plywood for the fronts, sides, and backs, and 1/4" for the bottoms making for a light yet very strong box.
Sliding Trays & Drawer Boxes
We decided to add sliding trays for the lower cabinets because it makes it much easier access stored items. Because these trays will potentially hold a lot of weight we made the box sides from 3/4" plywood. The bottom is made from 1/2" plywood. The edges of the tray bottom are rabbeted to form a tongue that fits into a 1/4"-wide groove in the tray sides.

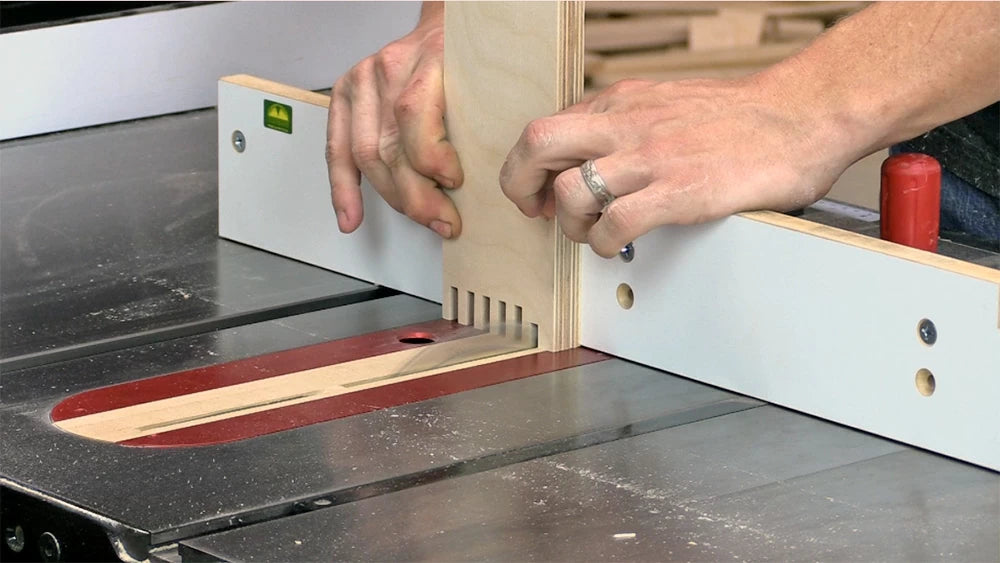
For joinery, we decided to use a box joints (or finger joints) using a box joint jig and an Infinity 1/4" kerf flat-top blade. This makes an attractive and extremely strong joint. What's even better is that, because of the design of the Box Joint Jig and 1/4" kerf blade, there is no tearout, which can be a major issue with plywood. Once you have the box joint jig set up, making the joints and getting perfect results is quick and painless.
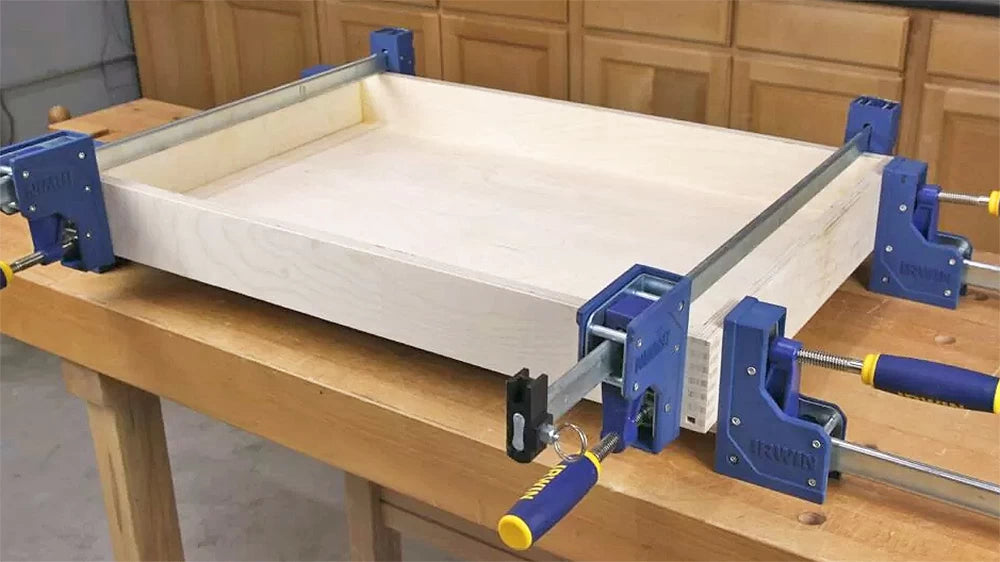
For clamping, I recommend using parallel jaw style clamps, because they apply even pressure across the entire clamping pad the help insure that the boxes end up square and with nice tight joints in all four corners.