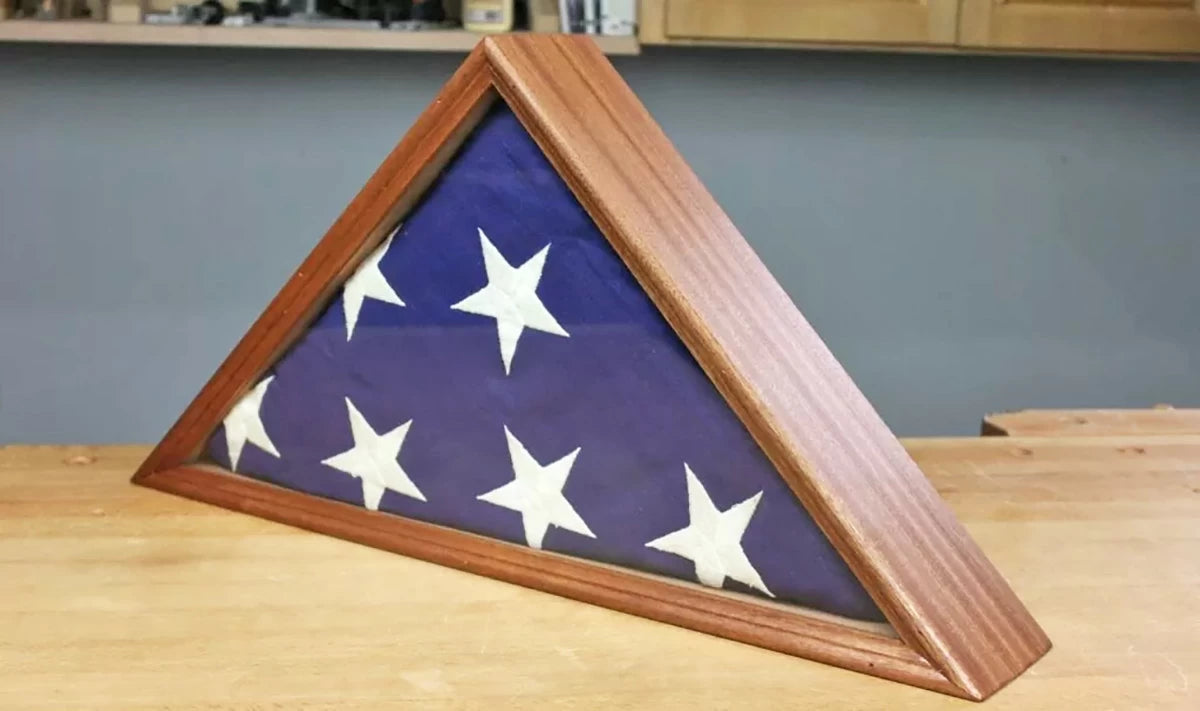
Military veterans who served honorably in the armed forces receive a flag to accompany their remains during their funeral service. Traditionally, this flag is given to the deceased's next of kin as a keepsake to honor their life and service. For many of us who have lost a loved one who served, these flags hold great sentimental value. We think a perfect way to display them is in a dedicated display case.
Read on to learn how to make a triangular display case for a United States flag to honor the veterans in your life...
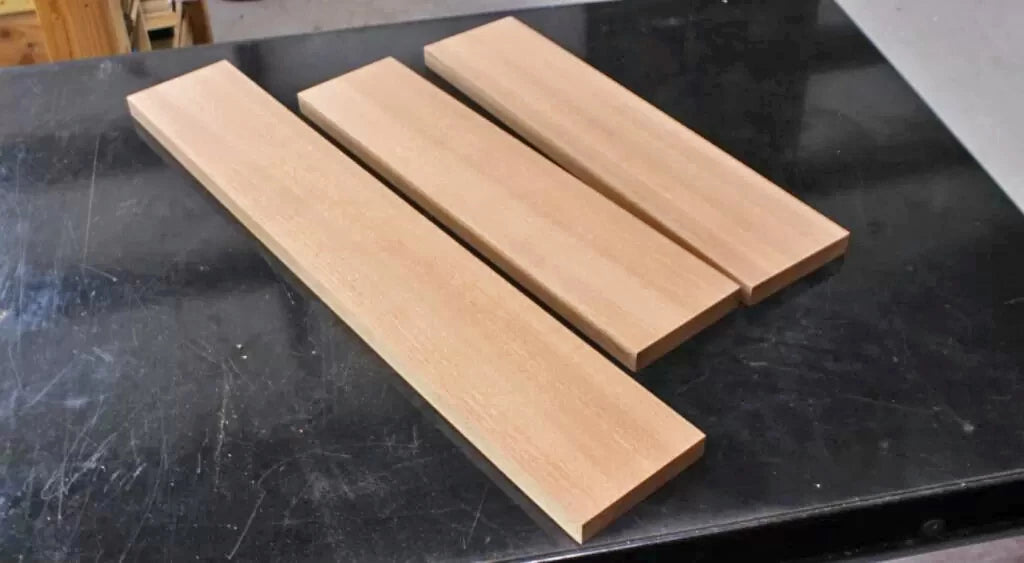
When folded into the traditional triangular shape, a 5' x 9'6" burial flag measures roughly 11" tall and 22" across the base. In practice, a little length and width for the flag are lost in the folds, and a nice fitting flag case often will measure 21.5" x 10.75". If you have the flag to be displayed on hand, I recommend making a mock-up to ensure everything fits to your liking when finished. In 3/4" thick material the outside dimensions of pieces need to measure: one piece at 4" x 25-1/8" and two pieces at 4" x 17-3/4". The 4" width will allow me to make a decorative profile on the front side of the display, and will also provide room for the glass and backer board.
Once I've cross-cut my three sides to these dimensions, I'm ready to make the miter cuts at the table saw - yes, the table saw!
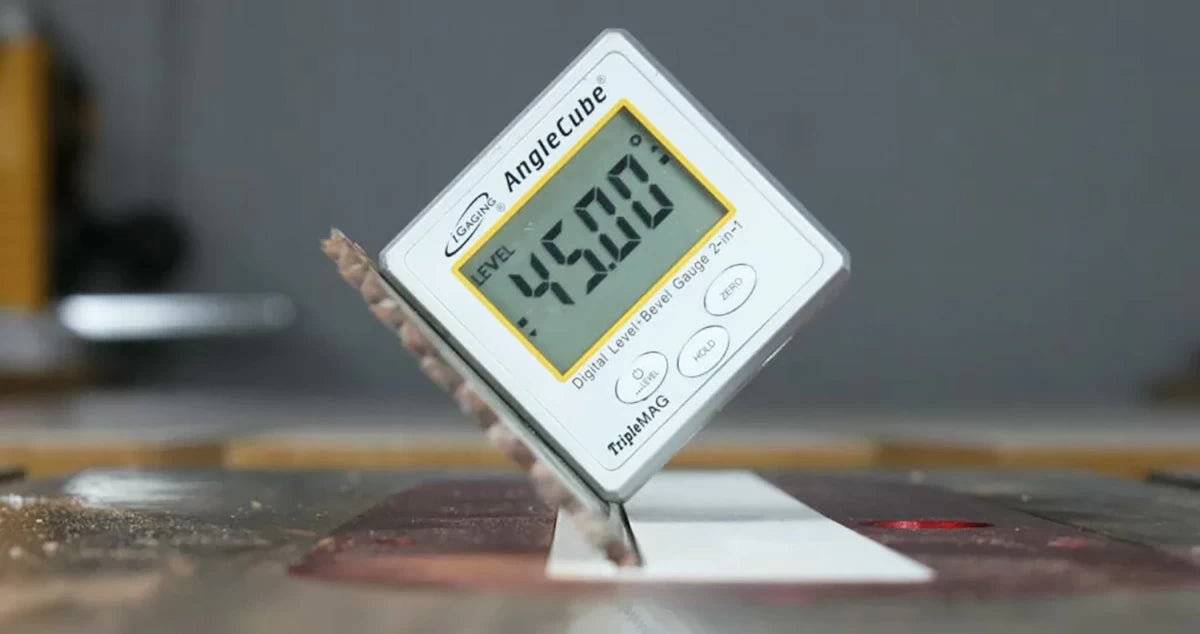
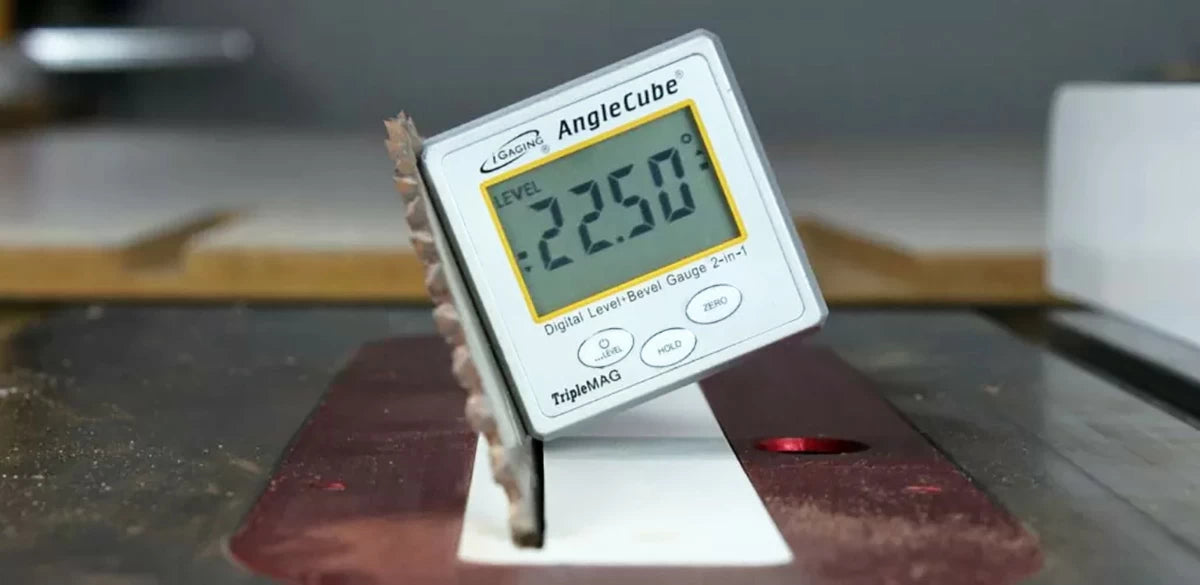
The real trick to making a flag display case is getting the angles at each of the three corners just right. The 90° right angle at the peak of the triangle is the easiest to make, requiring just two 45° cuts on each of the two side pieces. The bottom two miters require 22.5° angle cuts in order to make a combined 45° angle. When you add all three angles together (90° + 45° + 45°) you get the full 180° isosceles triangle you're after.
Dialing these cuts on the miter saw would be a little trickier than I'm comfortable with, so that's why I make them at the table saw. I'm able to use the iGaging Digital Angle Cube (item DAG-001) to set my table saw blade for all three cuts.
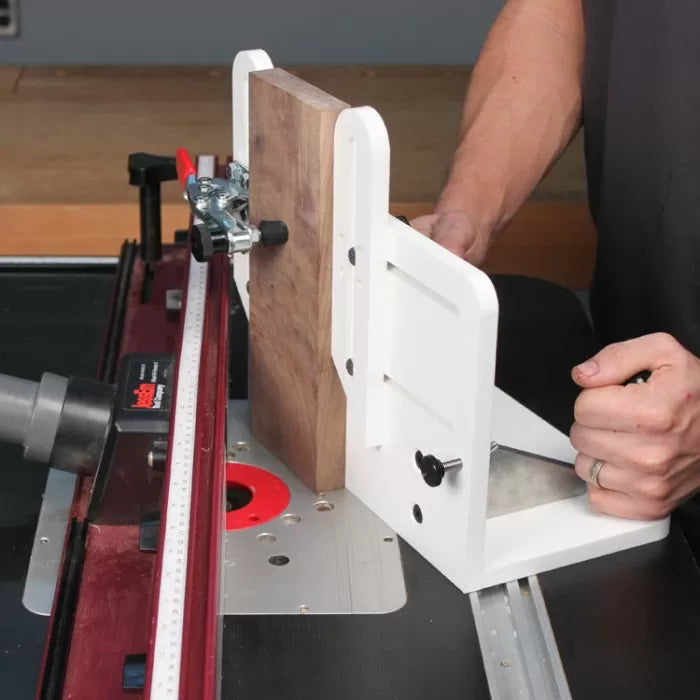
Now, as you can imagine, if I were to try and guide these 4" wide pieces of wood vertically across a table saw fence, things would be a little hairy (AKA "dangerous"). That's why the Infinity Tools Vertical Router Sled (item VRS-100) is a must for this kind of cut. The Vertical Sled will hold and guide my work-pieces in perfect position through the entire length of the cut.
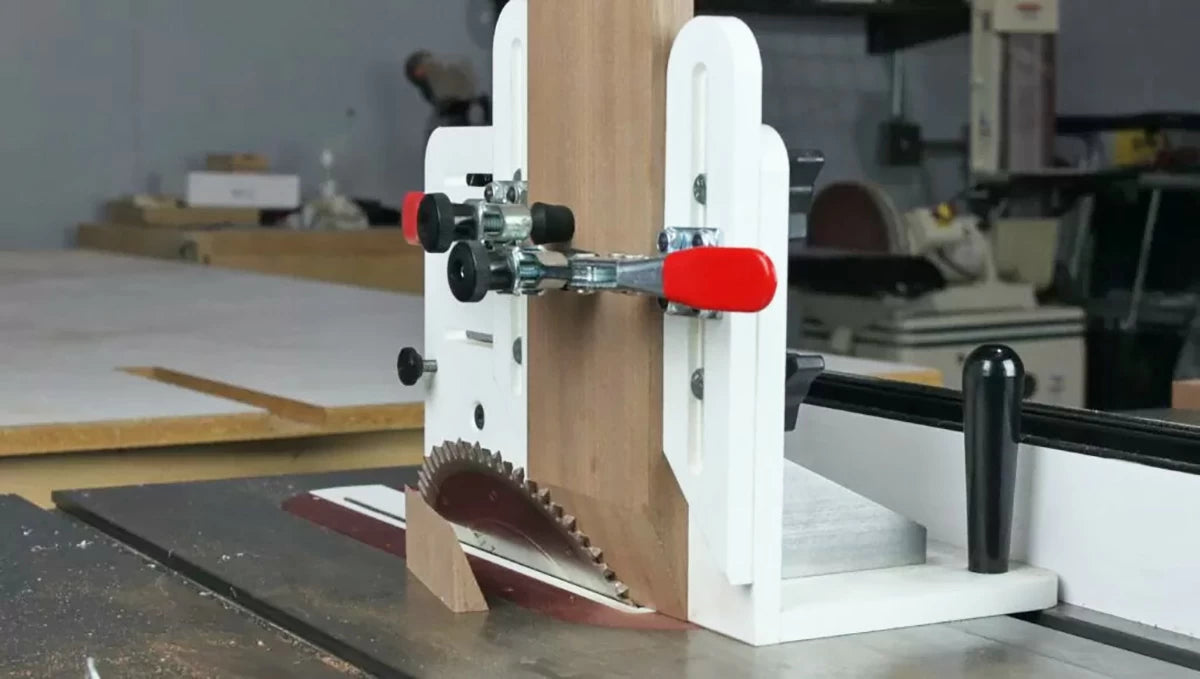
For all of this fancy table saw work, my blade of choice is an Infinity Tools Ultra-Smooth Crosscutting Table Saw Blade (item 010-080). This nickel armor-coated blade has a cross-cutting tooth geometry that will give me the cleanest possible cut.
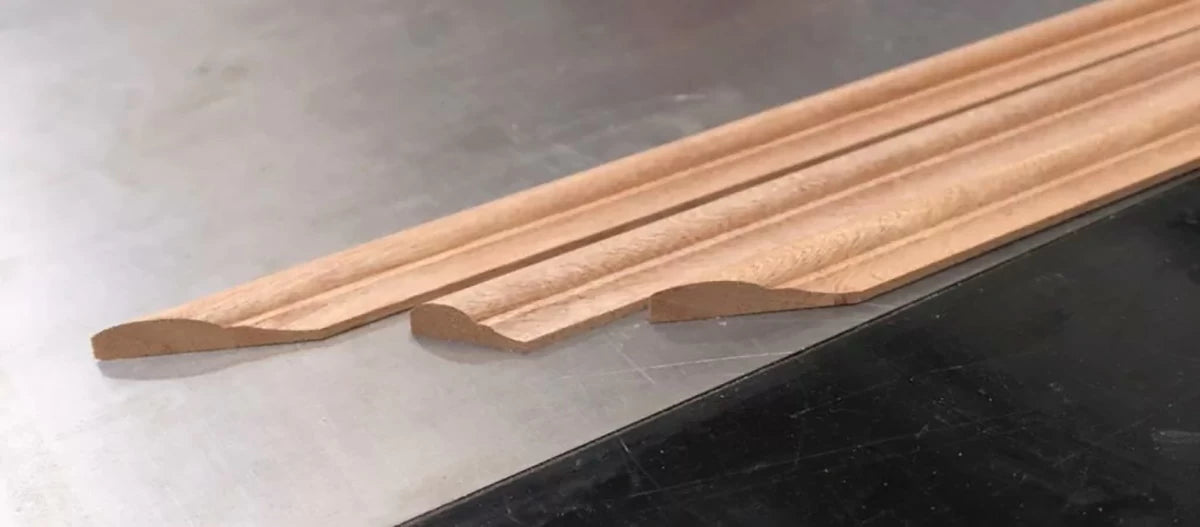
Once the miters are cut - and all the math is done — it's time to add a decorative edge to the front of the case. An Infinity Tools 17th Century Router Bit (item 17-540) is the perfect choice for this job. With this bit, You can make a variety of different designs by just adjusting the height and exposure of the bit. For this project, I'm taking the full cut to put the profile across the entire leading edge of the display case.
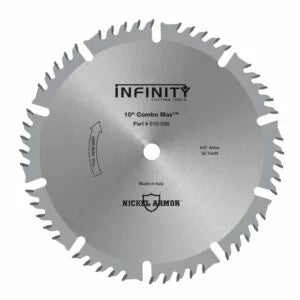
Now that I've created the edge I want, I need to go back over to the table saw and rip cut it away from the workpieces with a Combo Max Table Saw Blade (item 010-050). These decorative edges will be nailed into place later on, and will act as a stop to hold the glass in place. This will also allow you to replace the glass if it's ever broken in the future.
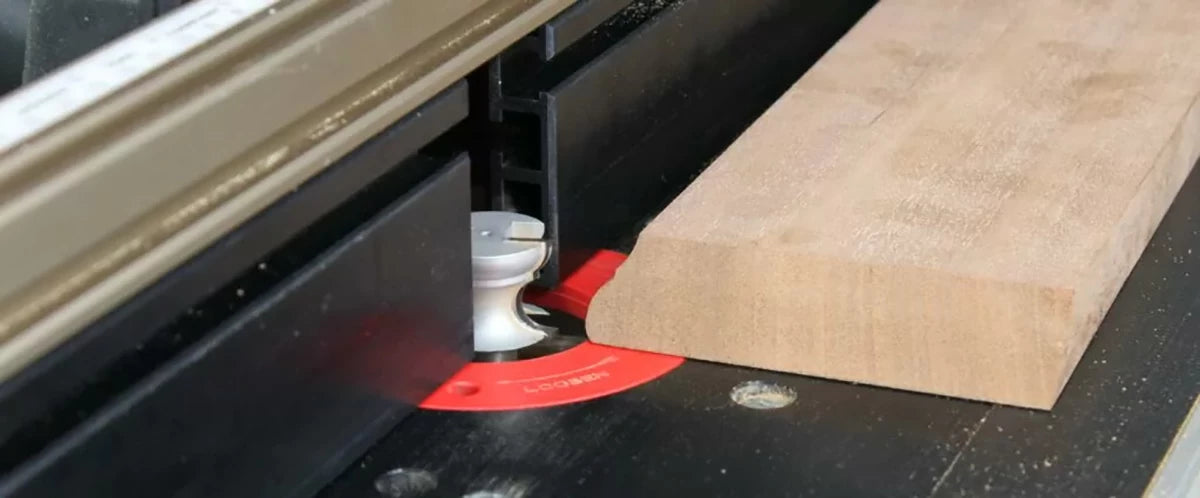
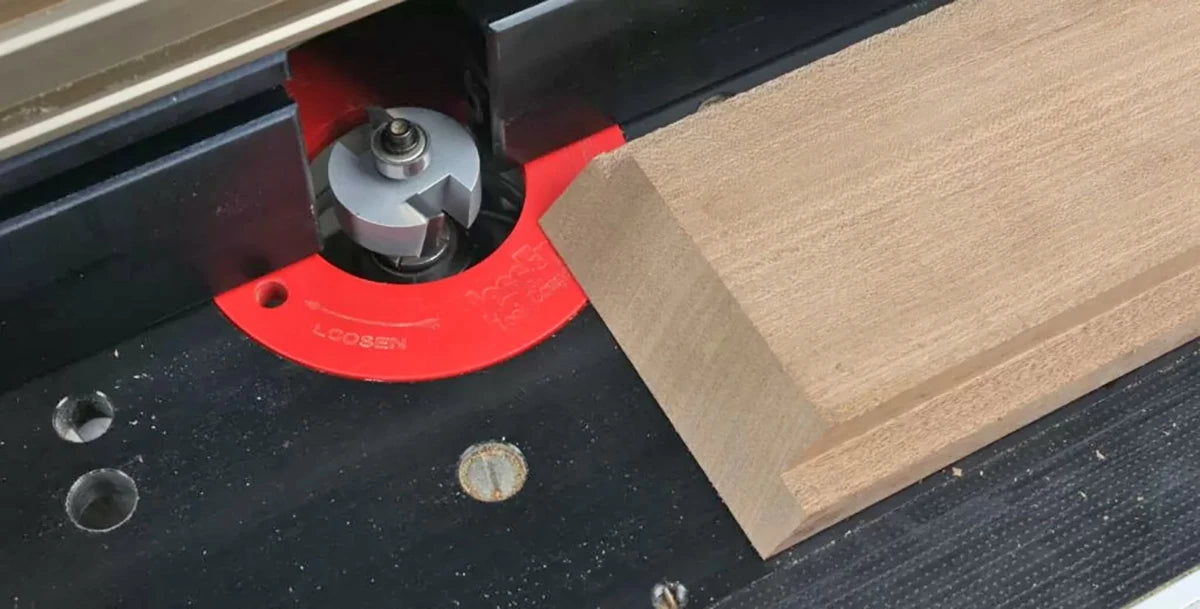
The next thing we need to do is create rabbets to hold the glass and back panel. An Infinity Tools Rabbeting Router Bit (item 35-850) performs this function with outstanding accuracy. The rabbet that holds the glass is cut to 1/4". The back panel rabbet is cut to 3/8" wide by simply raising the router bit.
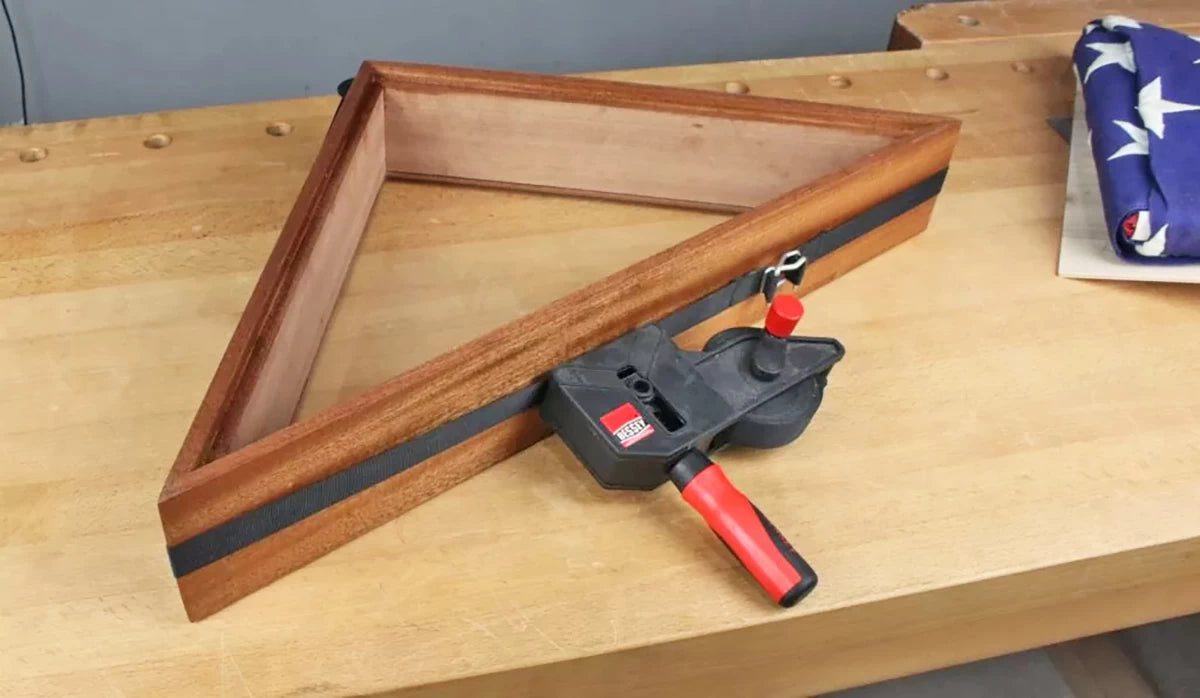
Gluing this triangular case would be a chore if not for my Bessey Variable Angle Band Clamp (item 100-594). I mean, I could spend all day trying to engineer the perfect arrangement of bar clamps that would hold this case together, but I've got things to do. Depending on how wide your case is you may want to use a second band clamp to ensure the miters pull together evenly along the entire glue surface.
The last item to be made is backer board. Krenovian woodworkers may disagree with me, here, but since nobody is going to be examining the back panel, I don't need to overcomplicate this part of the project. A piece of 1/4" thick plywood works perfectly.
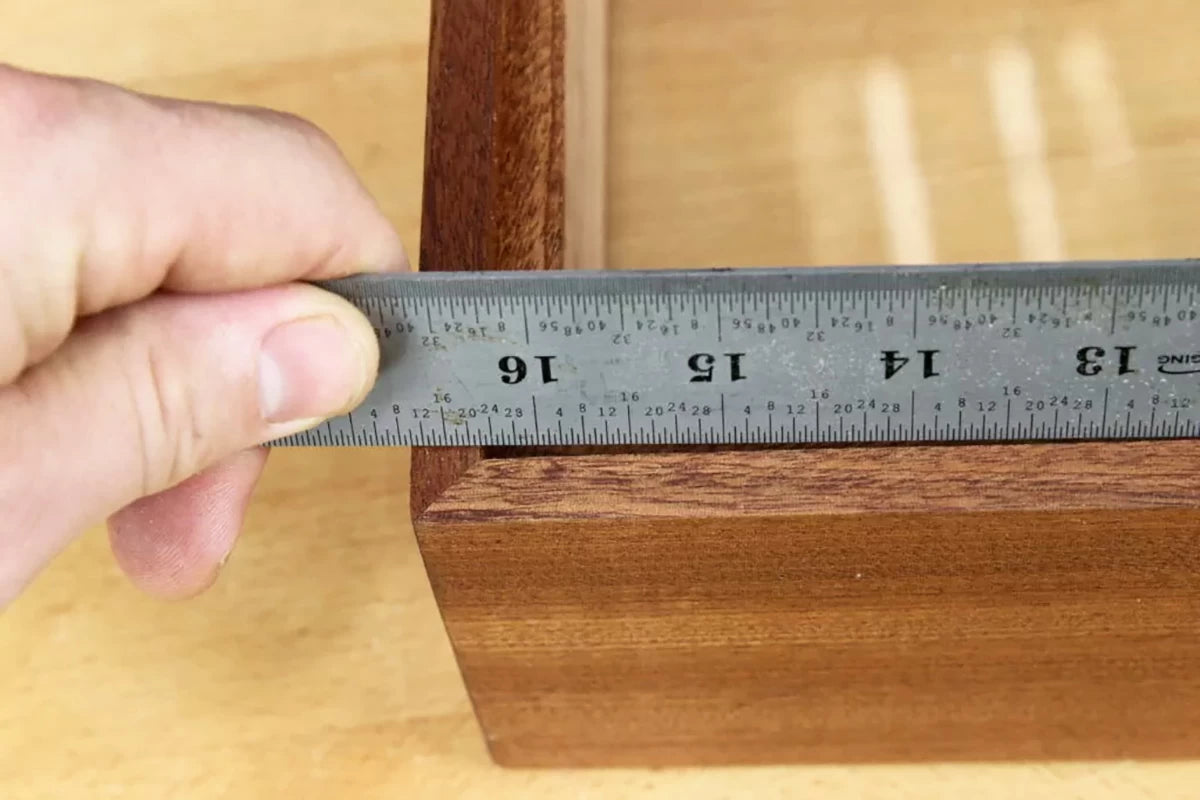
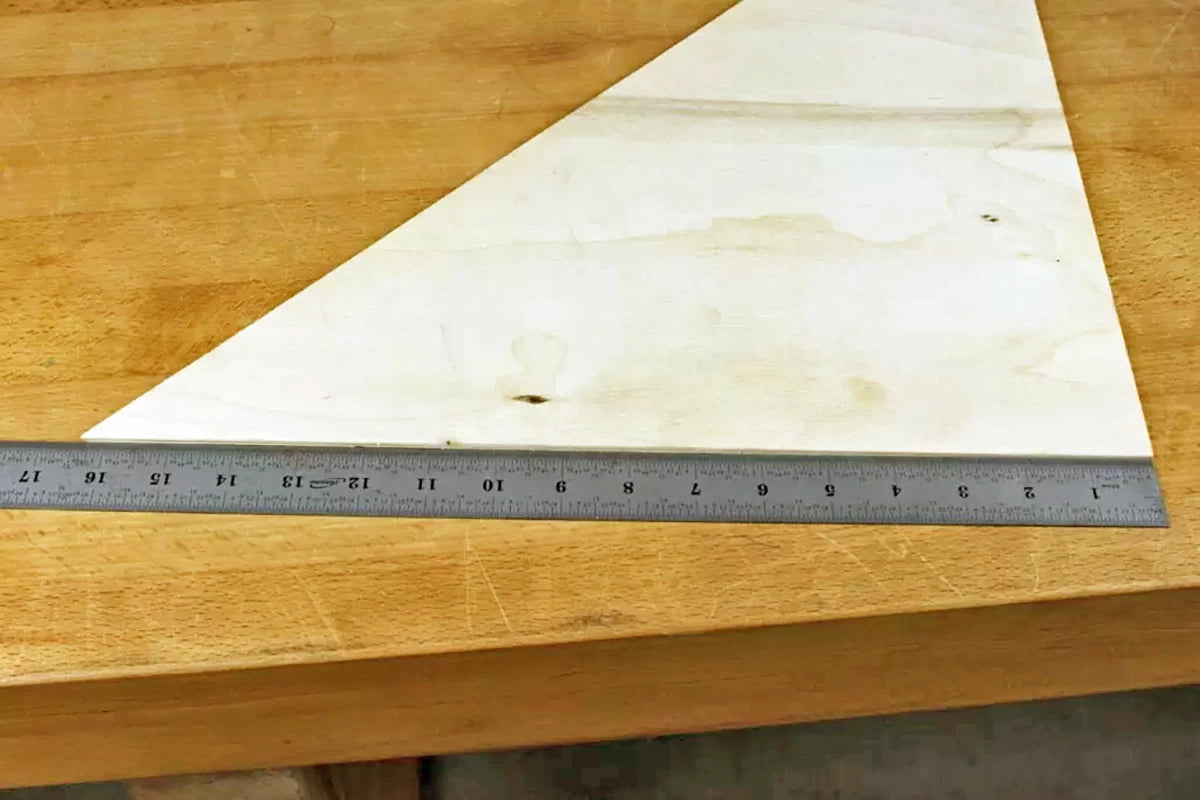
To size the back, measure from the 90° corner to the 45° corner and transfer the measurement to the plywood back. Both measurements should be the same. Use a ruler to connect the marks and cut the bottom of the triangular back. while this cut can be made in a number of ways I prefer to freehand the cut at the bandsaw. This same method can be used to make a template to bring to your glass supplier to ensure that the glass will be a perfect fit for the case.
Once the glue is dried, let's put everything together. Place the glass and nail the moulding to the carcass (main body of the case) so that the glass is trapped in the rabbet. If you ever need to replace the glass, all you have to do is pry the moulding away from the body.
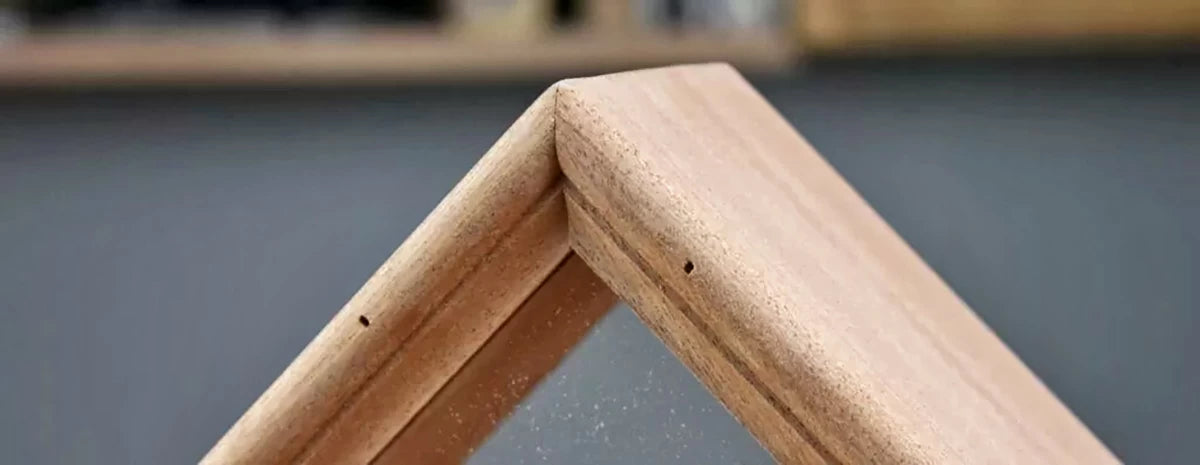
Take your time when installing the moulding and double-check that the corners and edges line up perfectly. Because these pieces were made after the miters were cut, the grain pattern should be a perfect match to the rest of the case. Don't get carried away with the brads, three in each piece should do the trick. A little wood putty can be used to fill in the holes and make them disappear completely.

Now you just need to sand and apply the finish of your finish of choice. I decided to use Odies Oil Food Safe Wood Finish on this project. Over the last few years, Odies Oil has become my go-to finish for the majority of my projects.
The task of making a memorial flag case may seem daunting at first, but, like most things in life, I'm sure that you'll find it a simple task when you break it down into a step-by-step process.
Project Cut List:
1 piece 3/4" x 4" x 25-1/8"
2 pieces 3/4" x 4" x 17-3/4"
Glass and back cut to fit.
Back roughly measures 16-1/4" x 16-1/4" x 23"
For more information on Memorial Flags and who is eligible to receive one visit the U.S. Department of Veterans Affairs.