Building an exterior or interior door for your home doesn't have to be an intimidating process. In this four-part series, "Building an Entry Door," we show you how to prepare the lumber, mill the workpieces to final size (Part 1), create the rail and stile joinery for the door frame (Part 2), and assemble the frame with drawbore joinery (Part 3). In this last installment, you'll learn how to sand and paint the door. Finally, you'll install the hinges and knob assembly before hanging the door in the jamb.

Part 4 - Final Details
Before installing the glass, I painted the door with an exterior latex primer/paint. For a smooth finish, I sprayed the paint using the Earlex 5500 SprayStation. The Earlex 5500 is a complete, self-contained spray system. It's a great choice if you don't have an air compressor and filter system in your shop. The 5500 comes with a 2mm tip that is perfect for spraying paint.
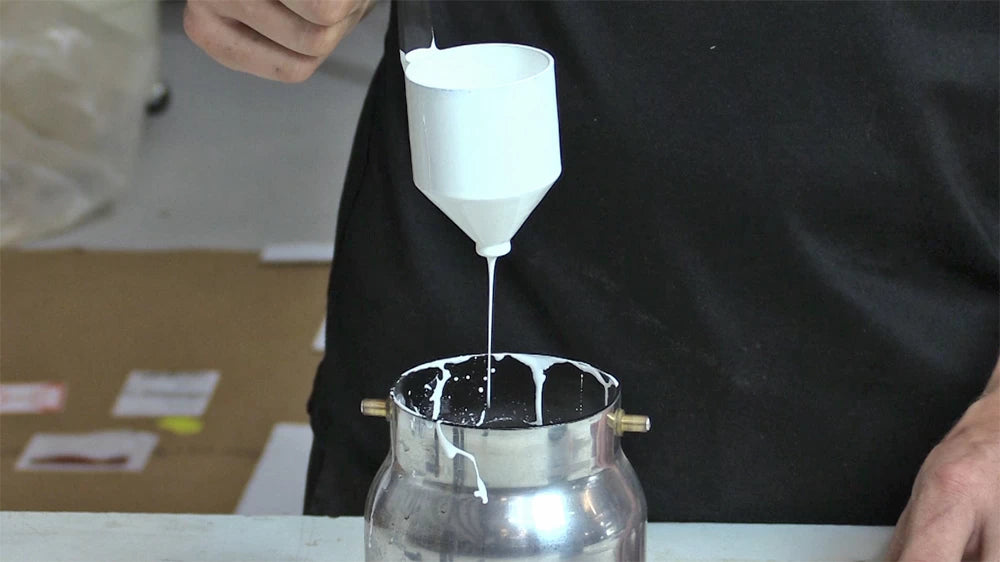
Getting good results with a spray gun requires having the finish at the right viscosity. The included viscosity cup makes this easy. The cup is submerged in the paint or finish. Lifting the cup out, start a stopwatch when the top of the cup breaks the surface. When the stream at the bottom of the cup breaks, stop the timer. This gives you an indication of the viscosity. You'll most likely need to thin the paint until the viscosity matches the recommendations in the Earlex instructions.
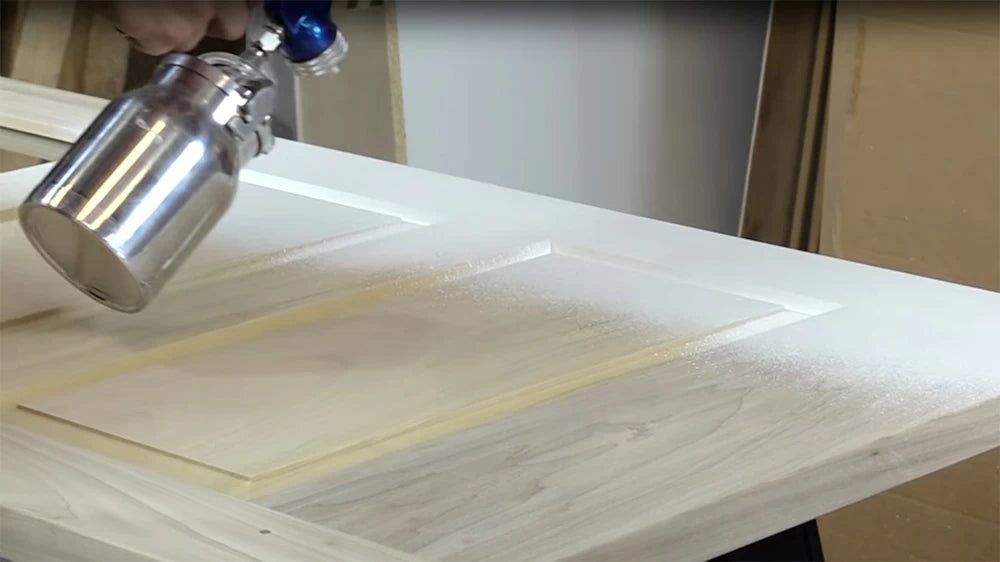
Once the paint is thinned and thoroughly mixed, setting up and spraying the paint is even easier. There's only one control on the Earlex gun so if you're not getting enough paint to spray, adjust the knob out. If the volume of paint exiting the tip is too much, adjust the knob inward.
When spraying, keep the gun a consistent distance from the door as you make overlapping passes. If you've never used a spray gun before, it's a good idea to practice on a large piece of cardboard first. Overlap each pass by 50% and don't be tempted to go back over thin spots. This could cause runs, drips, and sags. Instead, let the thin coat of finish dry and then apply another coat.
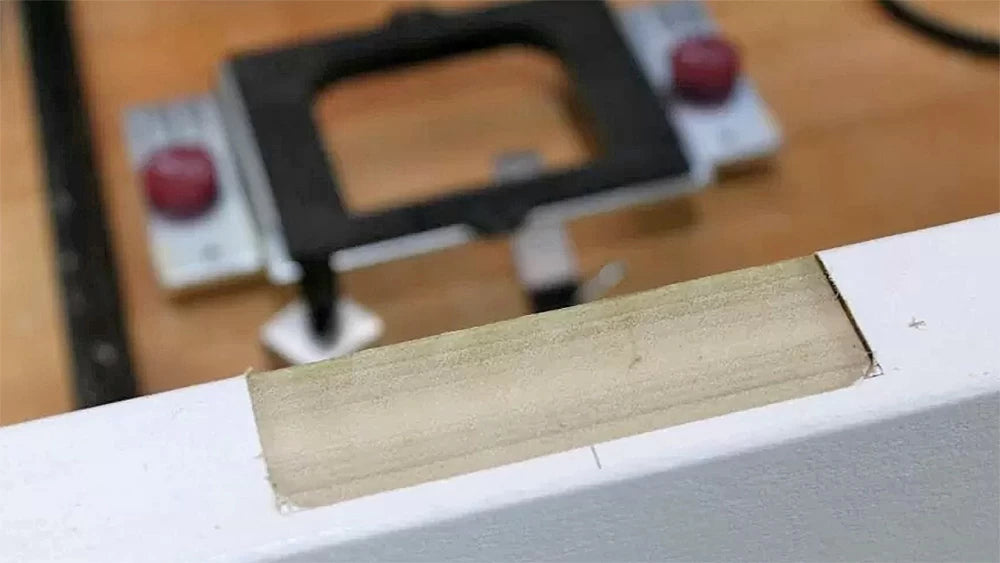
After allowing the paint to dry overnight, it's time to install the glass panel. To hold the glass panel in place, I made glass stop by routing a bead profile on the edge of a wide blank using a 1/4" radius roundover and beading router bit. I ripped the bead free on the table saw. I think this little touch adds an extra level of detail you wouldn't find on a standard door. I primed and painted the glass stop before installation. Before installing the glass I cut the glass stop to length, mitering the ends, and testing their fit in the rabbeted opening in the door frame.

The process for installing the glass is simple. First, lay a continuous bead of silicone caulk into the rabbet of the door frame and then gently drop the glass panel in place. The caulk seals the glass into the door, making it watertight and airtight.
A few small brads secure the strips of glass stop. This makes them relatively easy to remove and or replace if I ever need to remove or replace the glass.
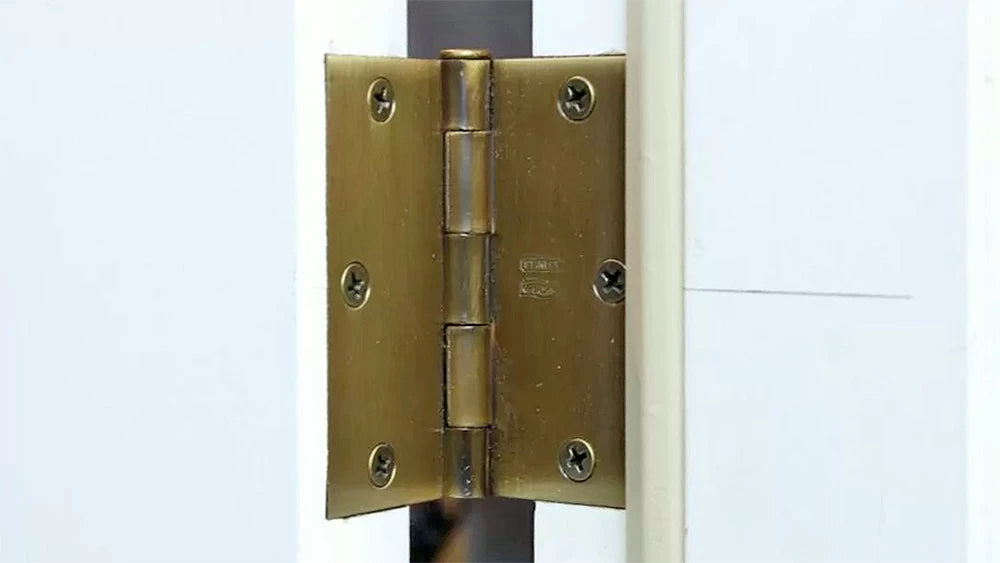
All that remains is to install the door hardware, including the hinges and doorknob. To mill the mortises for the hinges I use the Milescraft Door Mortise Kit (100-158). This jig includes everything you need to rout the hinge mortises for a perfect fit on both the door and door jamb.
I chose square-corner hinges so I finished the mortise with a square corner chisel. Use a self-centering drill bit to create pilot holes for the hinge screws. Self-centering bits have a conical tip that automatically aligns the bit in the screw holes of the hinge.
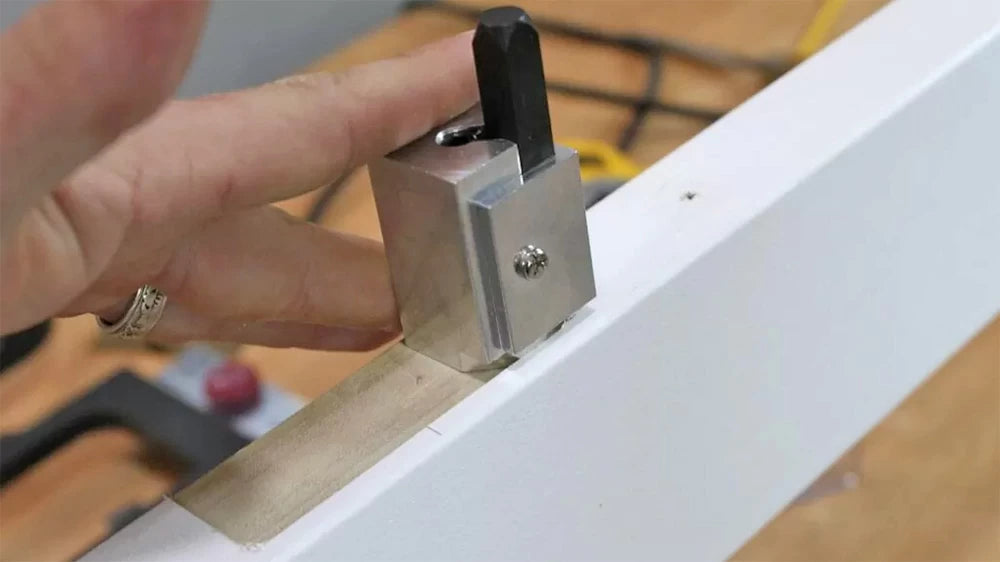
Using a square-corner chisel is an easy way to create a sharp, square corner for a hinge mortise.
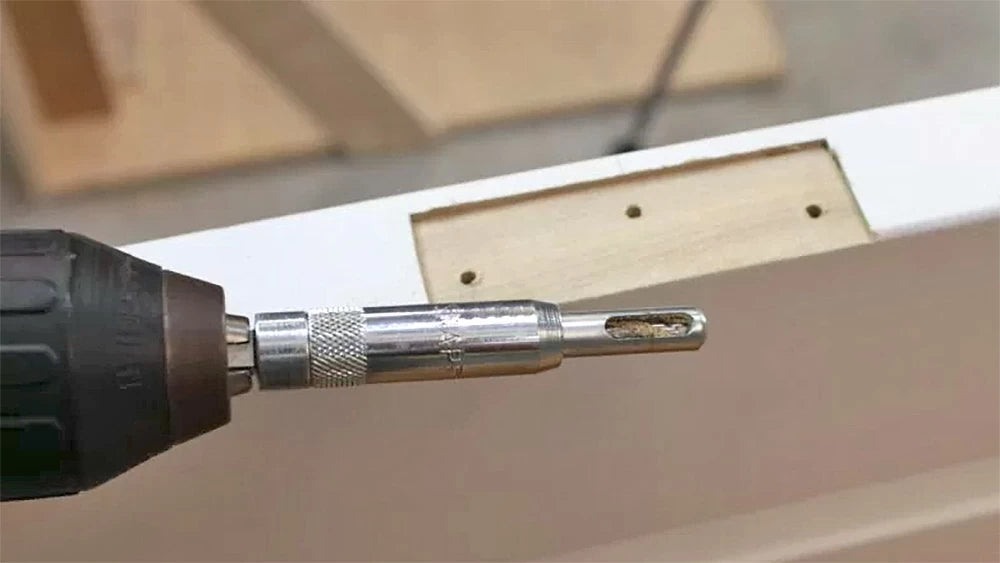
The geometry of a self-centering drill bit guarantees accurate placement of pilot holes for screws in hardware like hinges and latch plates.
I used the same methods to locate and install the other half of the hinges into the door jam.
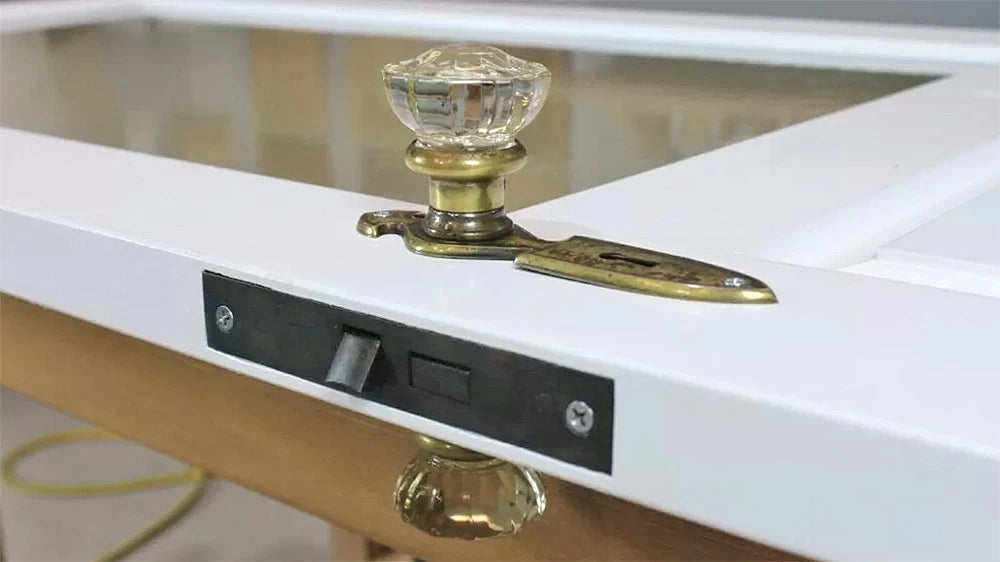
Modern doorknobs are easy to install using a door drilling jig from the home center. If you decide to go this route, the Milescraft Door Mortise Kit includes templates for installing the door latch and jamb strike plates.
Once you have all of the hardware installed, you can get a helper to assist in hanging the door in the jamb. Take a celebratory walk through the door, take a step back to admire your craftsmanship, then realize that you conquered the project of creating your own custom door.