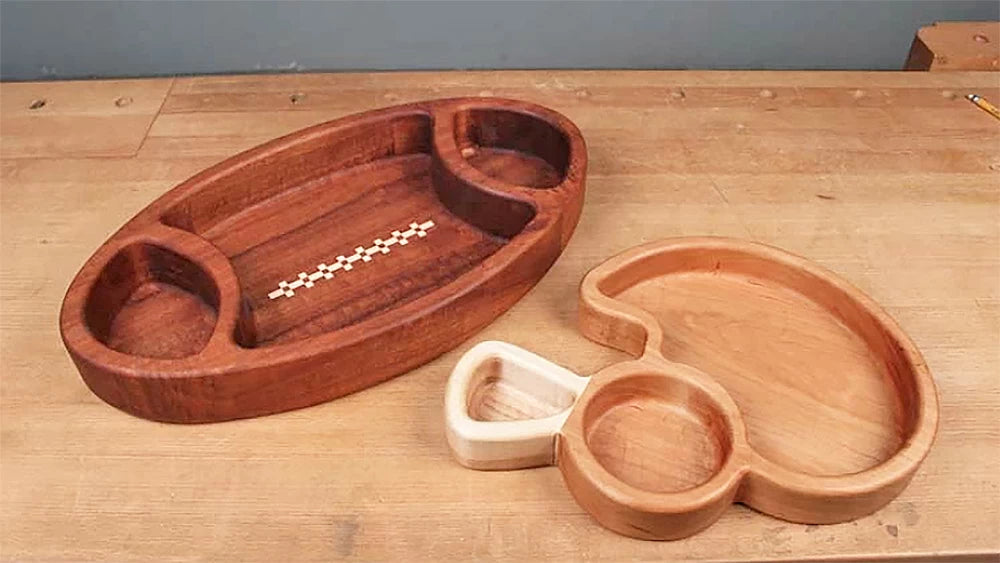
Handmade party platters and trays are a great way to add some spice to just about any event; from Halloween to birthdays to Christmas. One day, however, stood out as being neglected: Gameday! Infinity Cutting Tools has designed a pair of templates that will surely be a hit from training camp to the Pro Bowl and all the way through to your Draft Parties. These trays will score one big touchdown with your guests when you break them out on Super Bowl Sunday. Making these trays is both easy and a great way to use up some of the scraps that are piling in the corner of your workshop. If you're new to the tray-making game, fear not, here is the Infinity Cutting Tools playbook that will help you get your trays done in time for the big game!

Making a tray regardless of design is easy and only requires a few tools. Here is a list of all the ingredients you'll need to make any of Infinity Cutting Tools' custom serving trays:
- One Fantastic Router (116-269 or 116-270)
- One Tray Template of choice (115-018 or 115-019 or both with 115-TK4)
- One Large Router Base Plate (115-032)
- One Bowl and Tray Router Bit
- A Dash of Sanding Supplies
- A Drizzle of Waterproof Wood Glue (101-521)
- And a slathering of a Food-grade Wood Finish (115-403)
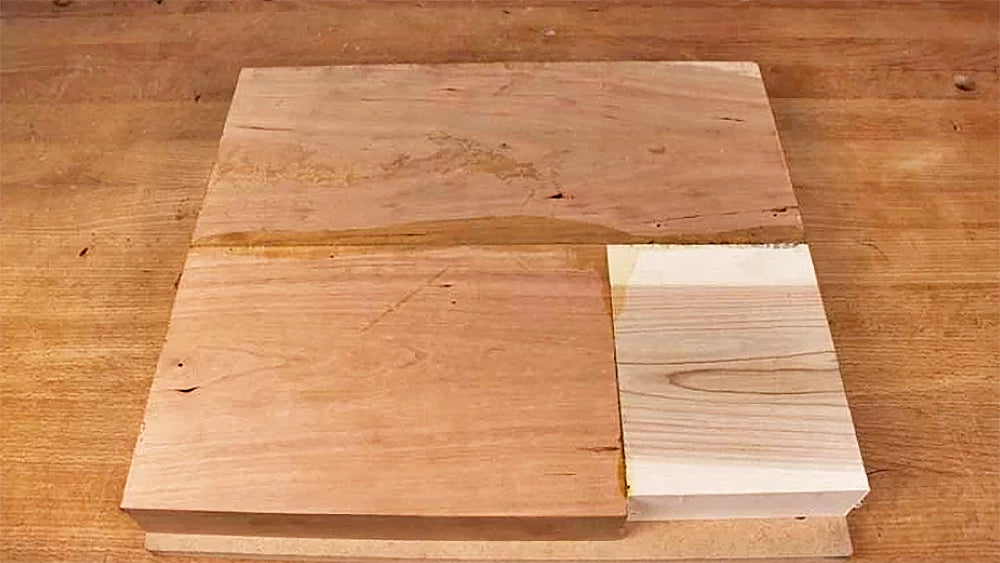
The first step to creating any tray is to create a blank large enough for the tray. This is a great time to get creative and use up all those scraps that you have laying around the shop. When gluing up the blank don't be afraid to get creative. Adding detail-like laces to the bottom of the football tray is a real game-changer that doesn't take any special skills.
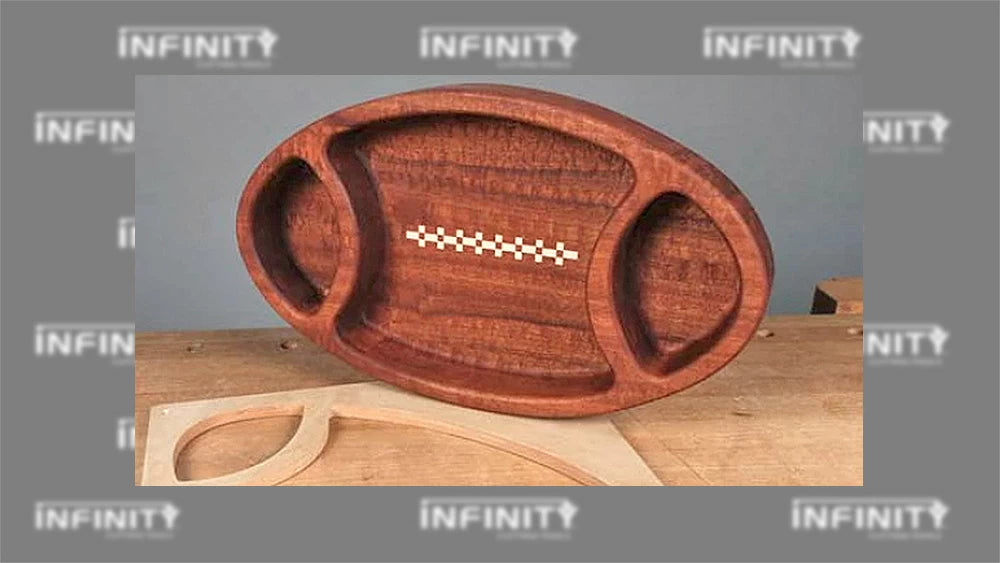
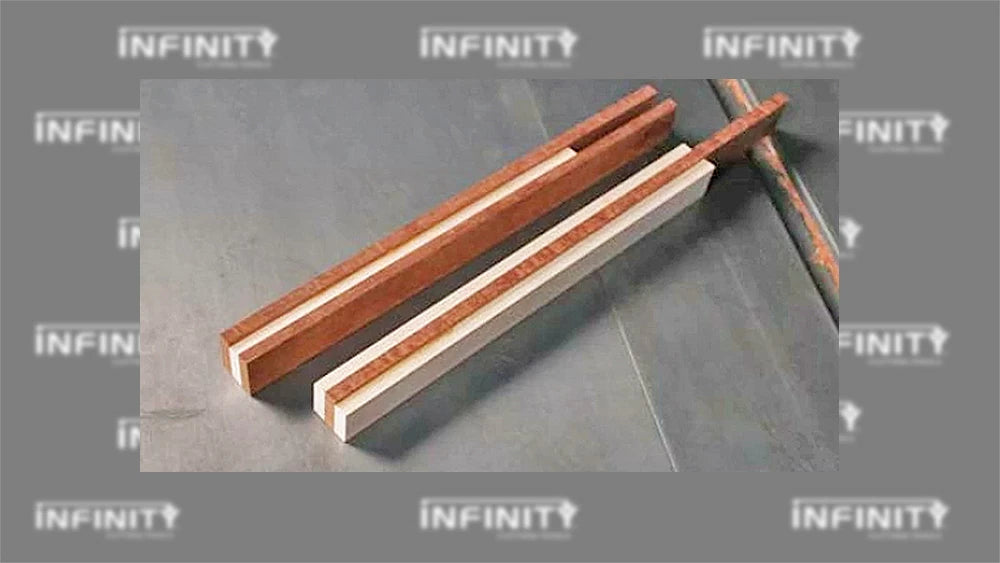
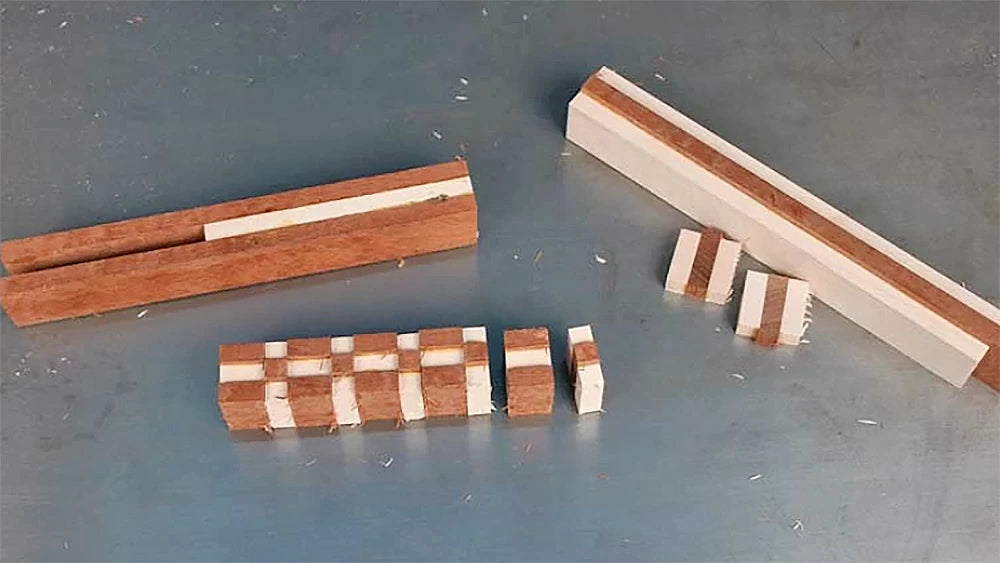
Once the glued strips dry, cut the new Dark/Light/Dark strip into 1/2" long blocks, then cut the Light/Dark/Light strip into 1/4" long blocks. Position these 1/2" and 1/4" blocks into the pattern you see below and glue them together. When dried, glue them into the middle of your blank with a solid color strip on either end and BOOM - you've got laces!
Once your blank is glued up, It's time to attach the template and start hollowing out the innards. A large diameter forstner bit in the drill press makes short work of removing the majority of waste to speed up the routing process.
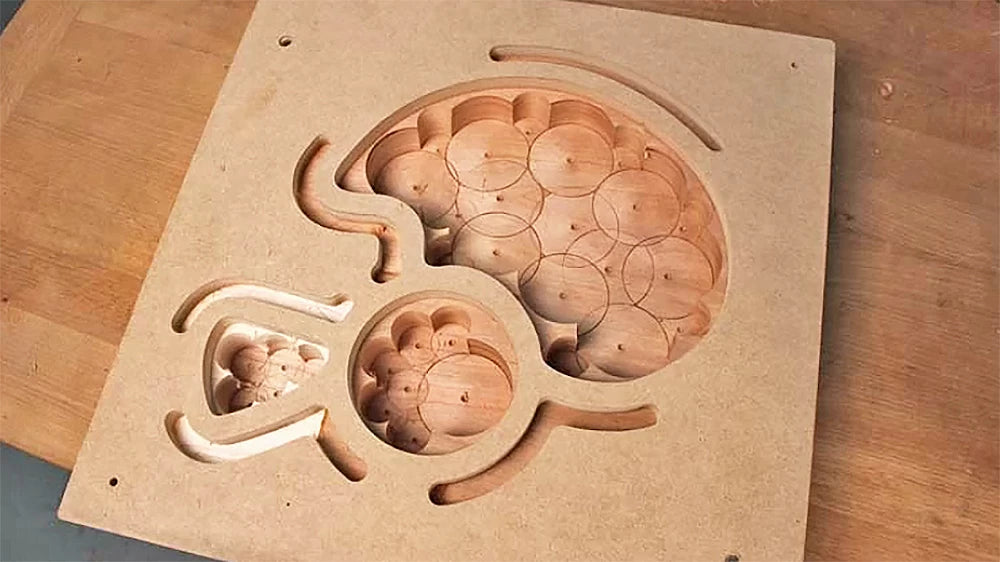
Now that you've removed the majority of the waste, routing the bowl out is a clean sweep. Using a large router base plate and a bowl and tray bit with a top bearing, simply follow the inside of the template, stepping down little-by-little with each pass until you reach the desired depth of cut.
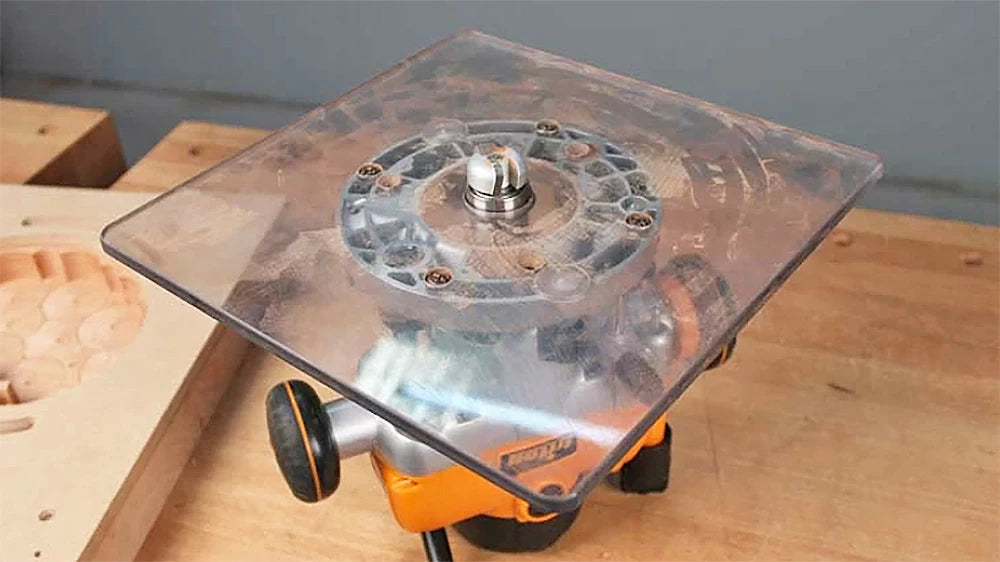
Depending on how much material was removed with the Forstner bit, 1/4" to 1/2" per pass should do the trick. If you want to make a bowl that is deeper than your router is capable of reaching, you can remove the template after the first few passes to gain some extra reach. If the router still won't reach to the bottom of your bowl, a router collet extension will get the job done. Remember when routing around the edge it is a good idea to make an initial pass to remove the majority of material, then clean out the sawdust and make a final pass to ensure you get a good clean cut. Sawdust likes to build up in the corners of these kinds of projects and can keep the bearing from contacting the sides of the template as needed.
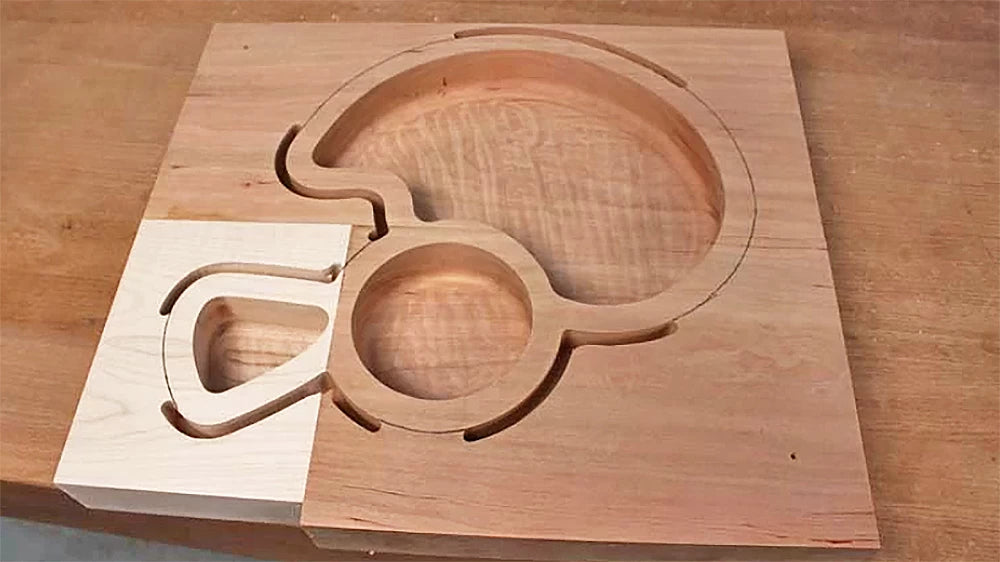
Once the guts are hollowed out, it's time to define the outside of the tray. On a complex tray like the football helmet which has lots of twists and curves, The template is often made with a track to accept a 1/2" guide bushing. This guide allows a 1/4" straight bit to shape these intricate areas. An upcut spiral bit does a great job of plunging in and routing out these areas. Once the complex parts of the template are cut, use a compass or dividers to follow the inside of the bowl and draw a line that defines the outside edge.
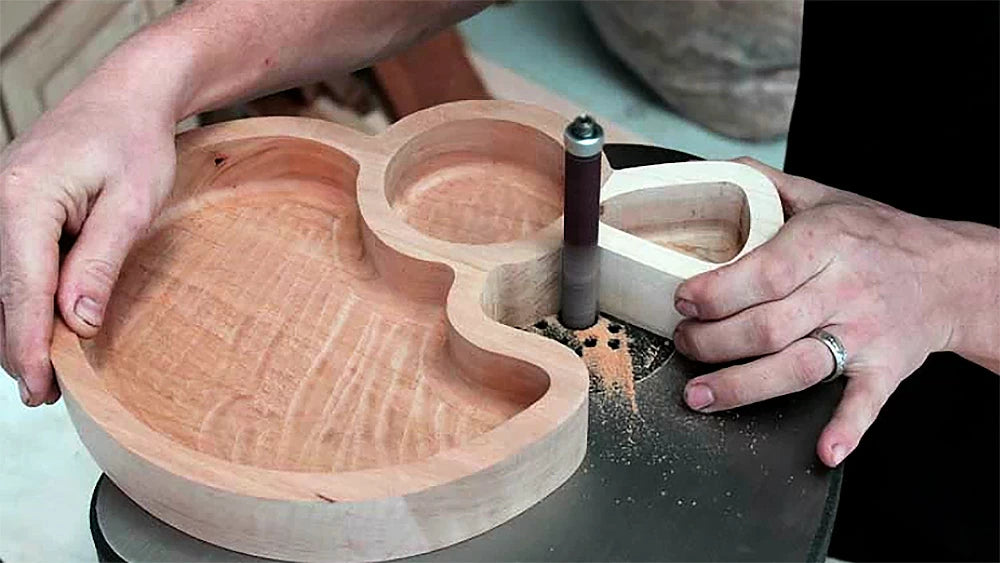
A bandsaw with a 1/4" blade works best to finish cutting the perimeter, but patience and a jigsaw can get the job done as well. Once you've finished with the bandsaw, you can remove the saw marks on the outside curves with a disk or belt sander. A spindle sander makes short work of the hard-to-reach inside curves. Sanding up the inside of the tray can be completed with sandpaper and a can-do attitude, but scuff balls can make the job go faster and getting into the tight corners easier.
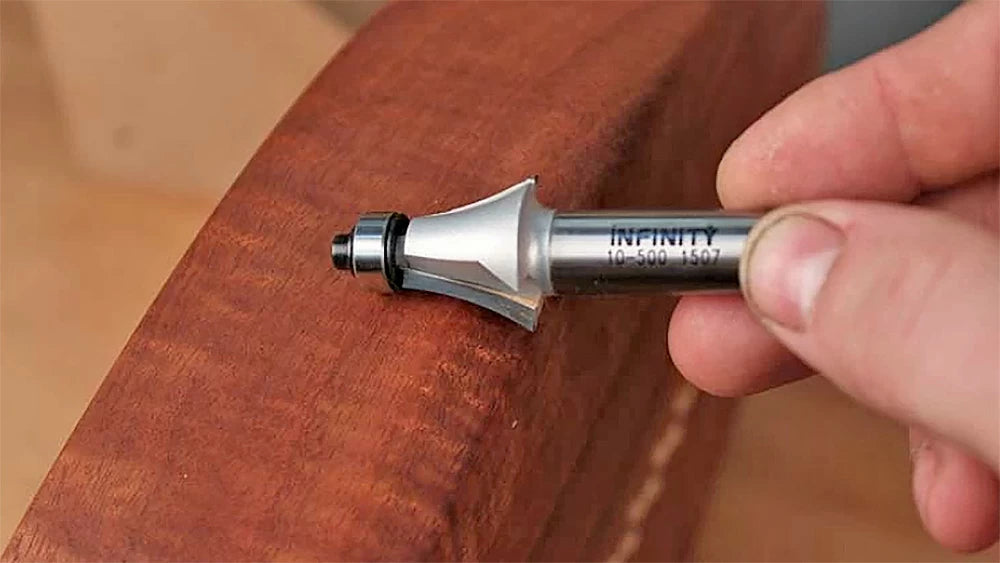
You could stop here, but hit the edges with a 1/4" roundover bit and you'll really make your new tray a well-made piece of decor. If you want to get creative, don't be afraid to substitute the roundover bit with something like an Infinity Cutting Tools Queen Anne bit to carry your new tray over the goal line.
When finishing your tray, don't forget that you are most likely going to be serving food in your gameday masterpiece. If you're going to be serving edibles out of any of these beautiful new trays, make sure to use a food-safe wood finish, like Odie's Oil. It's a great choice because it's easy to apply and produces lustrous results.
That's all it takes to score big at your next pigskin party! No smelly socks, tattered sweatshirts, or silly dances required to get the win next Sunday, Monday, or Thursday.